One of the most commonly captured images is from this view point, on the bridge over the Virgin River. The main highway makes a sharp curve and crosses this bridge. You will often see the bridge lined with photographers.
This shot was taken at about midnight, with a Canon 6D and a Rokinon 14mm lens.
I just got lucky on the satellite crossing and of course Orion looks stunning hovering above the scene…

Tag Archives: nature
Tips for Taking Great Trail Photos
1. The best light is in the morning and evening. Day hikes get you to your destination in the middle of the day. Plan your campsites to include the most scenic places. This may involve longer or shorter days that you would normally do, but it’s all worth it! A guide book is good for descriptions, you can get many great ideas of what and when to shoot but if I’ve never been to an area before, I do an image search for the specific place and get ideas of what’s there. I plan my entire trip around where I want to be at sunrise and sunset to take pictures.

2. Minimum of what to bring with you:
a. One lens – I always bring a Zoom Lens, a 24mm to 104mm or a 28mm to 135mm are good starting spots. This makes it possible to capture a wide angle shot and also get in close with the telephoto end. Of course it’s nice to have several lenses, but then you have to carry them!
b. Polarizer – This is a filter that attaches to the end of your lens. It handles refracted light so that the sky and clouds look wonderful and is a must for getting stunning images of water and reflections.
c. Light weight tripod, they are cheap and easy to strap on your pack. You can always weigh them down if needed
d. Simple cable release. When you use the tripod any movement of the camera makes the image blurry. This device allows take pictures without touching the camera.
e. Extra batteries, charged the night before you leave!
f. Lots of memory! Its cheap and doesn’t weigh anything
3. Avoid the auto mode for image capture. When you set the camera on automatic mode, the camera does all the thinking for you. You are a lot smarter than your camera! Instead use the Manual Mode on your camera or the various Creative Modes if there is no Manual setting.
4. Bracket your exposure. Bracketing means that you are capturing the same exact scene, but with different settings. This could include altering your depth of field (how much of the scene is in focus) or how bright or dark the image is. Scenes often have a great disparity between the dark areas and the bright ones. Try multiple shots, where you capture the details of one then the other.
a. Using the manual mode, set your aperture and shutter speed based on what the light meter tells you, THEN take several more shots of the same thing with slightly different exposures. If you have a manual setting, simply shoot over and under the recommended exposure.
b. If you are using a creative mode you can “trick” the light meter by pointing the camera a little bit above (or below or right or left) your intended subject, press the button half way, hold it, then lower or raise the camera back to your start spot and press the shutter the rest of the way.
5. Shoot in the RAW format. JPEG format compresses (and looses data from) the images, where as RAW records all the data and allows you to handle areas of over or under-exposure. It took a lot of effort to haul all your gear out there, not to mention yourself! The scenery is fantastic, the weather is perfect, who knows if you will ever have a chance to return…so shoot in RAW!
6. Four simple tips on Composition
a. The Rule of Thirds. Imagine a tic-tac-toe grid over your image. Try to get your subject on these lines, away from the middle. Get points of interest where the lines intersect.
b. Look for lines. Trails, clouds, trees, and more can create leading lines that add a wonderfully simple and compelling element to images. When you see a line anywhere walk all around it composing shots from different angles.
c. Reflections. Even a small puddle can make for a fantastic reflective composition. Get down on the ground for the best scope.

d. Near and Far. Pictures of an unbelievably awesome horizon will be 1,000 times better if you include something close. A tent, people, trees, flowers, any and all of these make a vista much more interesting.

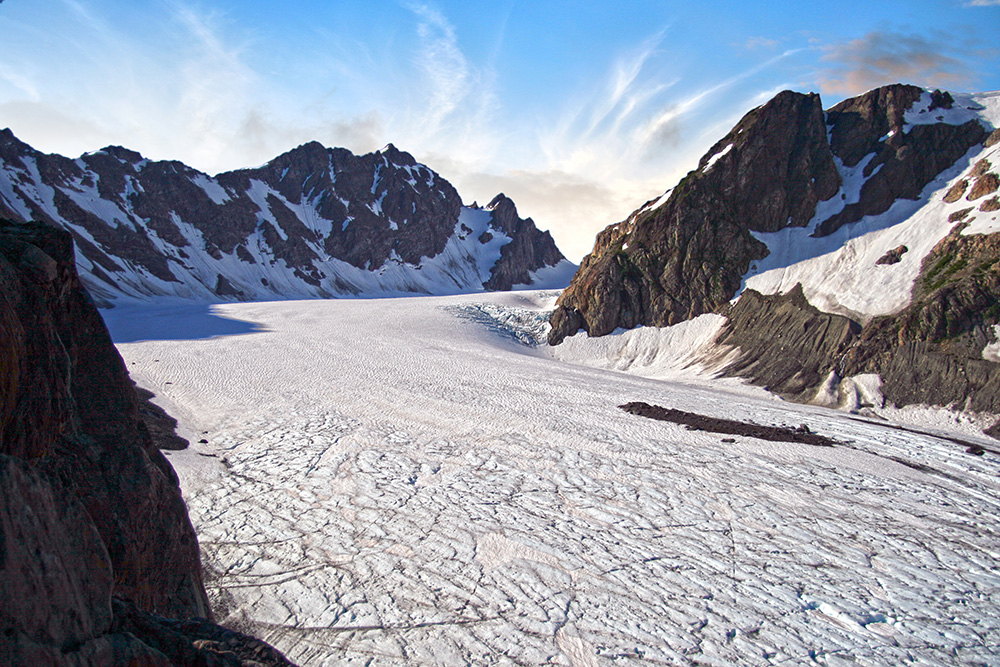
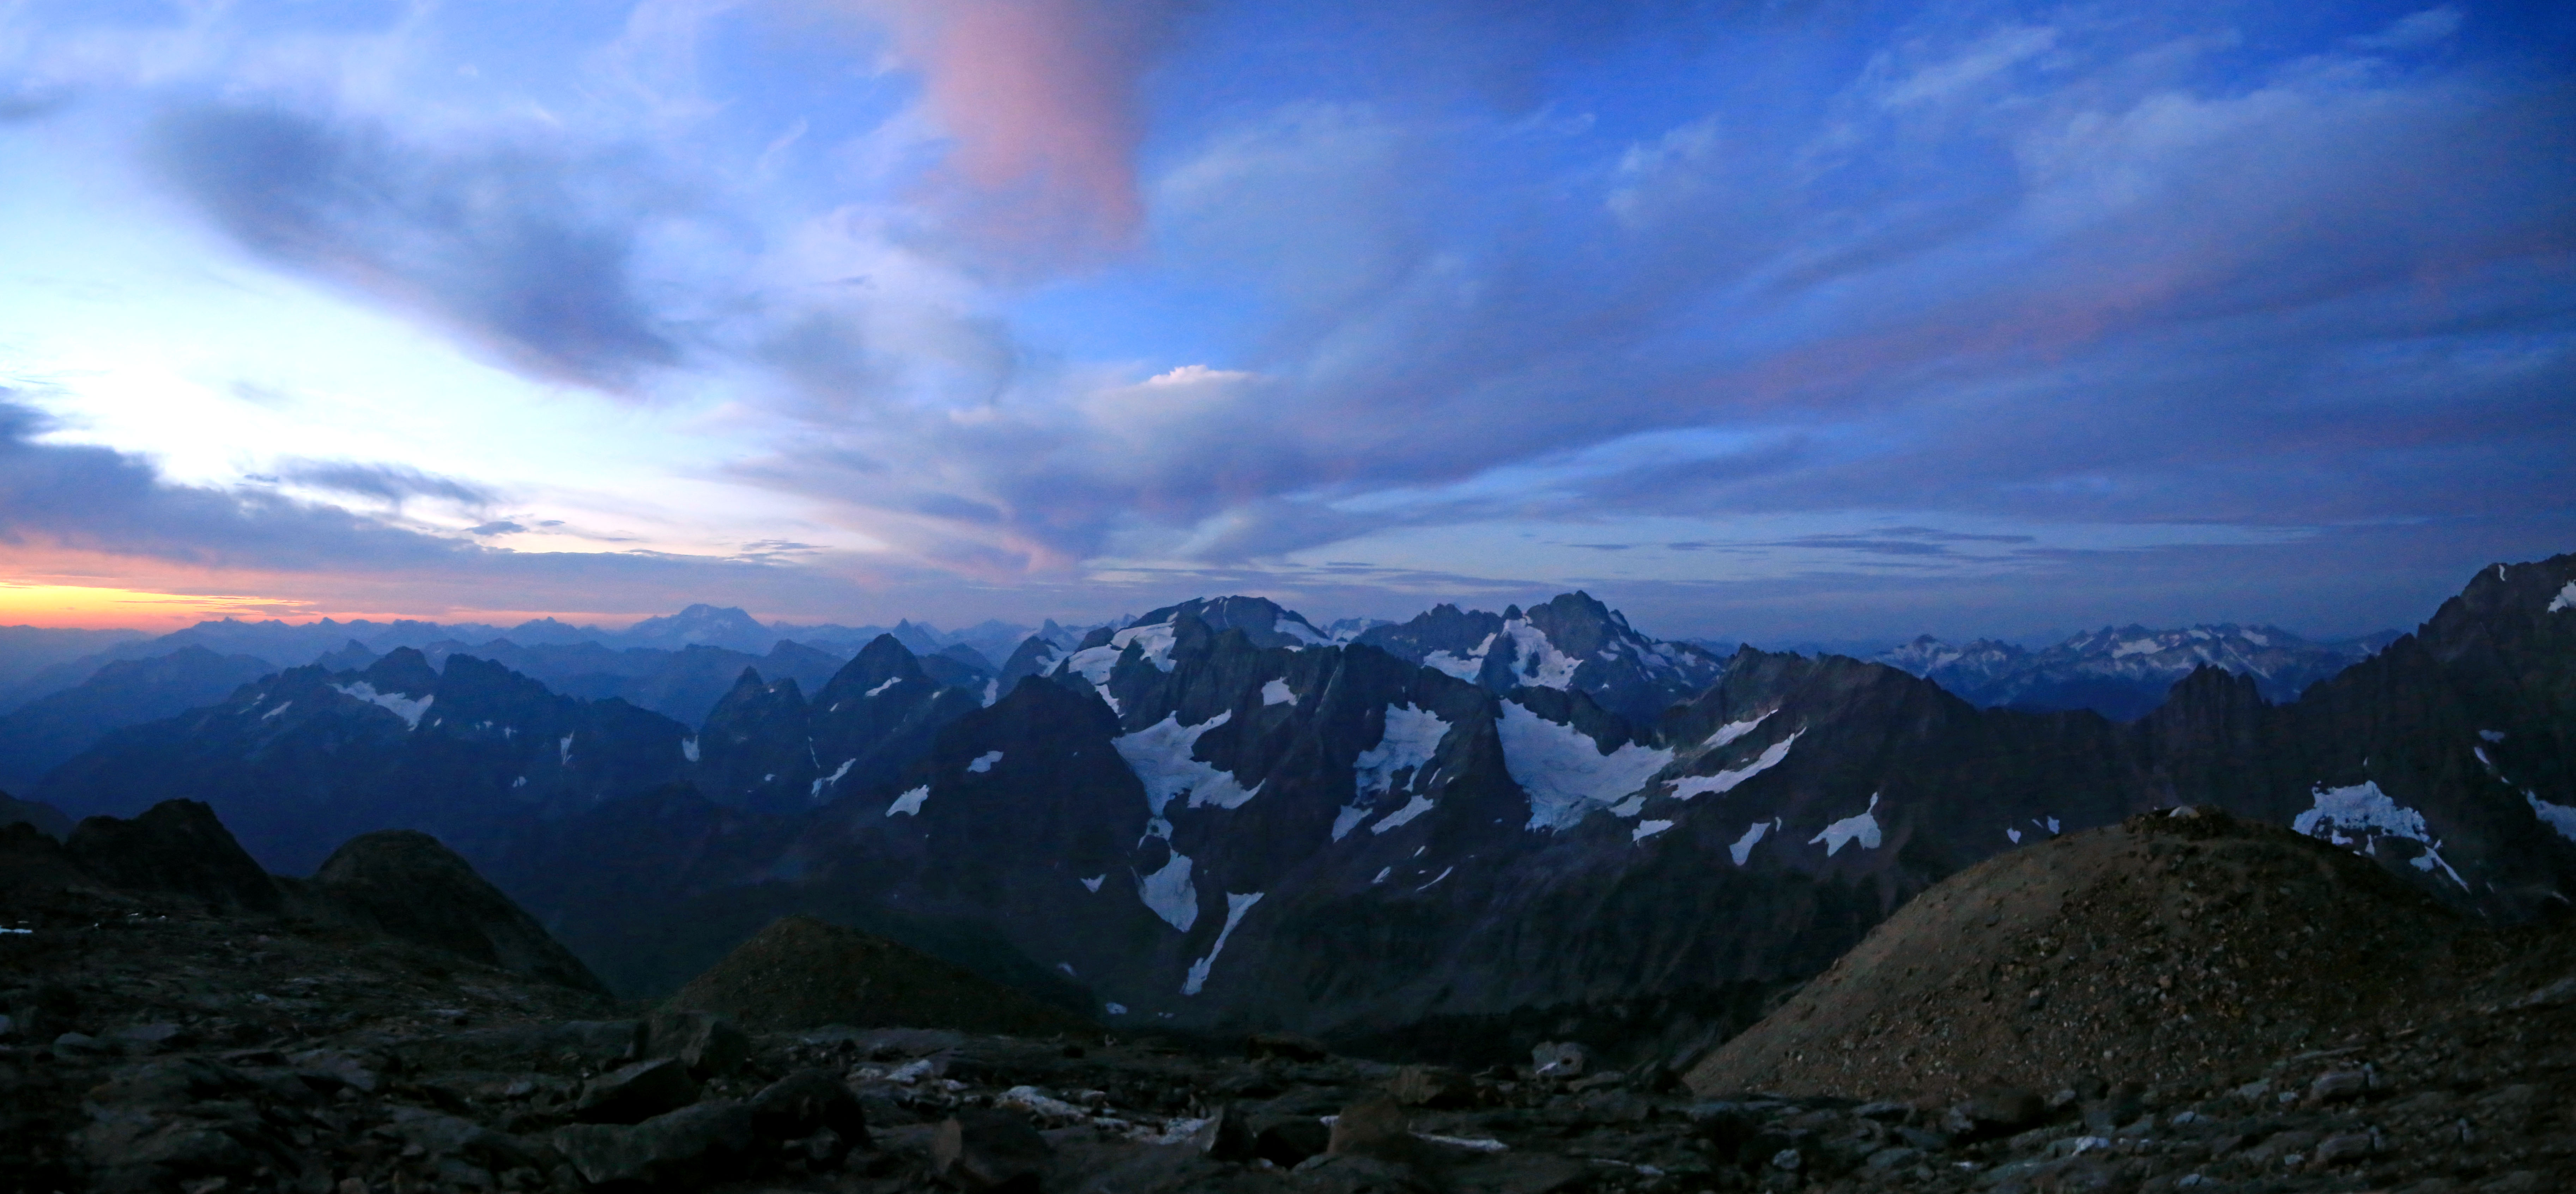
Sahale Camp Panoramas
Sahale Glacier Camp sits at the base of Sahale glacier atop 3 piles of rubble each crowned with a ring of stone. The views are breathtaking: a 180 degree sweeping view of the North Cascades, a sea of peaks stretching out to the horizon.


I have visited many times and tried to capture the feel of the view. Here are several panoramas, some from sunrise, and several from sunset, each comprised of two or more images merged.


North Cascades Book
I just got word that these three images will be included in a new book about the North Cascades, due out in the Fall of 2014.
More details coming soon!
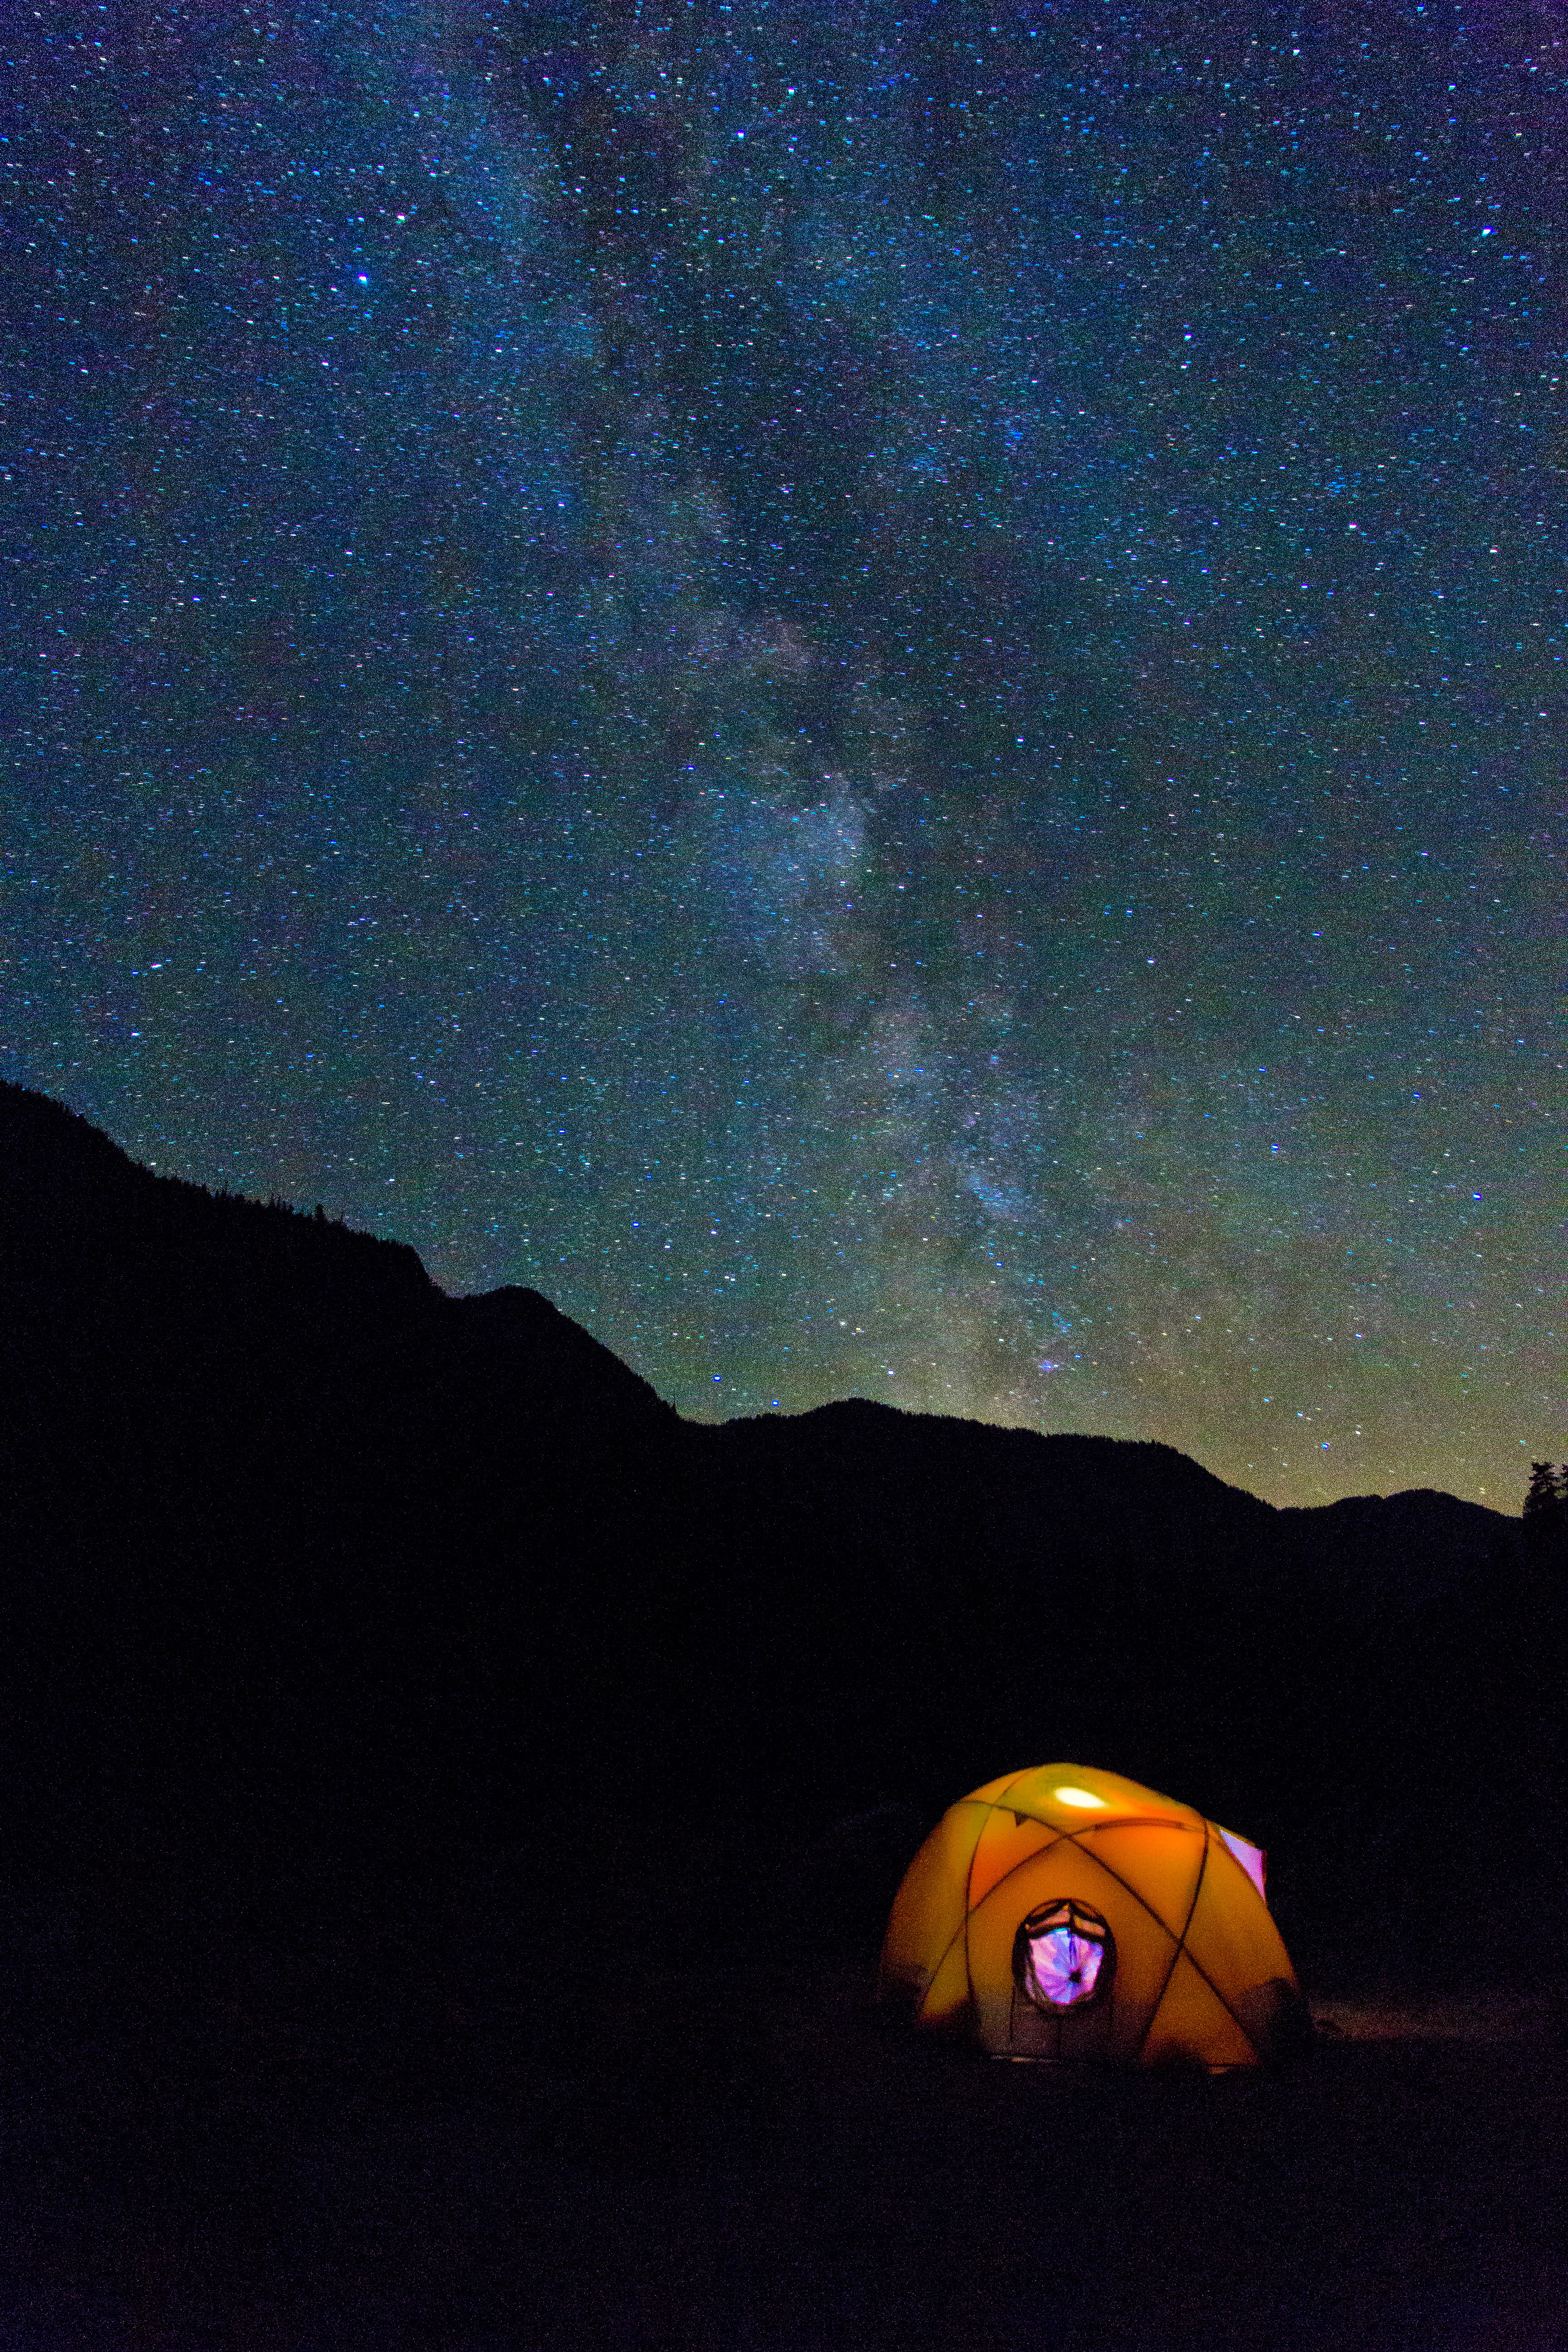
Camping under the stars
 Mount Baker and Coleman Glacier
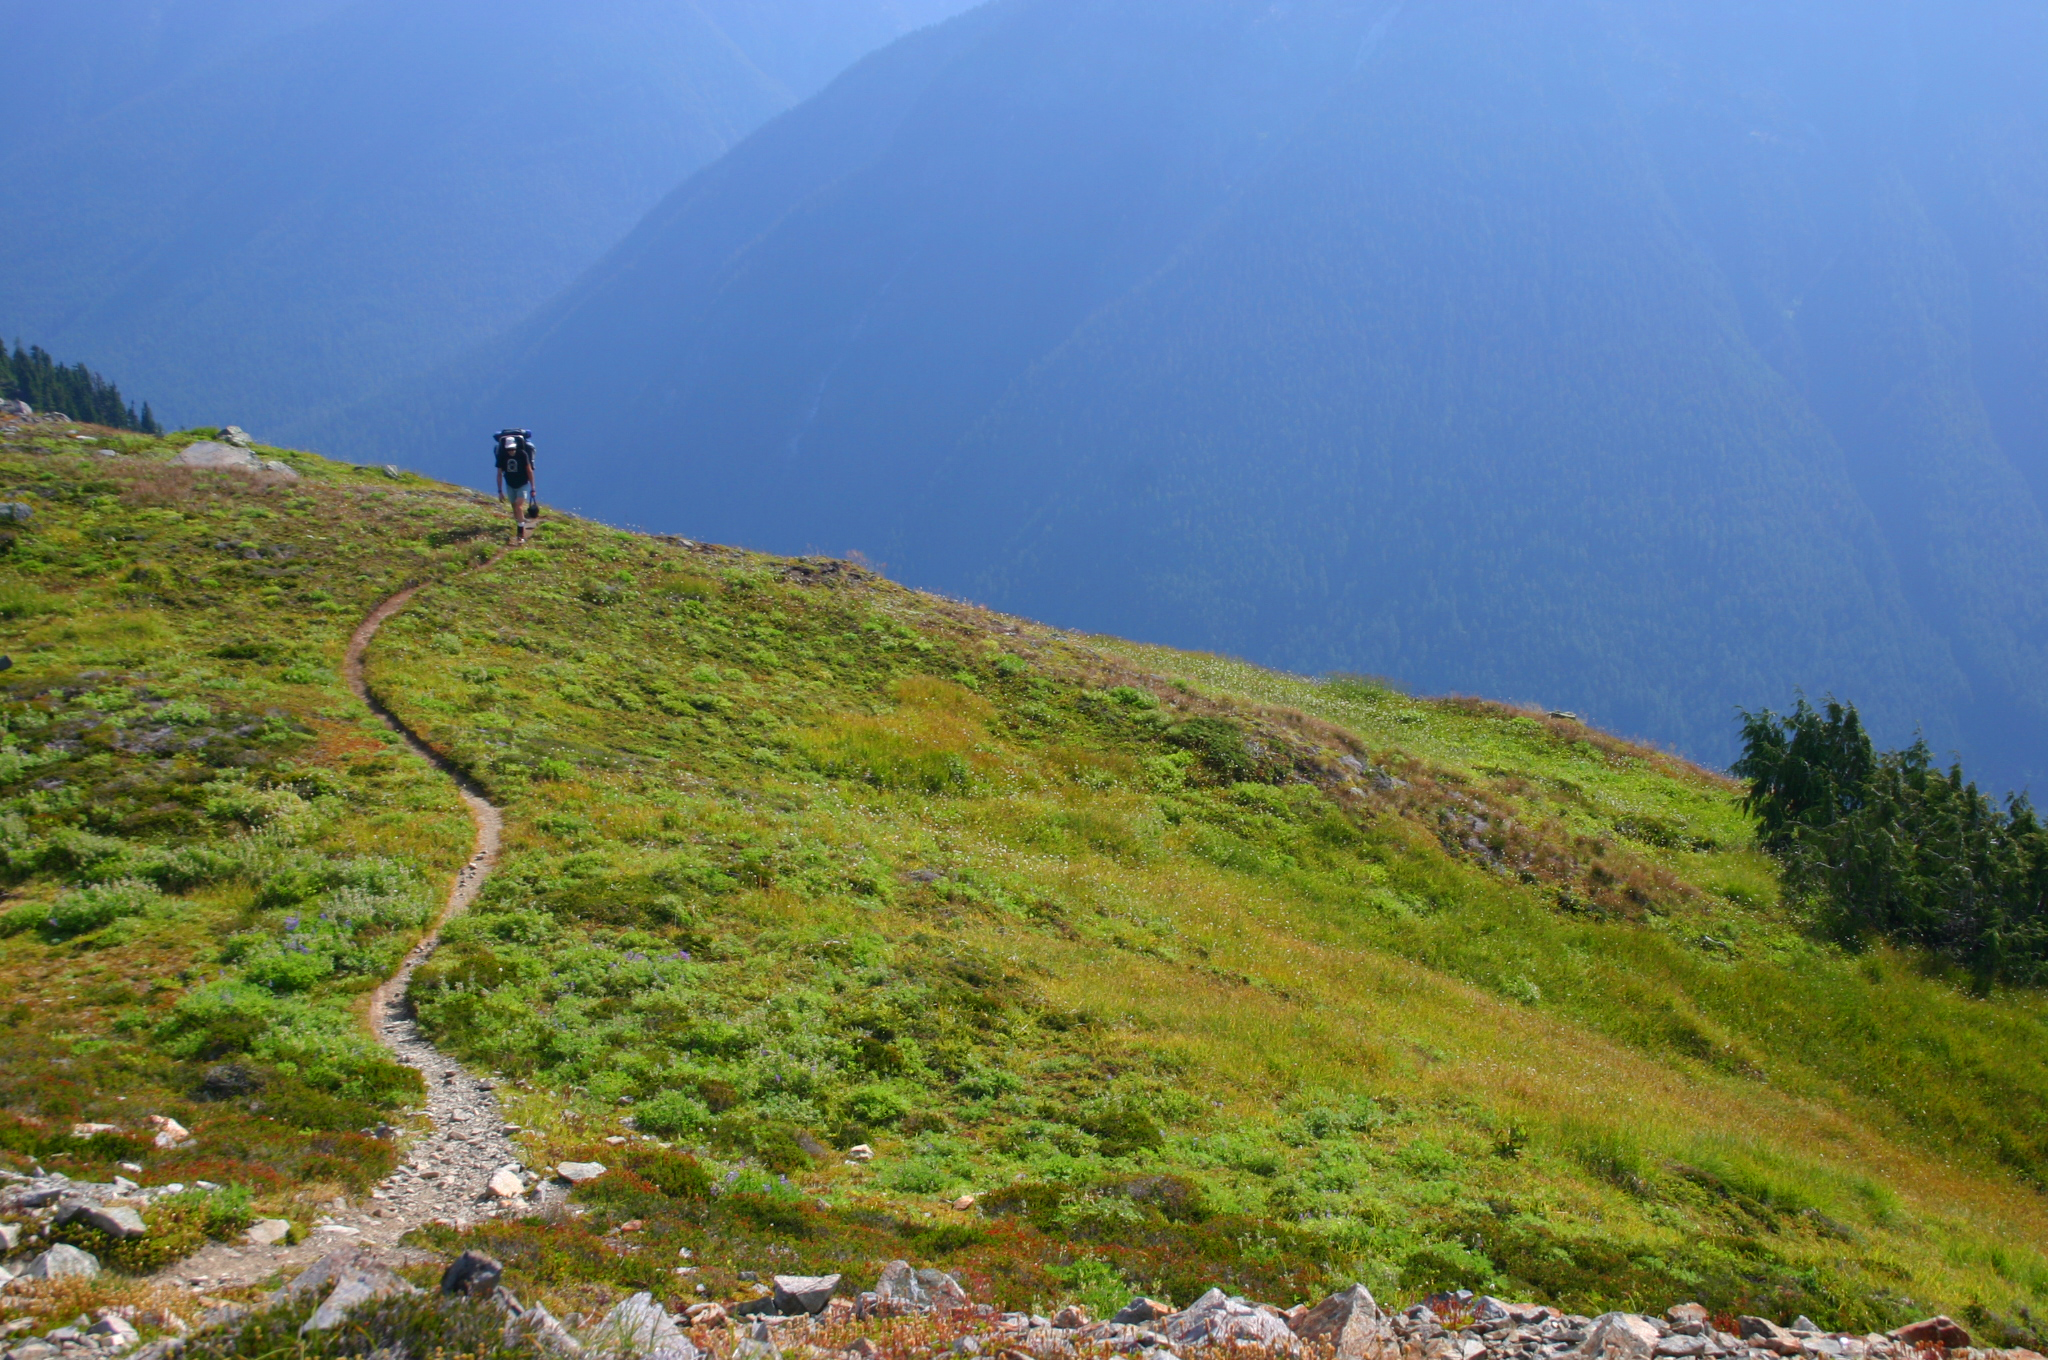
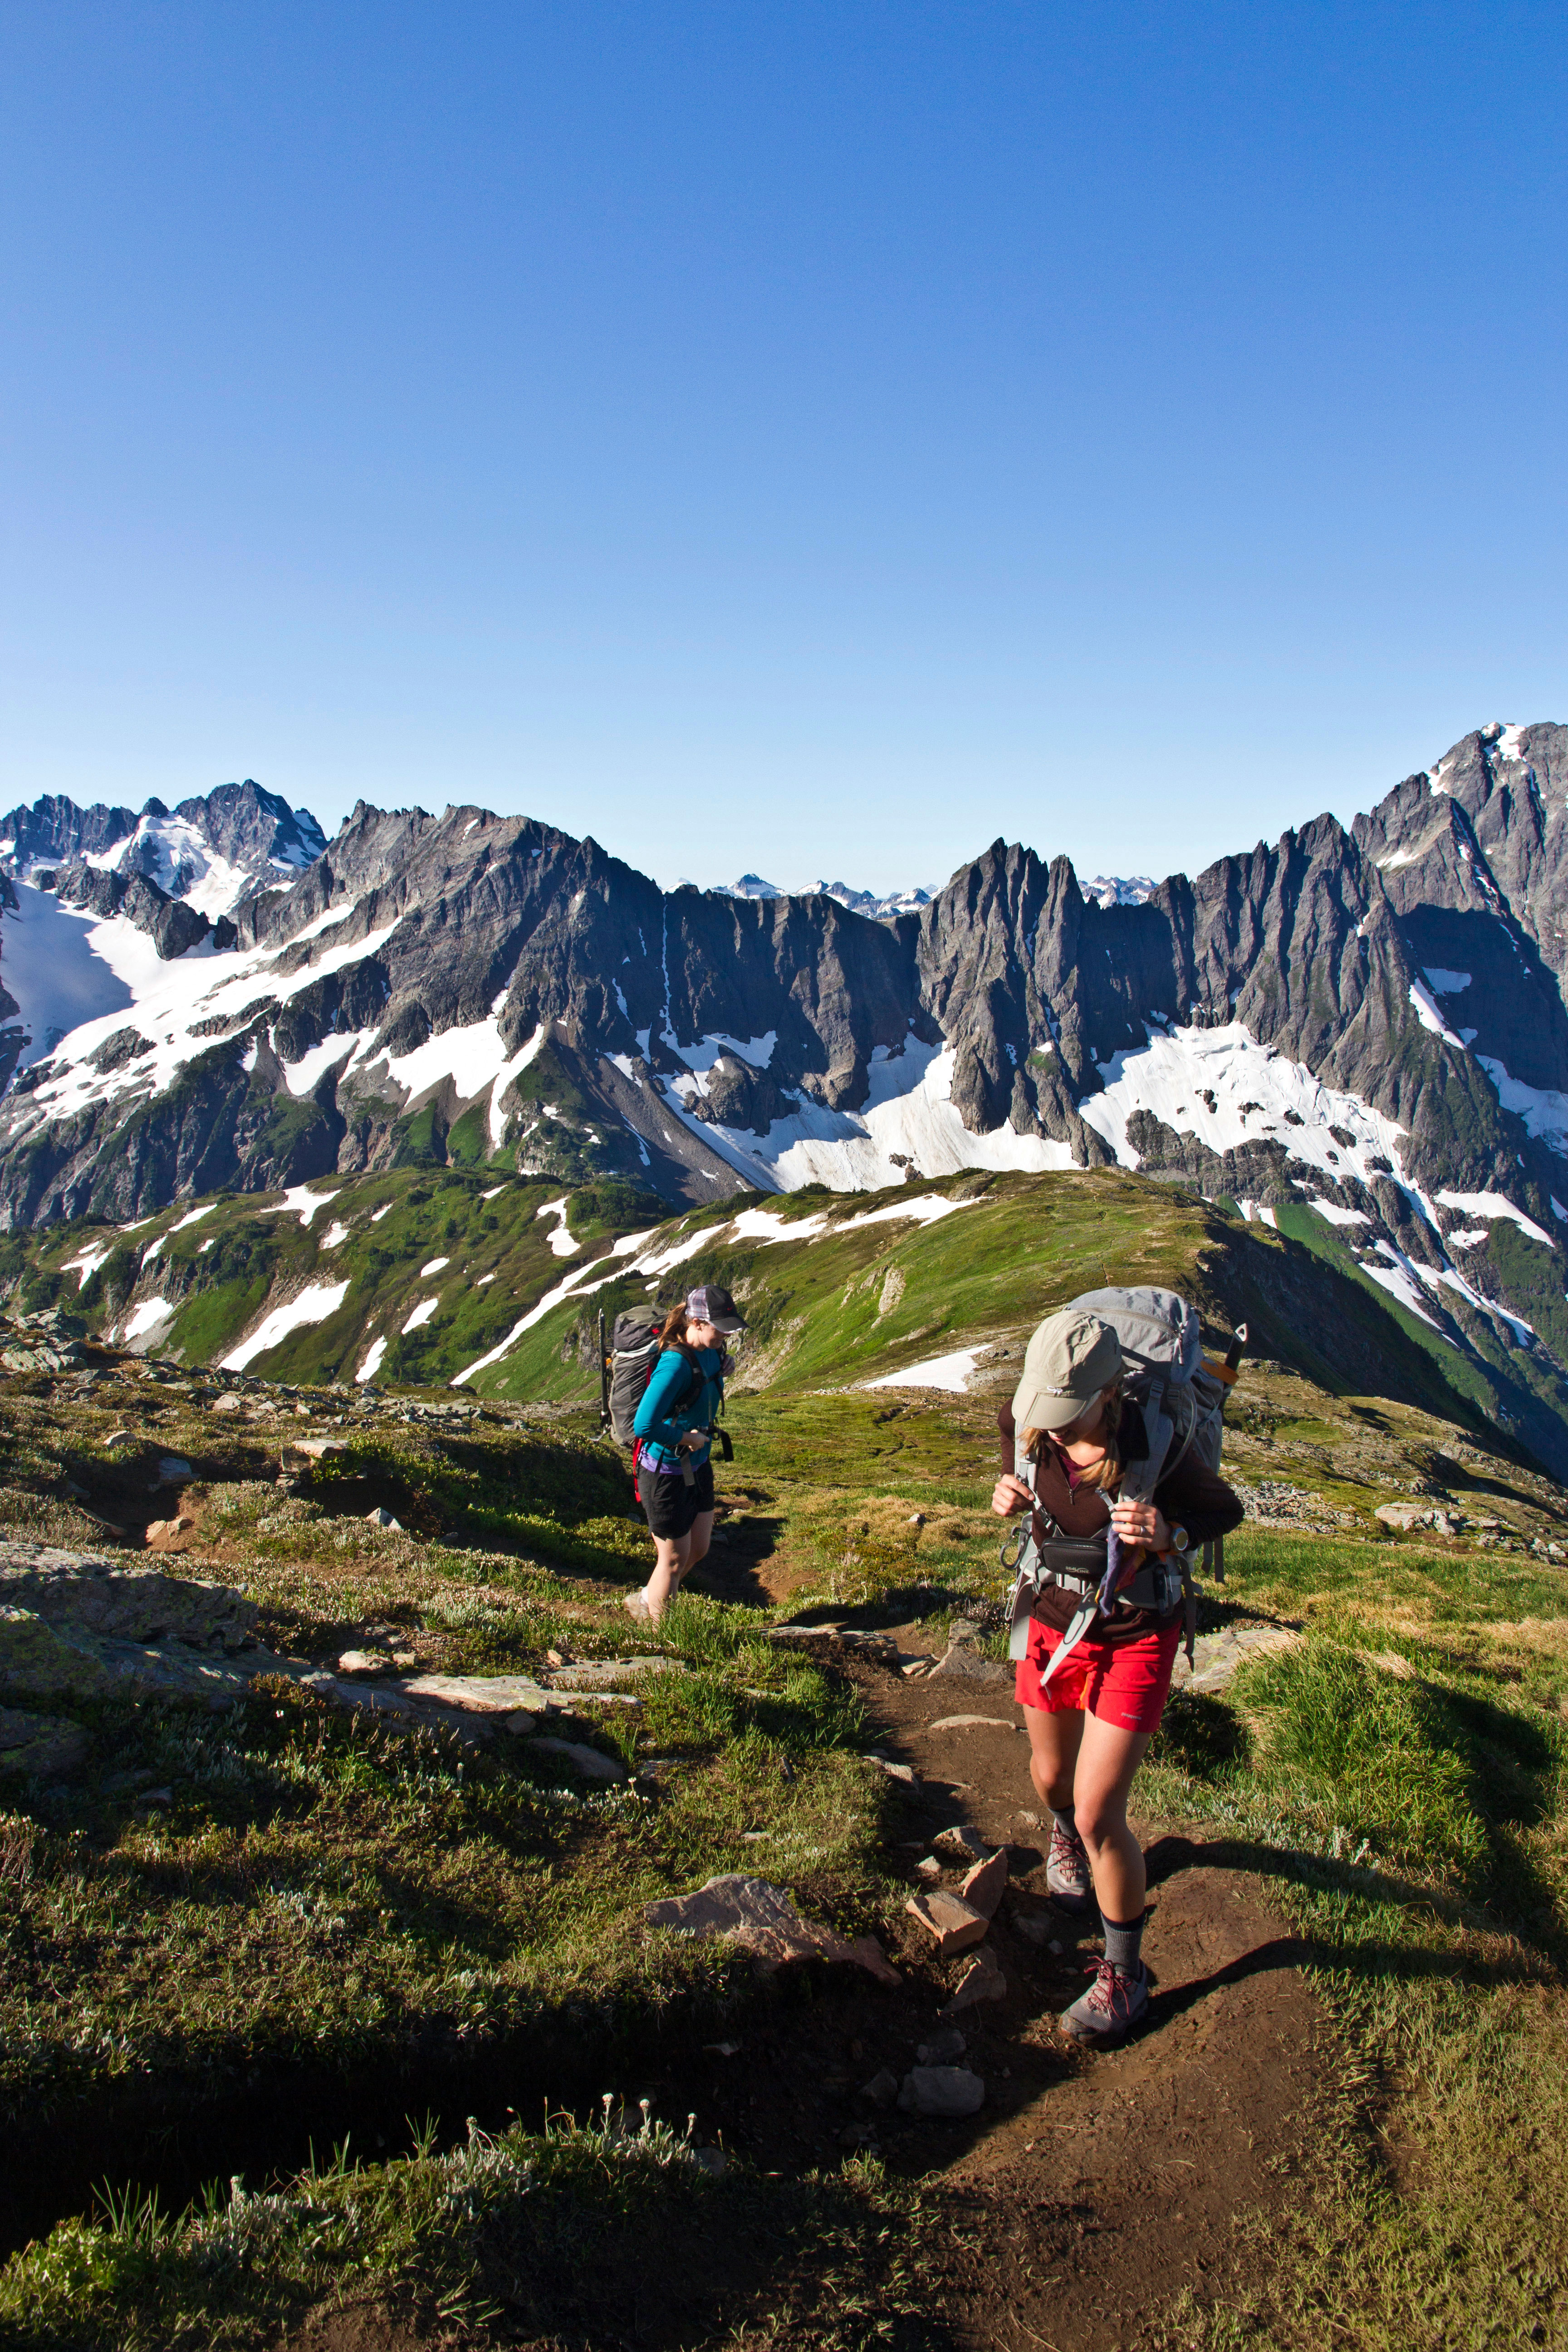 Hikers on Sahale Arm
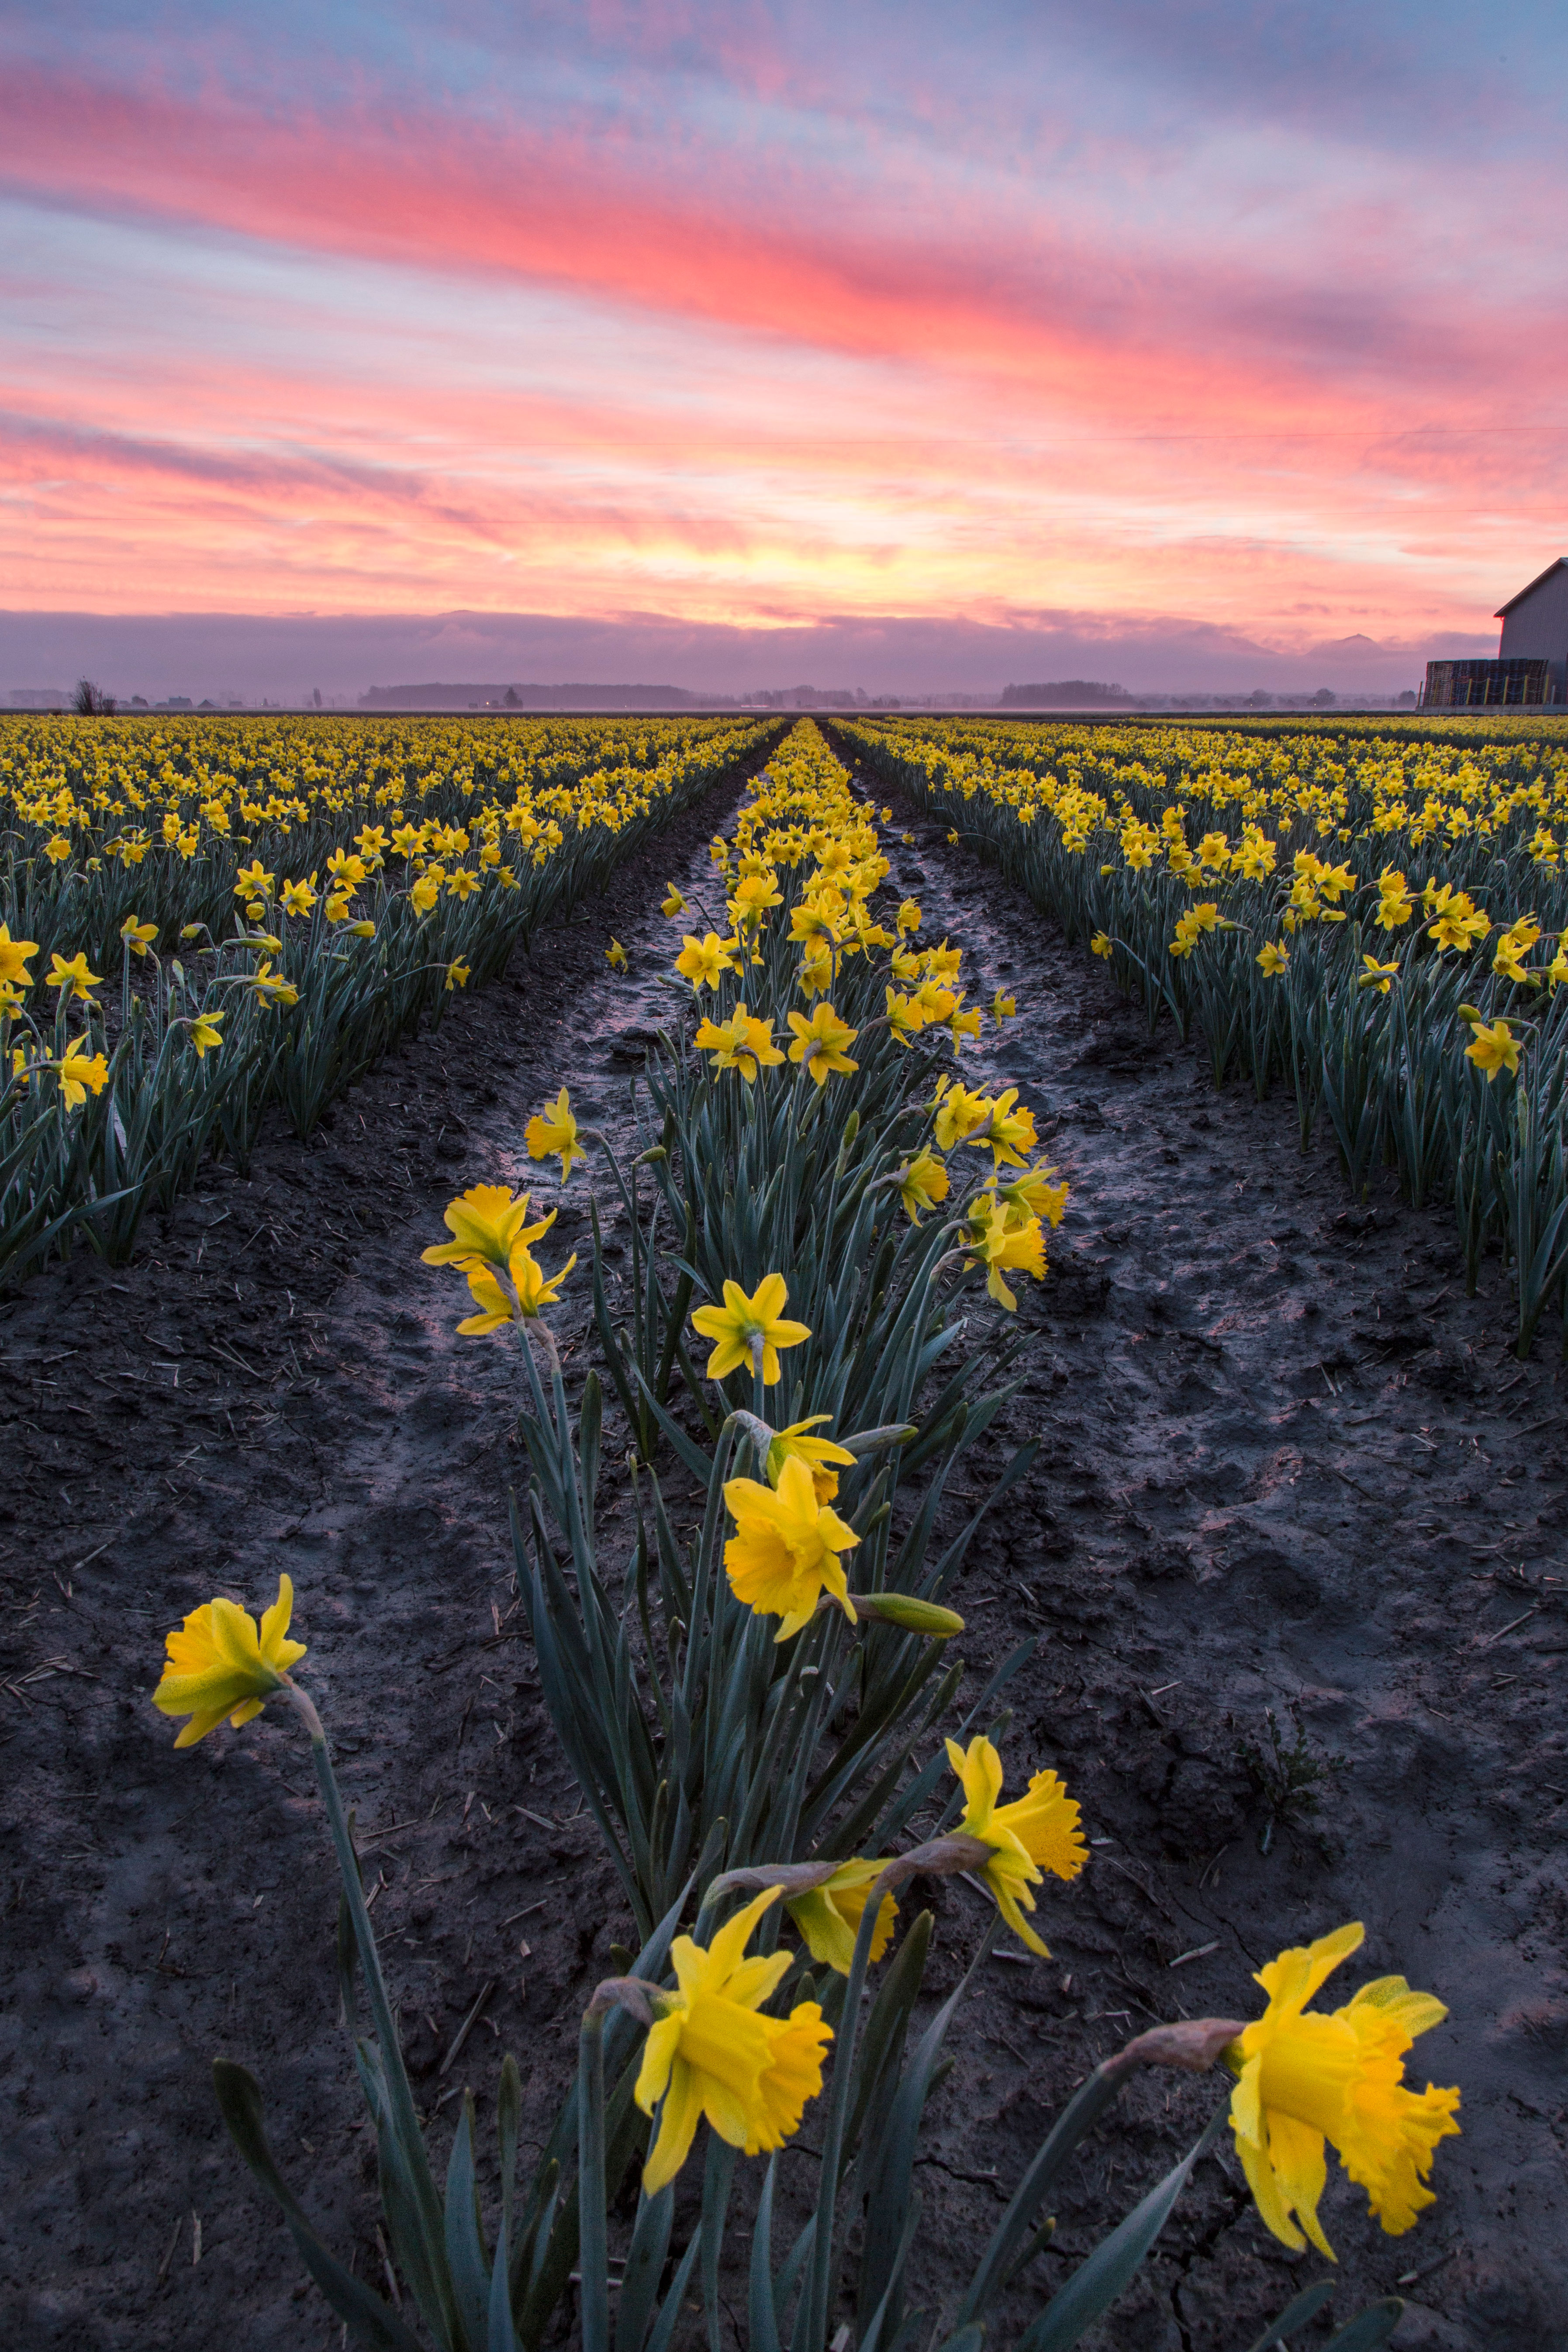
First Daffodils of 2014

These images were taken at sunrise, on March 13th, 2014!
Skagit Valley is famous for tulips in the spring. And daffodils! Each year the annual Skagit Valley Tulip Festival harkens the arrival of spring to the Pacific Northwest.
There are hundreds of acres of tulips and daffodils. If you want to visit, here is a link to the Bloom Map.
Daffodils bloom first, there three large fields alight now, with more to come. The arrival of the tulips generally happens in the first week of April, but it always depends on how many sunny days we get!

Samish Overlook: First Days of Spring!
These are a few images from last evening’s sunset. Overlooking Skagit Valley, things are starting to get green!


Tulips of Skagit Valley
March has arrived and it’s not too long now (hopefully!) until it gets a little warmer and the flowers start to arrive.
 Rows of Reds, Reflected
 This months issue of NW Travel Mag with one of my images on the cover!
I live in Skagit County, named after the Skagit Indians and Skagit River) in the NW corner of Washington State. And among its other striking features such as the North Cascades and Puget Sound we have the Tulip Festival every April.  Yellows at sunset
I understand that outside of Holland there are more tulips grown here than anywhere. The valley floor has a wide expanse of fertile, flat farmland and near the towns of Mount Vernon and La Conner there are fields and fields of bright tulips.  Infinite Pinks
Each year the bloom times change, but generally its mid April when they are at their height of color.
This is a web site that has a link for a map showing exactly where the fields are and when they are abloom.
 Rows and people
Every Saturday and Sunday the roads are crammed with cars forming long lines. This is not a good time to come! If you do come on the weekend make sure to arrive for either sunrise or sunset. I am often out for the sunrise and the fields are bright a crisp, a few workers and photographers are there, and that’s about it.
Weekdays are the best, plan to arrive about 5 or 6. The tulipy stores are closed and the manicured gardens. But the huge expansive fields are alive with the hue of low light and alive with vibrance!
 Yellowy mud!
Make sure to dress for mud, and bring your tripod and polarizer!
 Reds and a dramatic sky
If you decide to make the trip for a sunrise or sunset and want a tour guide, make sure to let me know! I am always happy to have company!
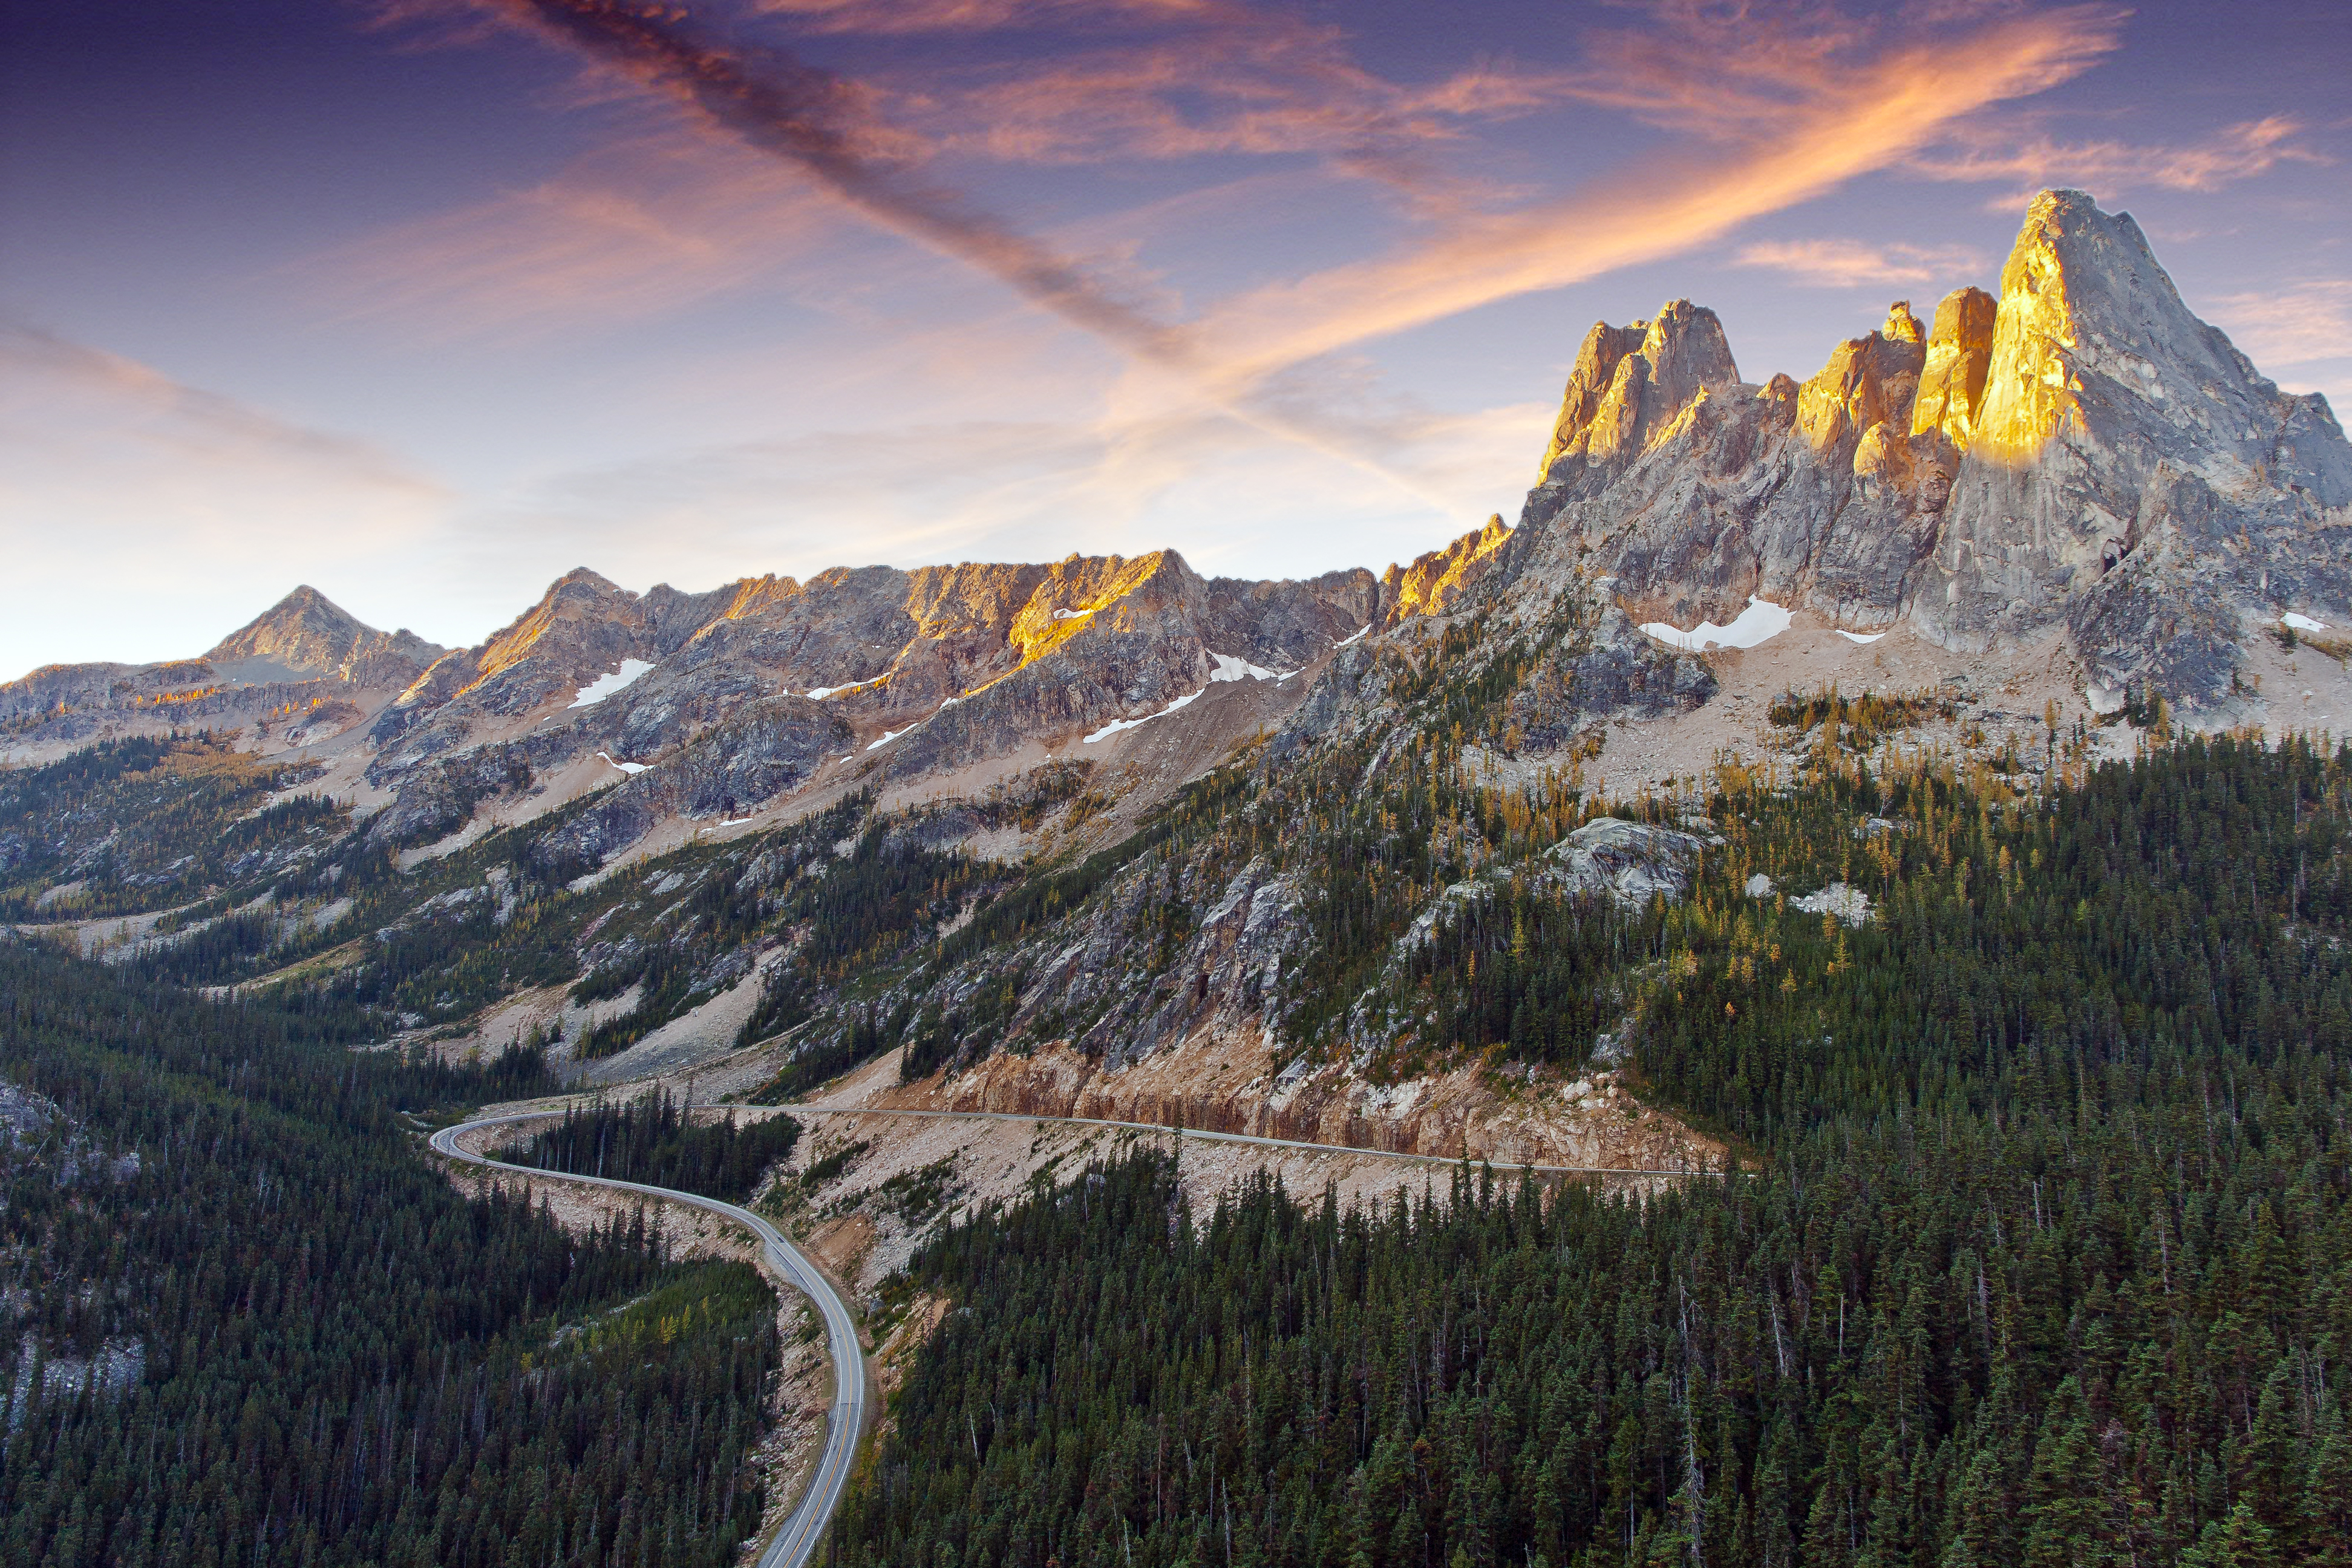
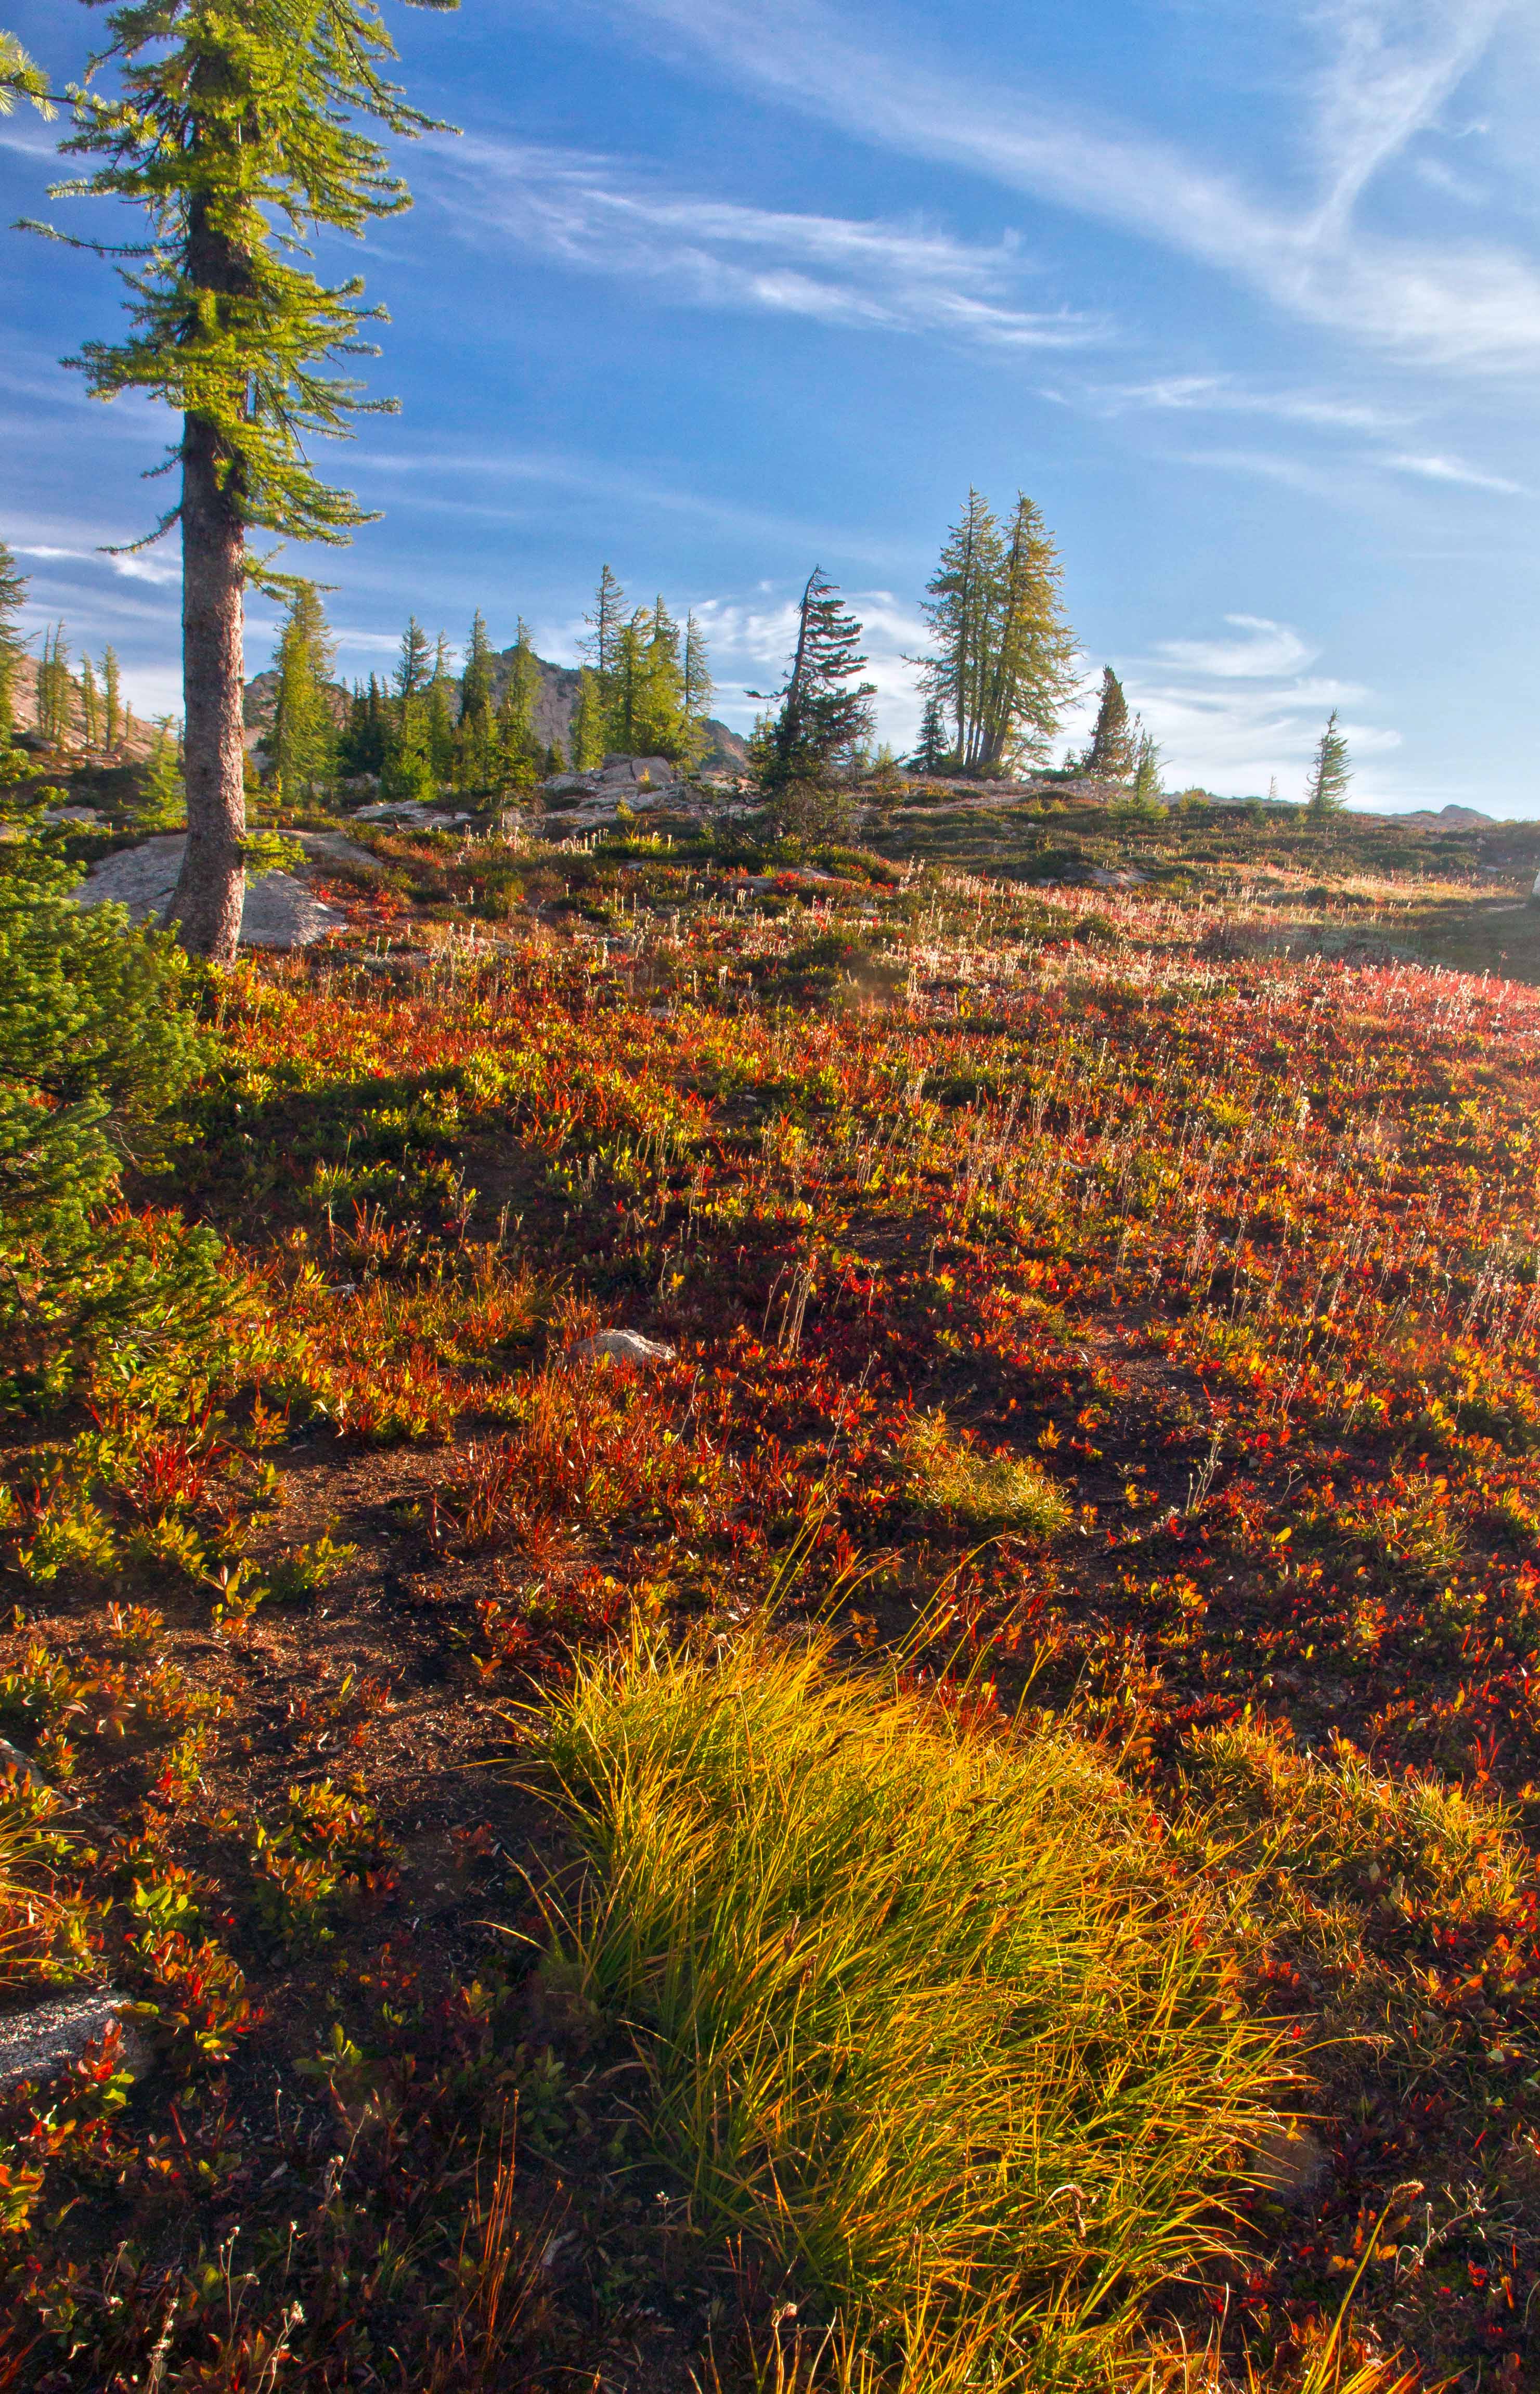
Cutthroat Pass, North Cascades
 Cutthroat Pass Panorama
The hike to Cutthroat Pass is an easy one, both to get to and to hike. The trail leaves from the parking area at the north side of Rainy Pass, along the North Cascades Highway. It’s about 5 miles or so to the top. Along the way there are streams, meadows and higher up, camps.
 Cutthroat Pass Trail
 Sunrise at Cutthroat Pass
I made the jaunt up to capture some fall colors. We slept on slabs at the top of the pass.
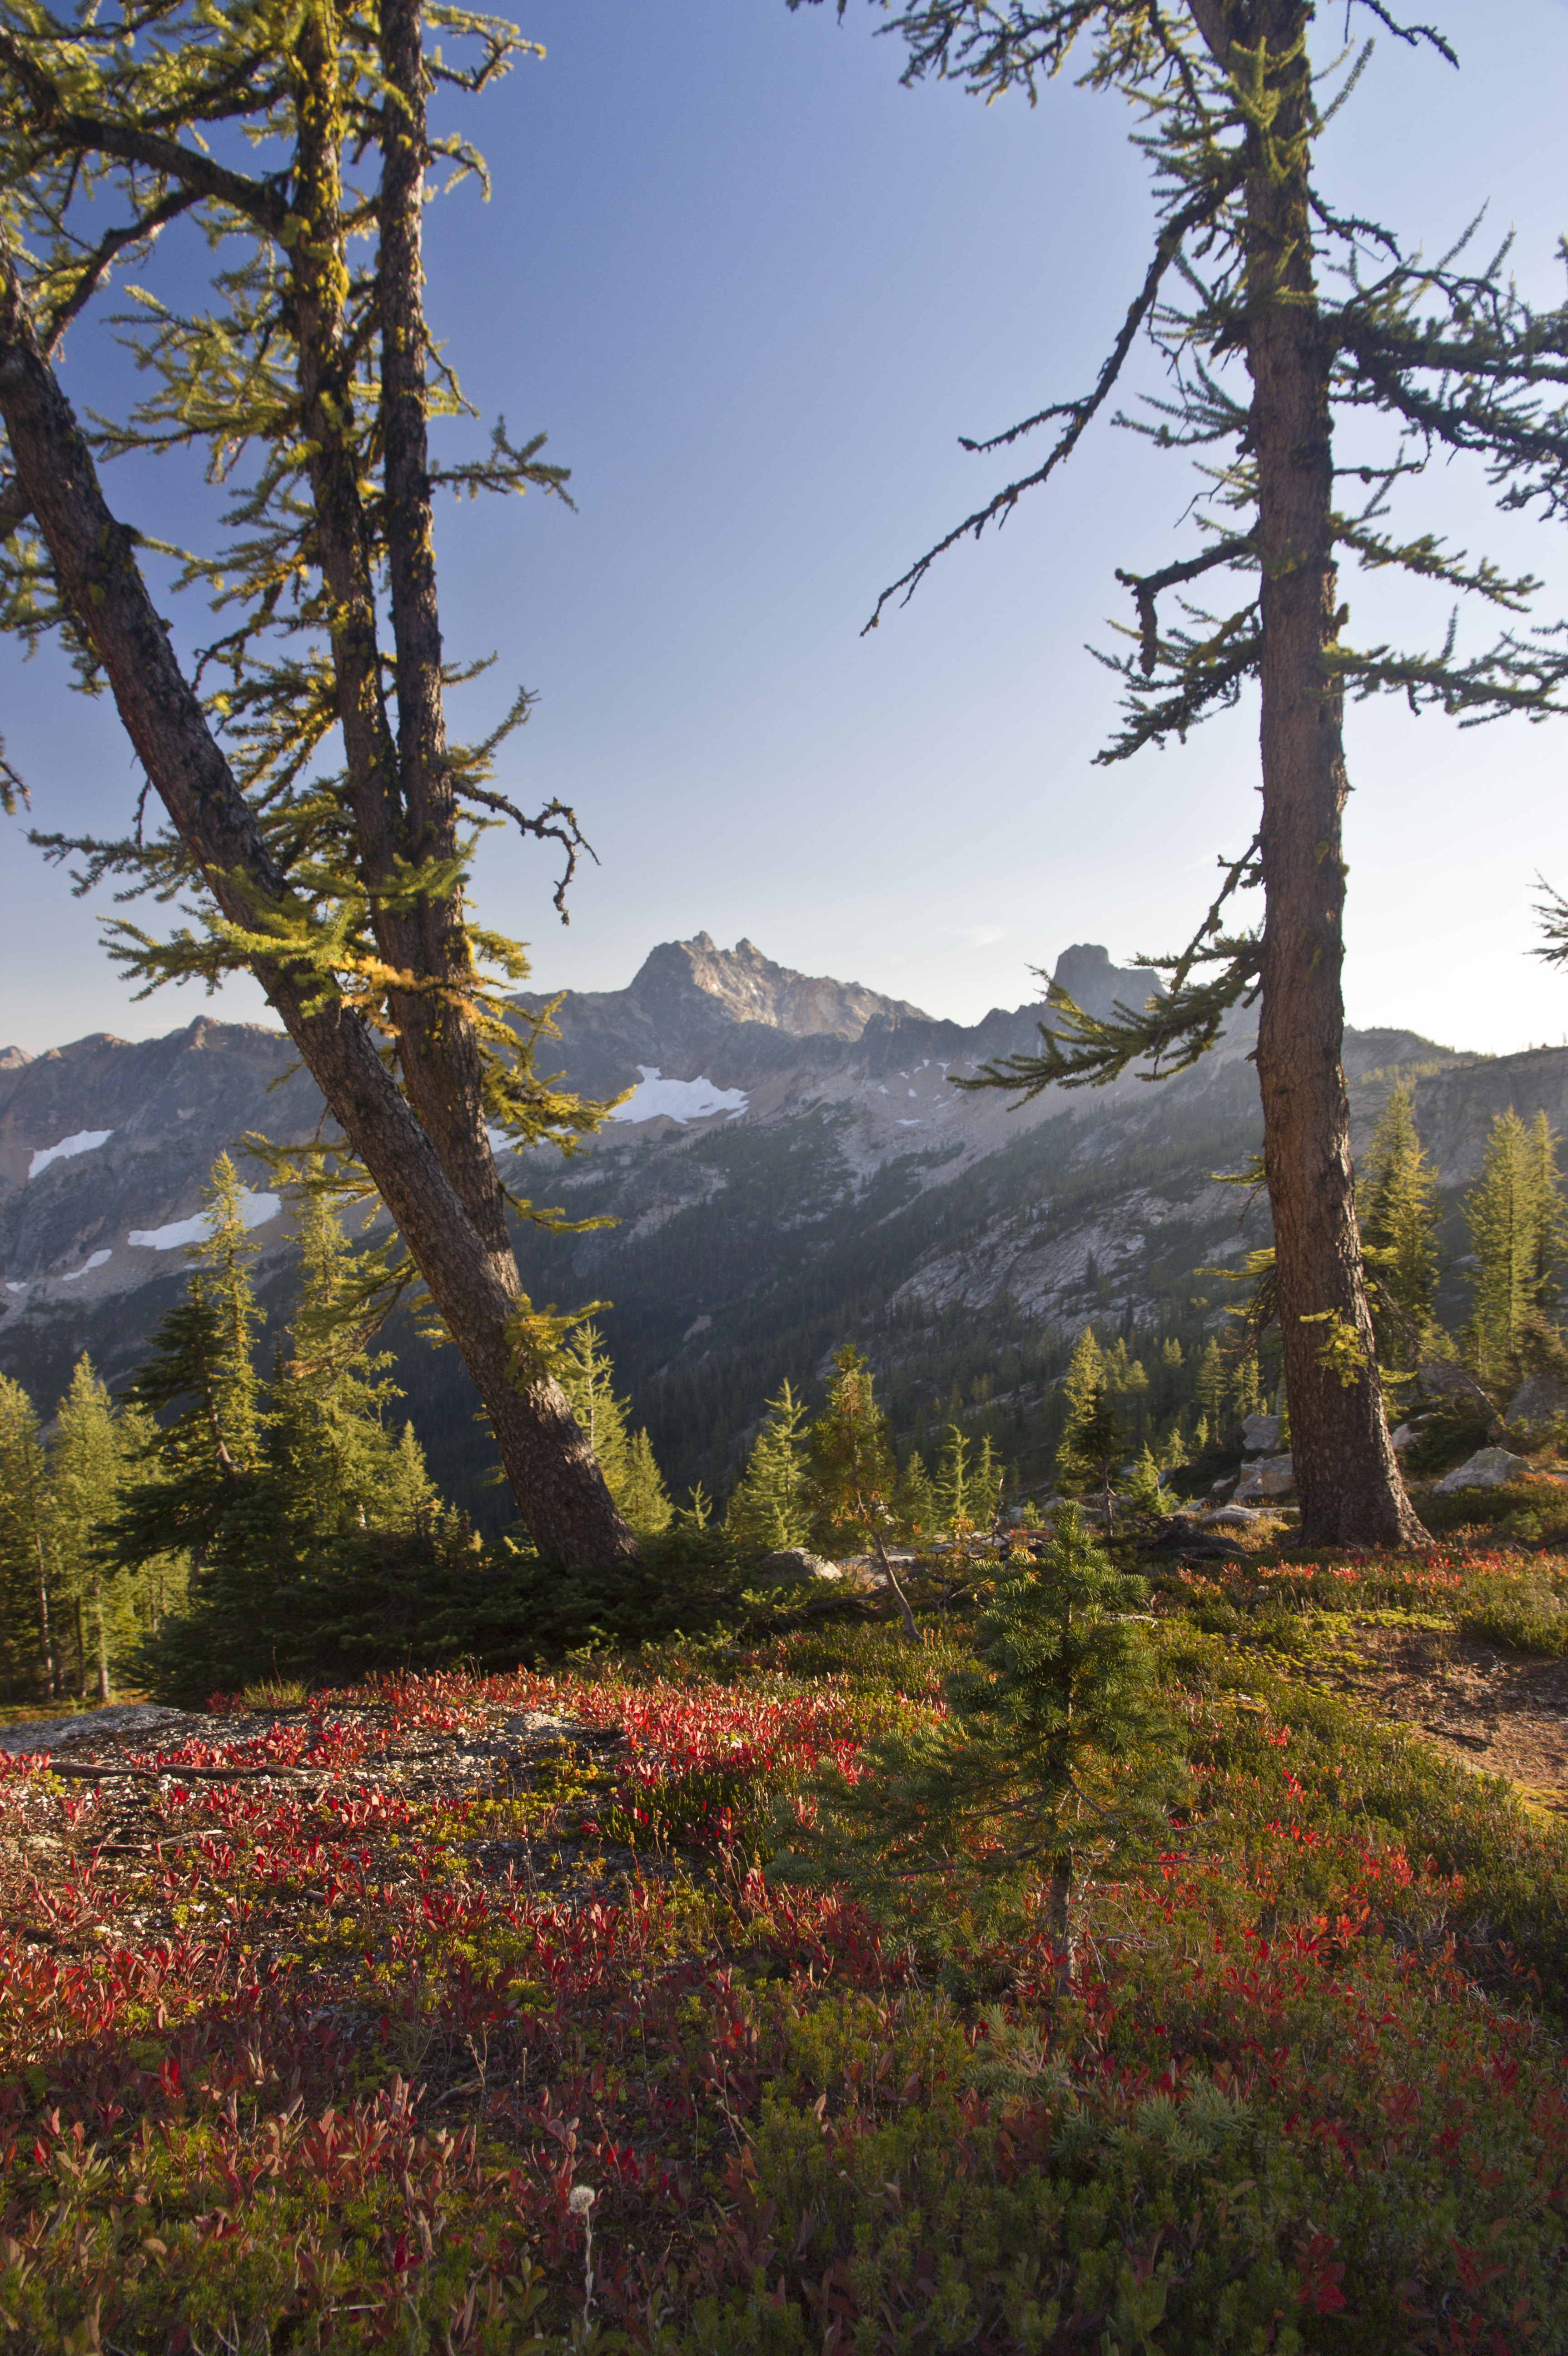 View from camp atop Cutthroat Pass
 View from camp atop Cutthroat Pass
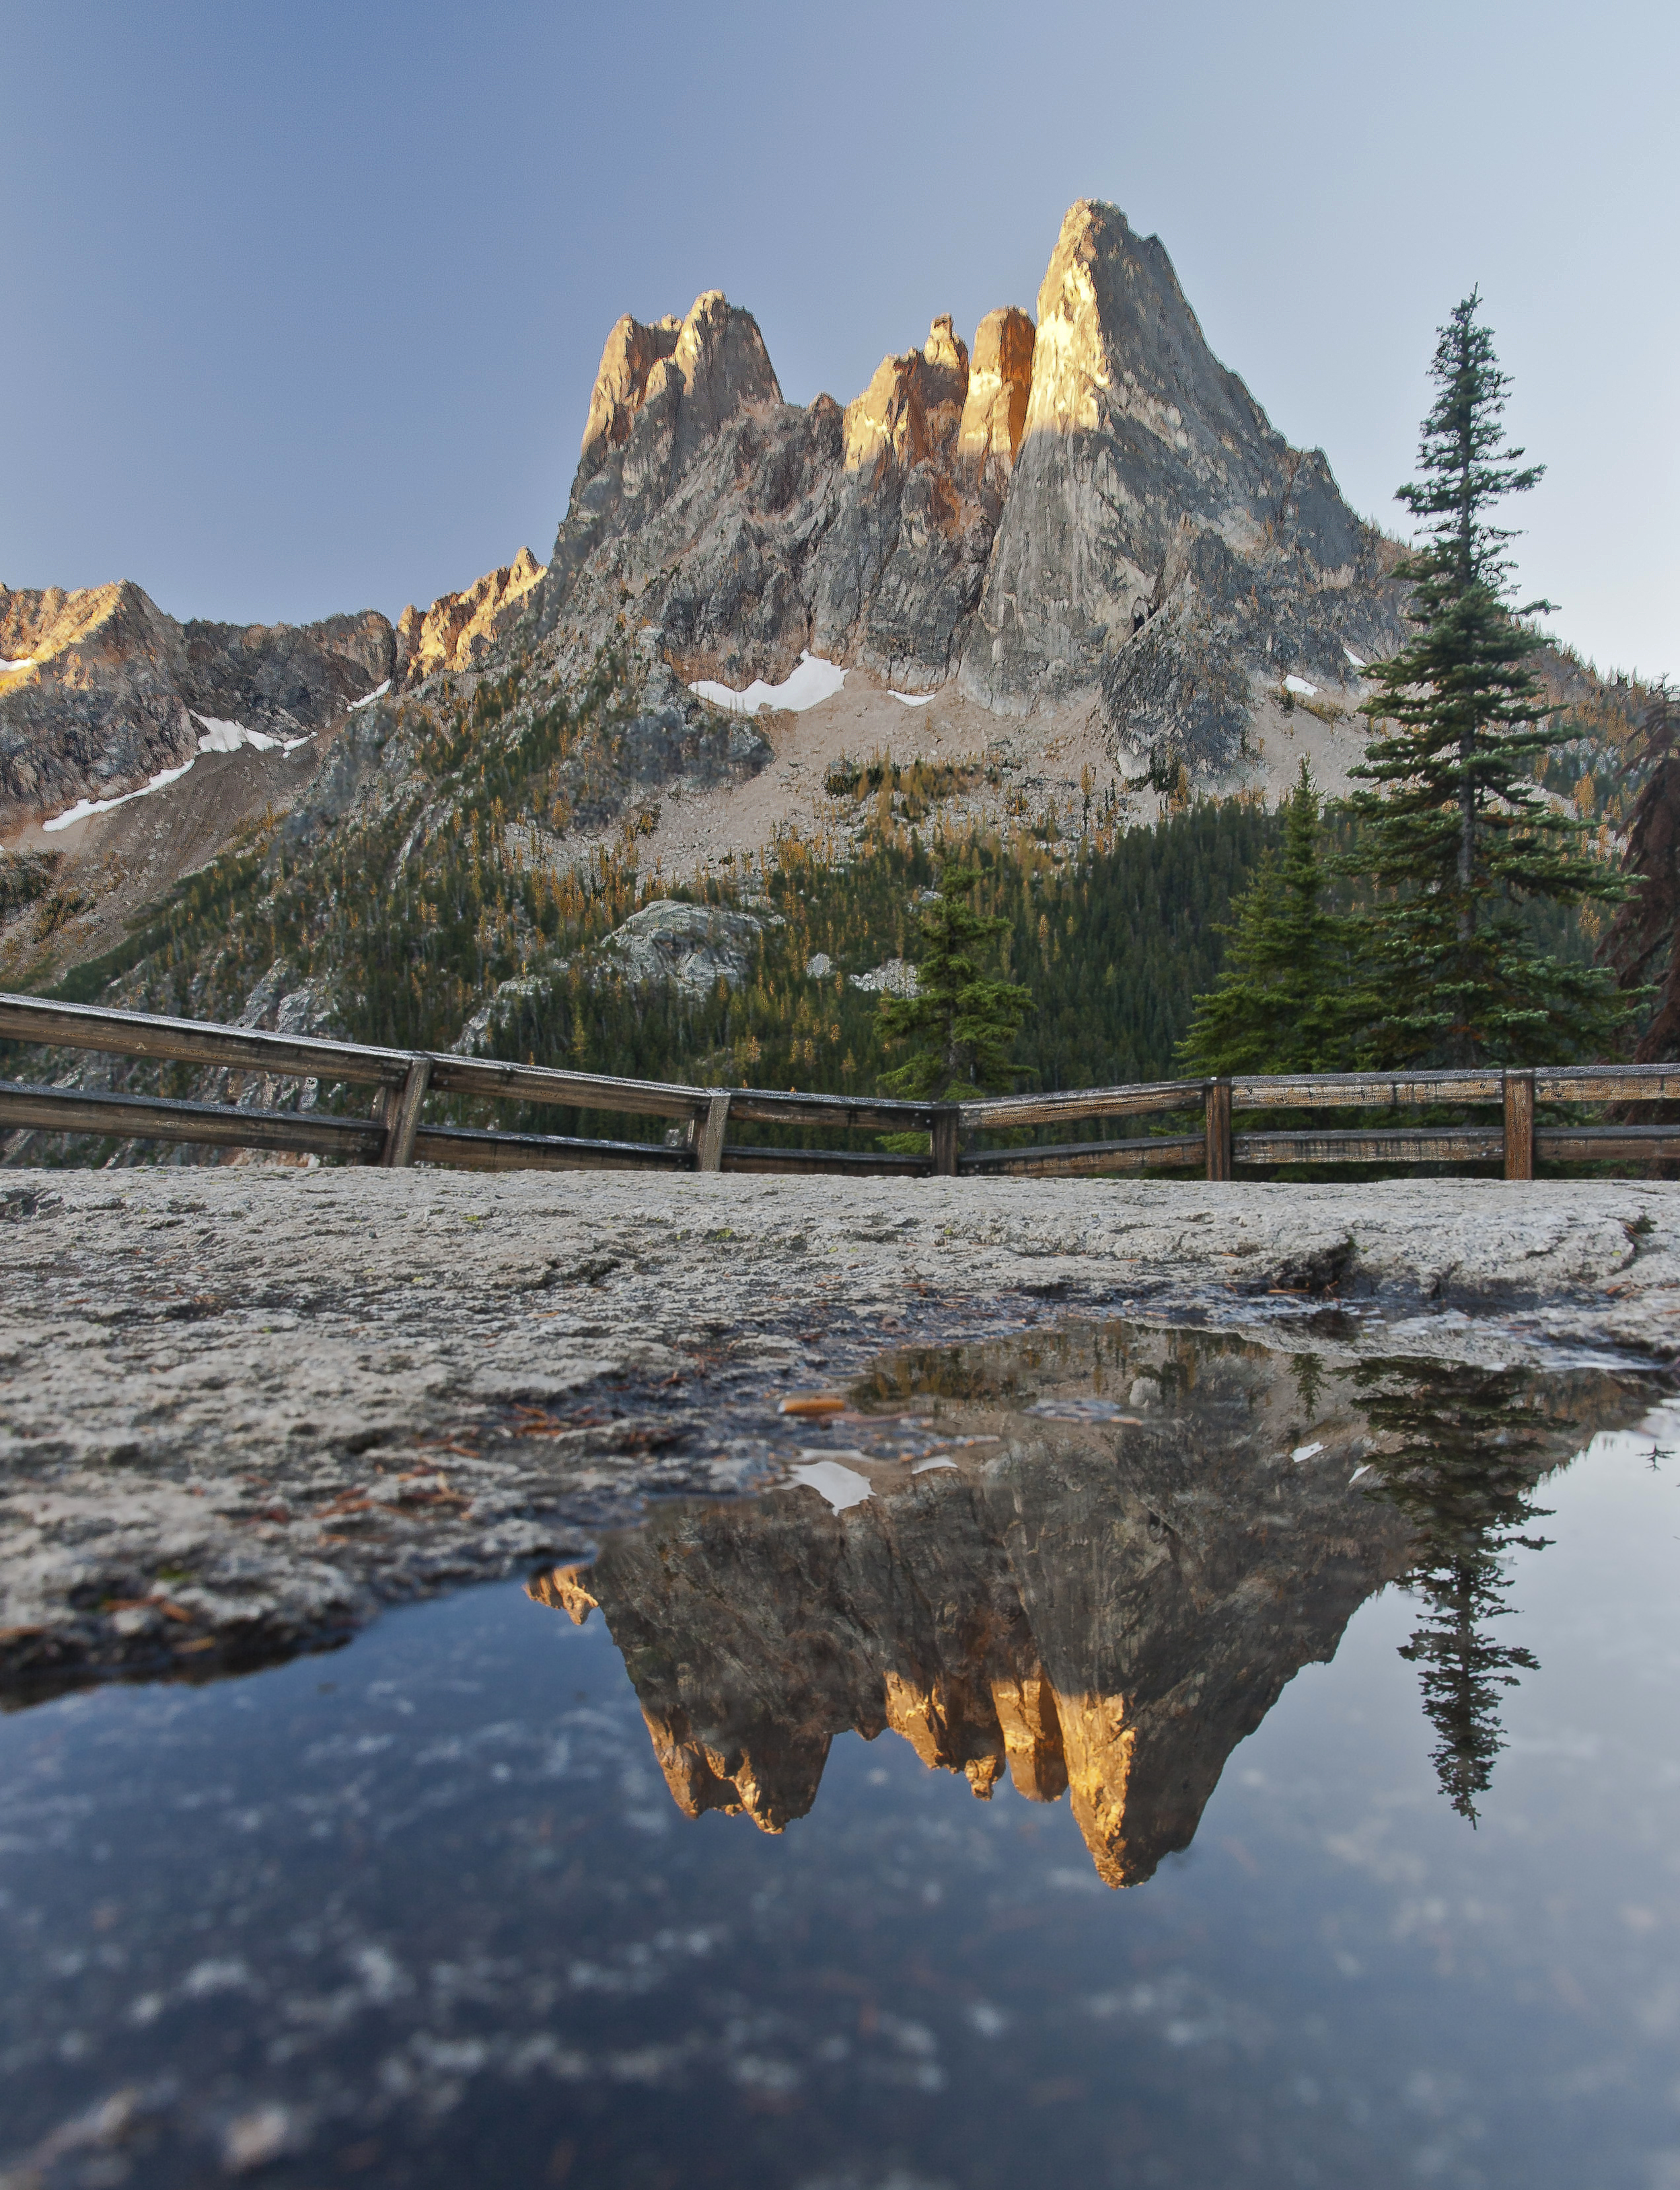
 Cutthroat Peak
 Milky Way from Cutthroat Pass
Point of the Arches and Shi Shi Beach
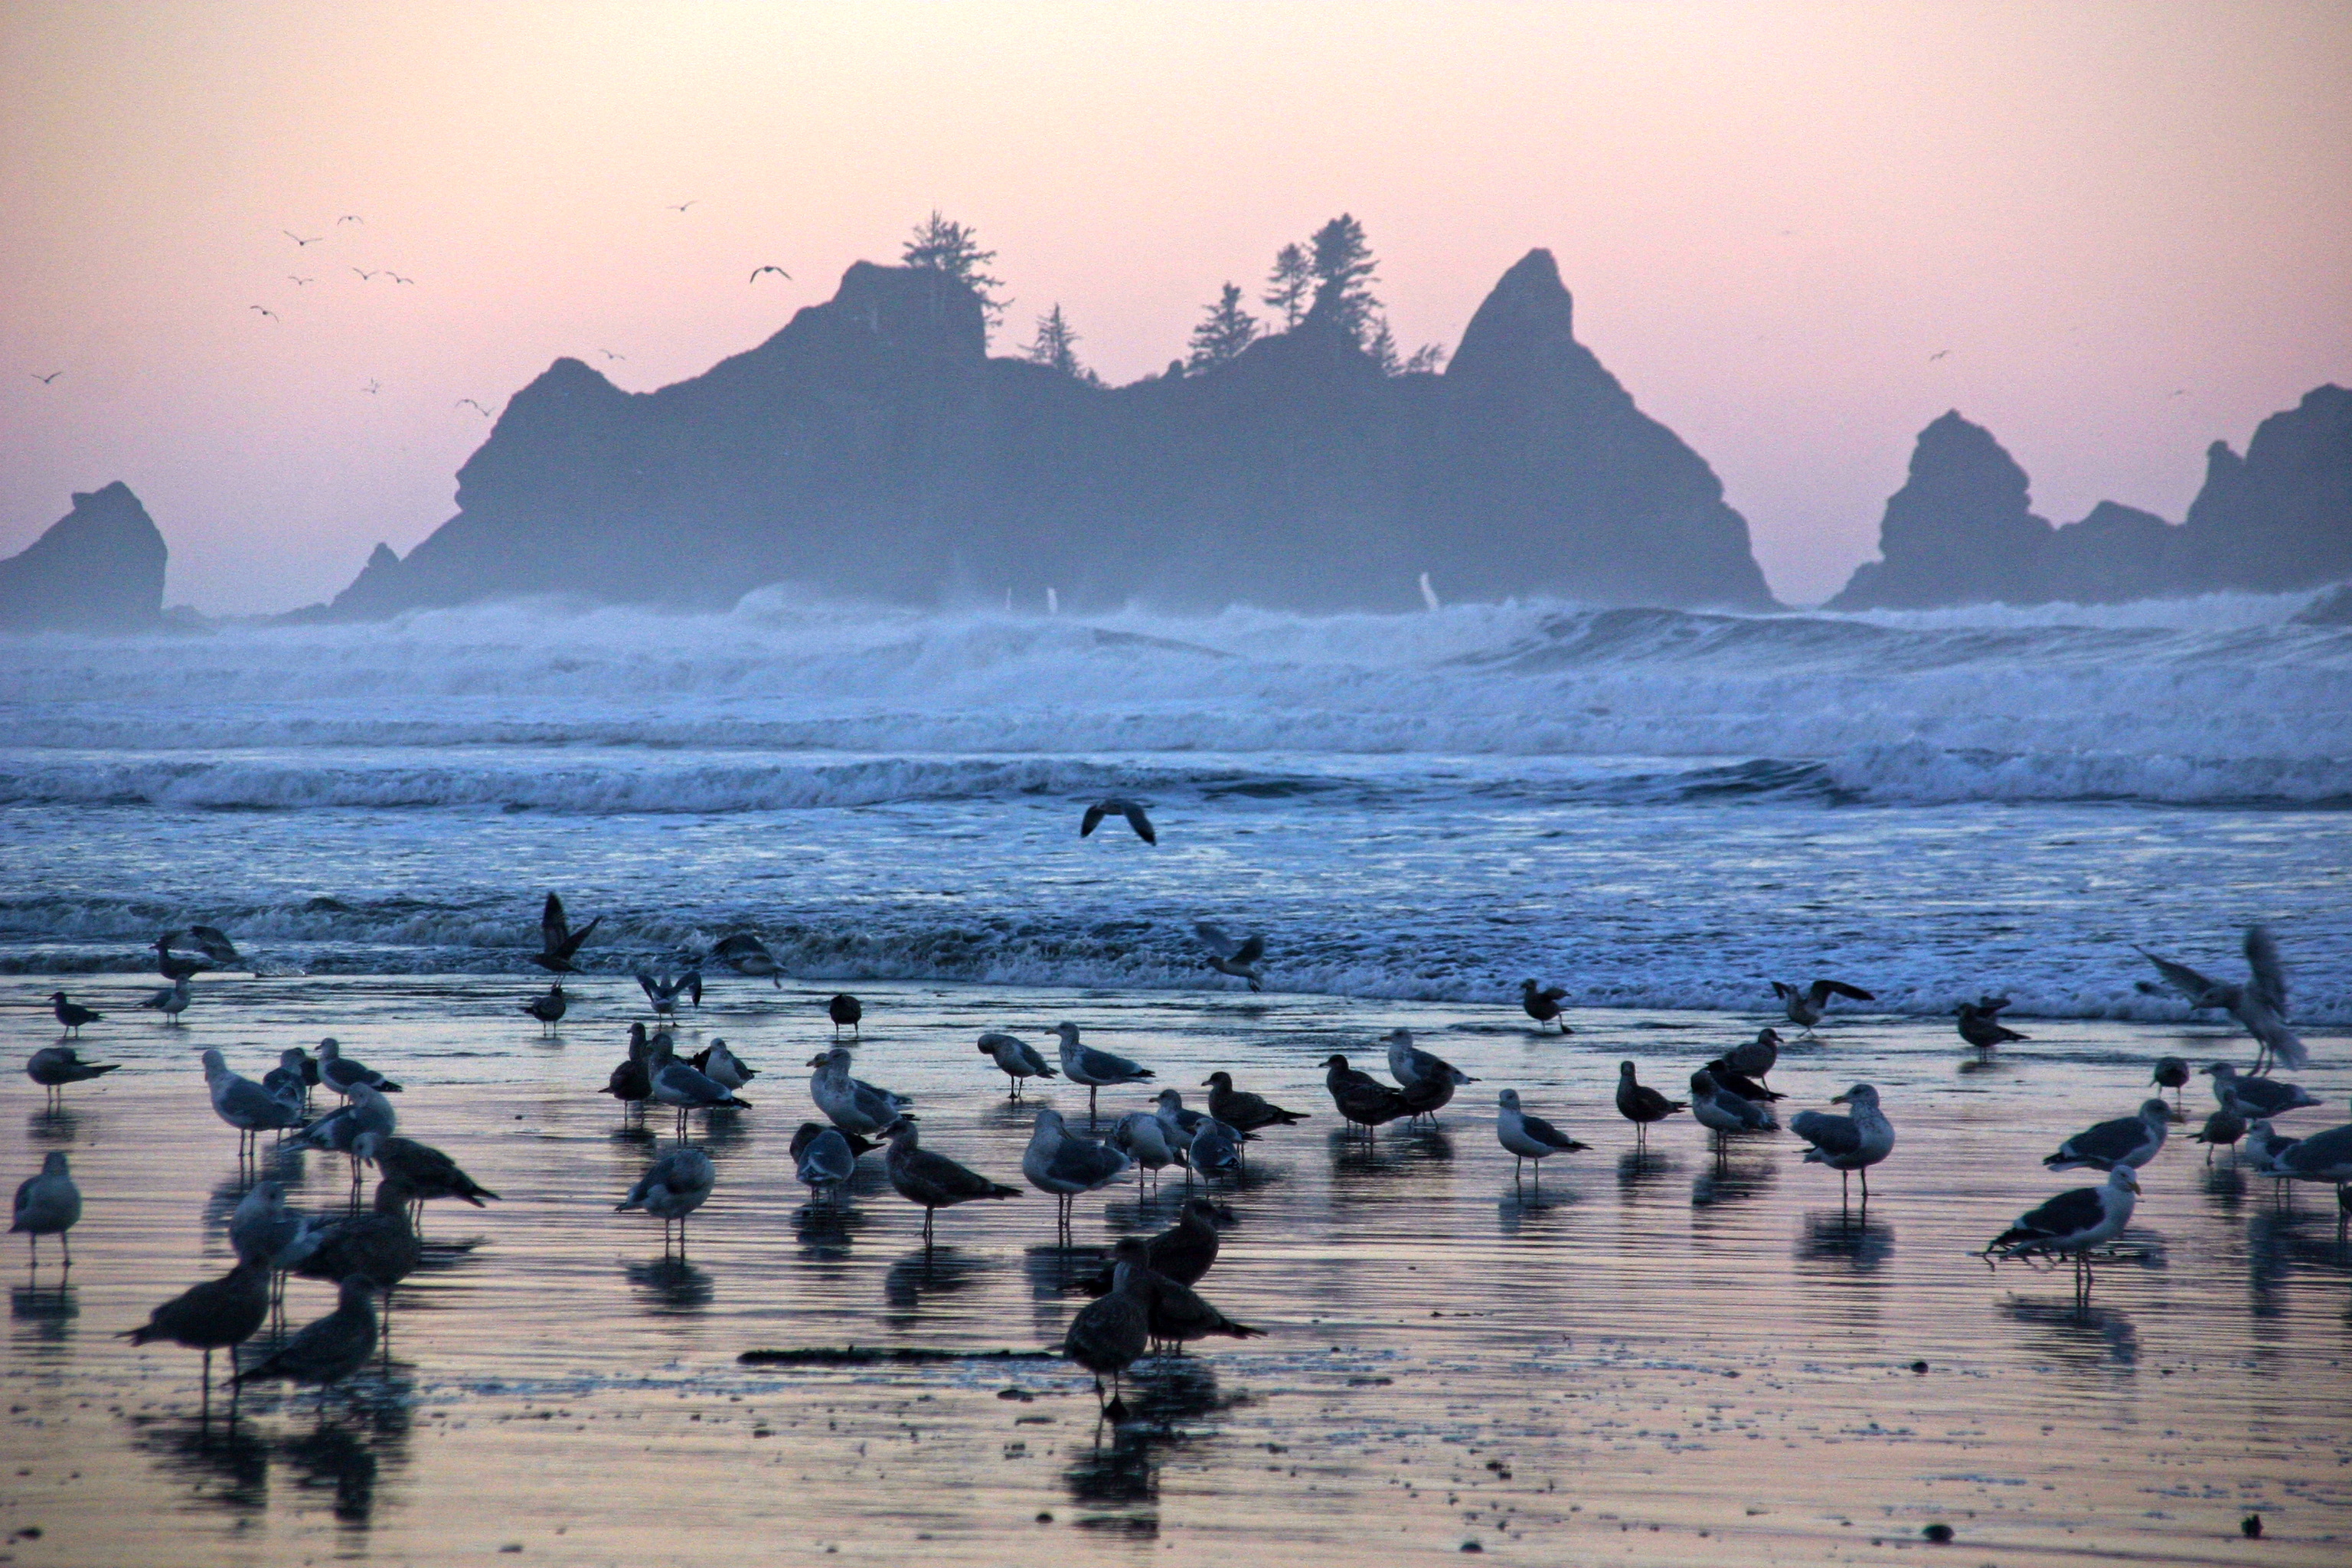
 Seastacks and seagulls.
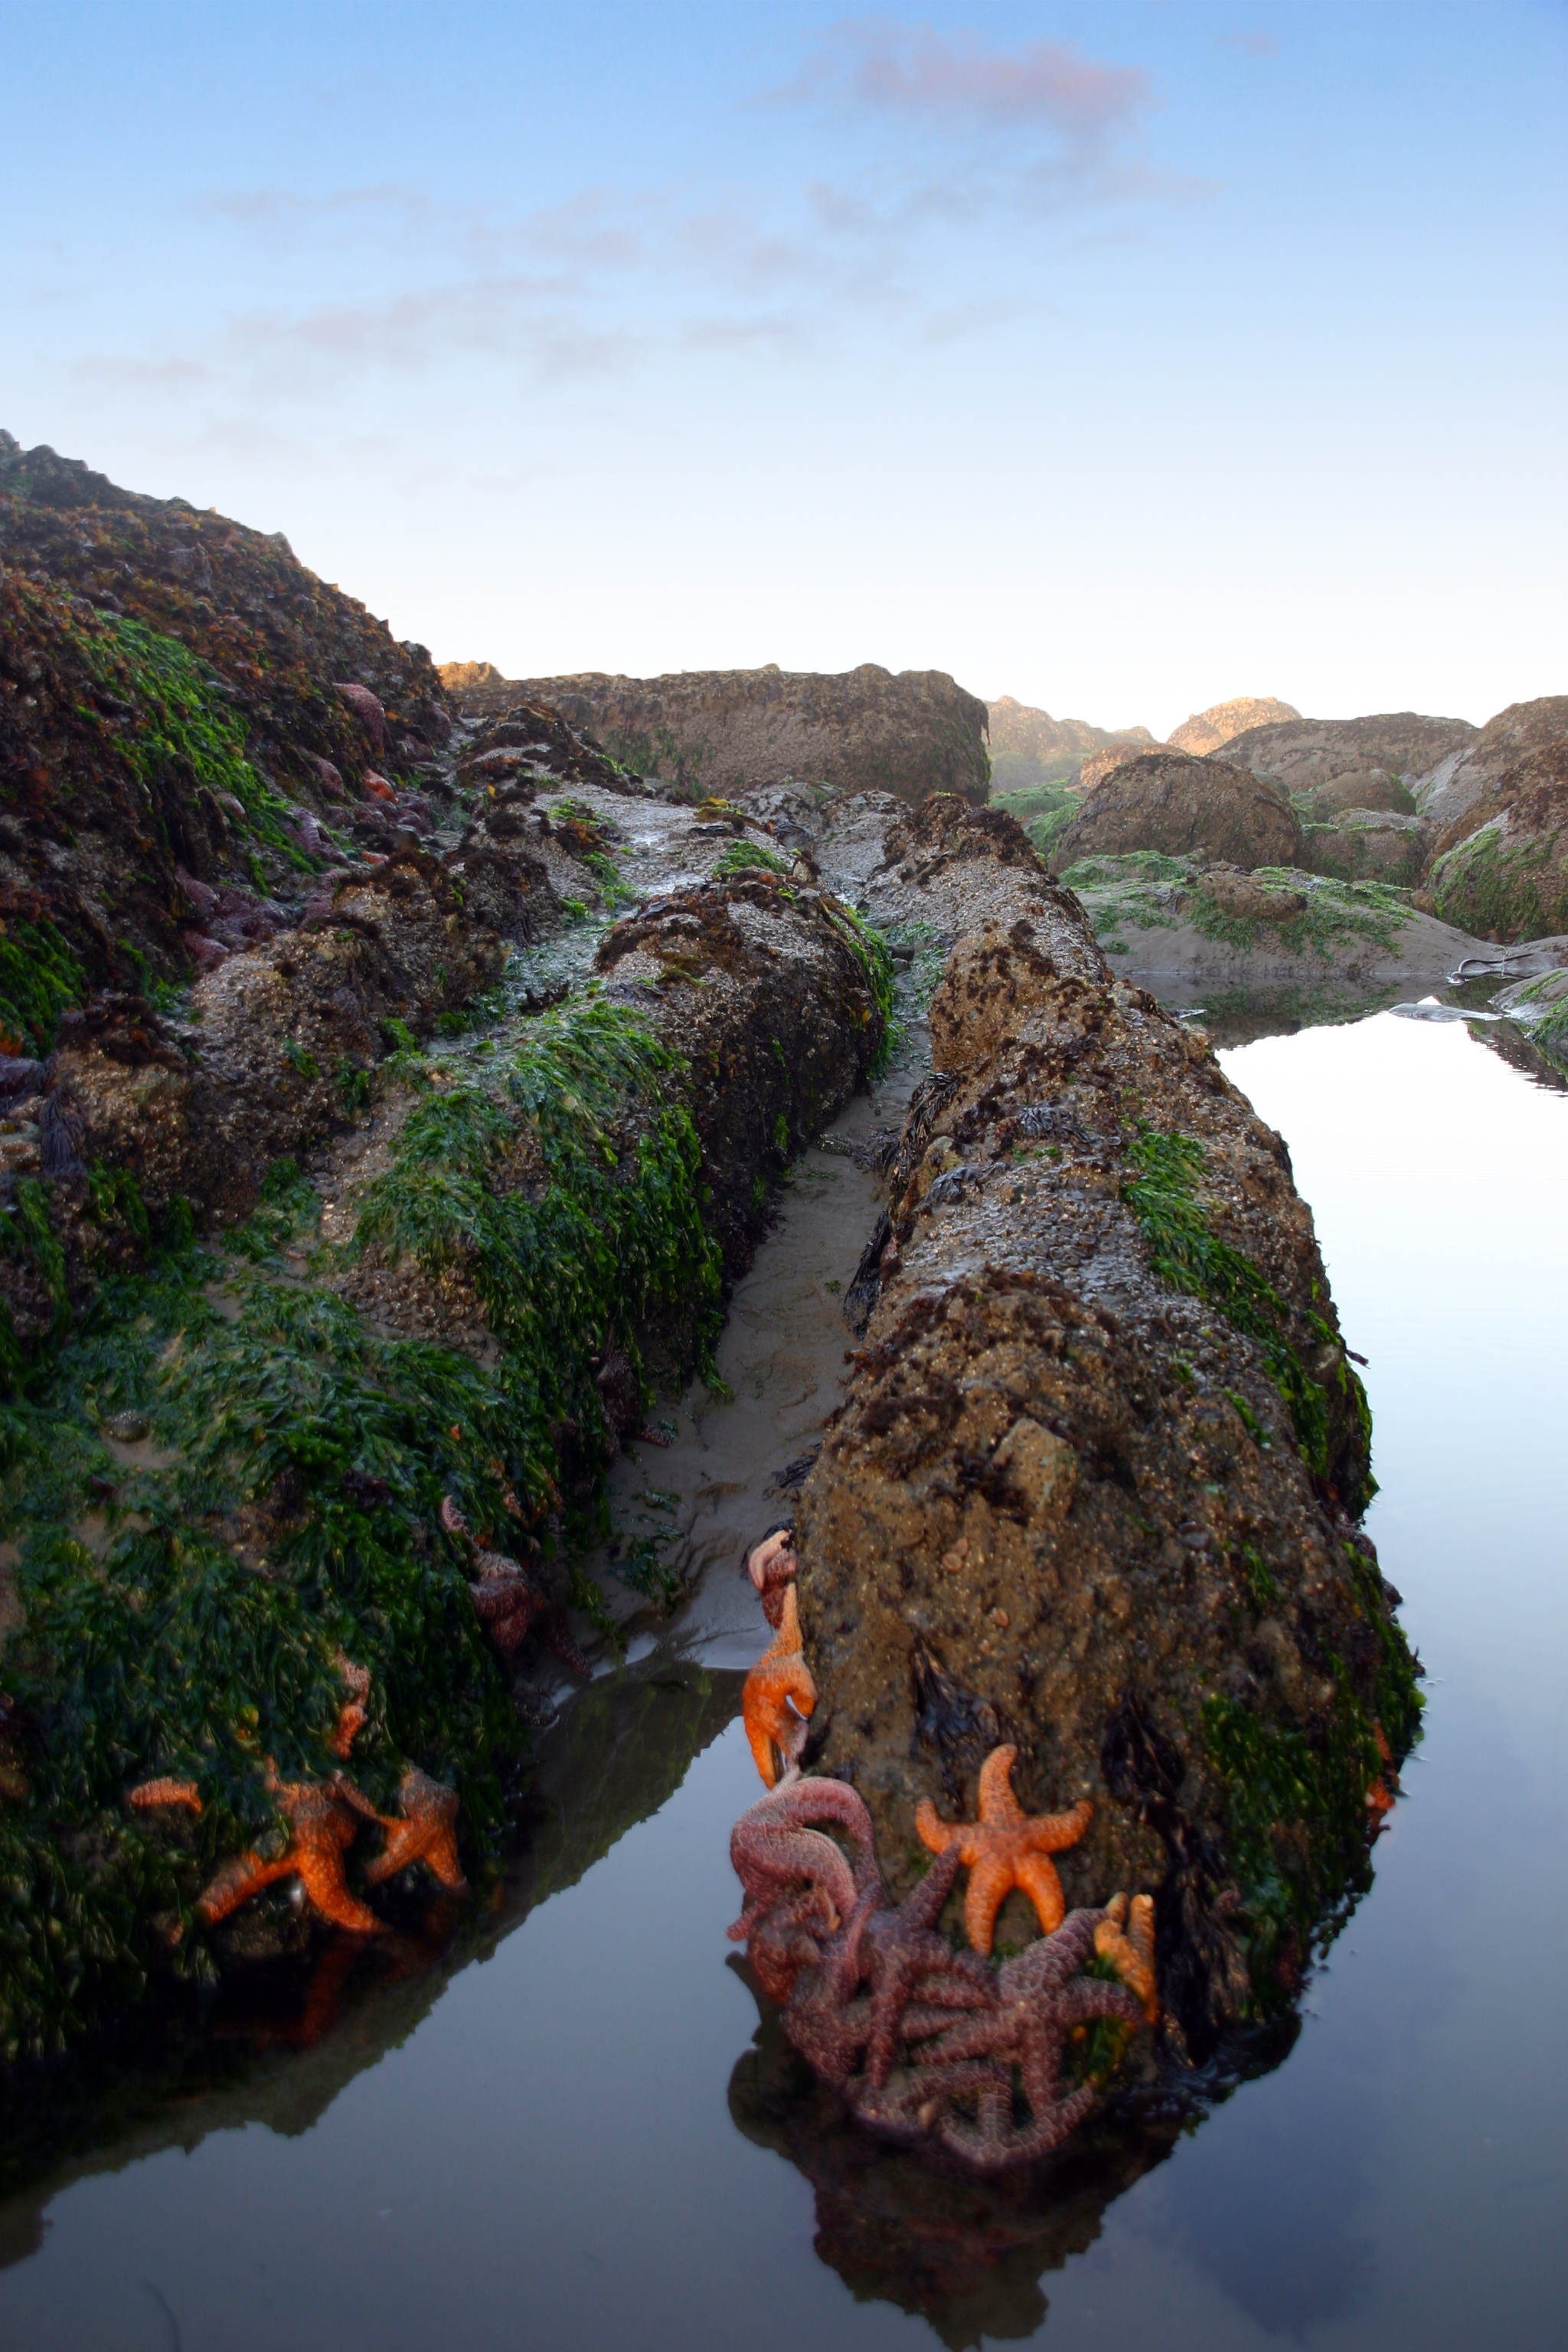
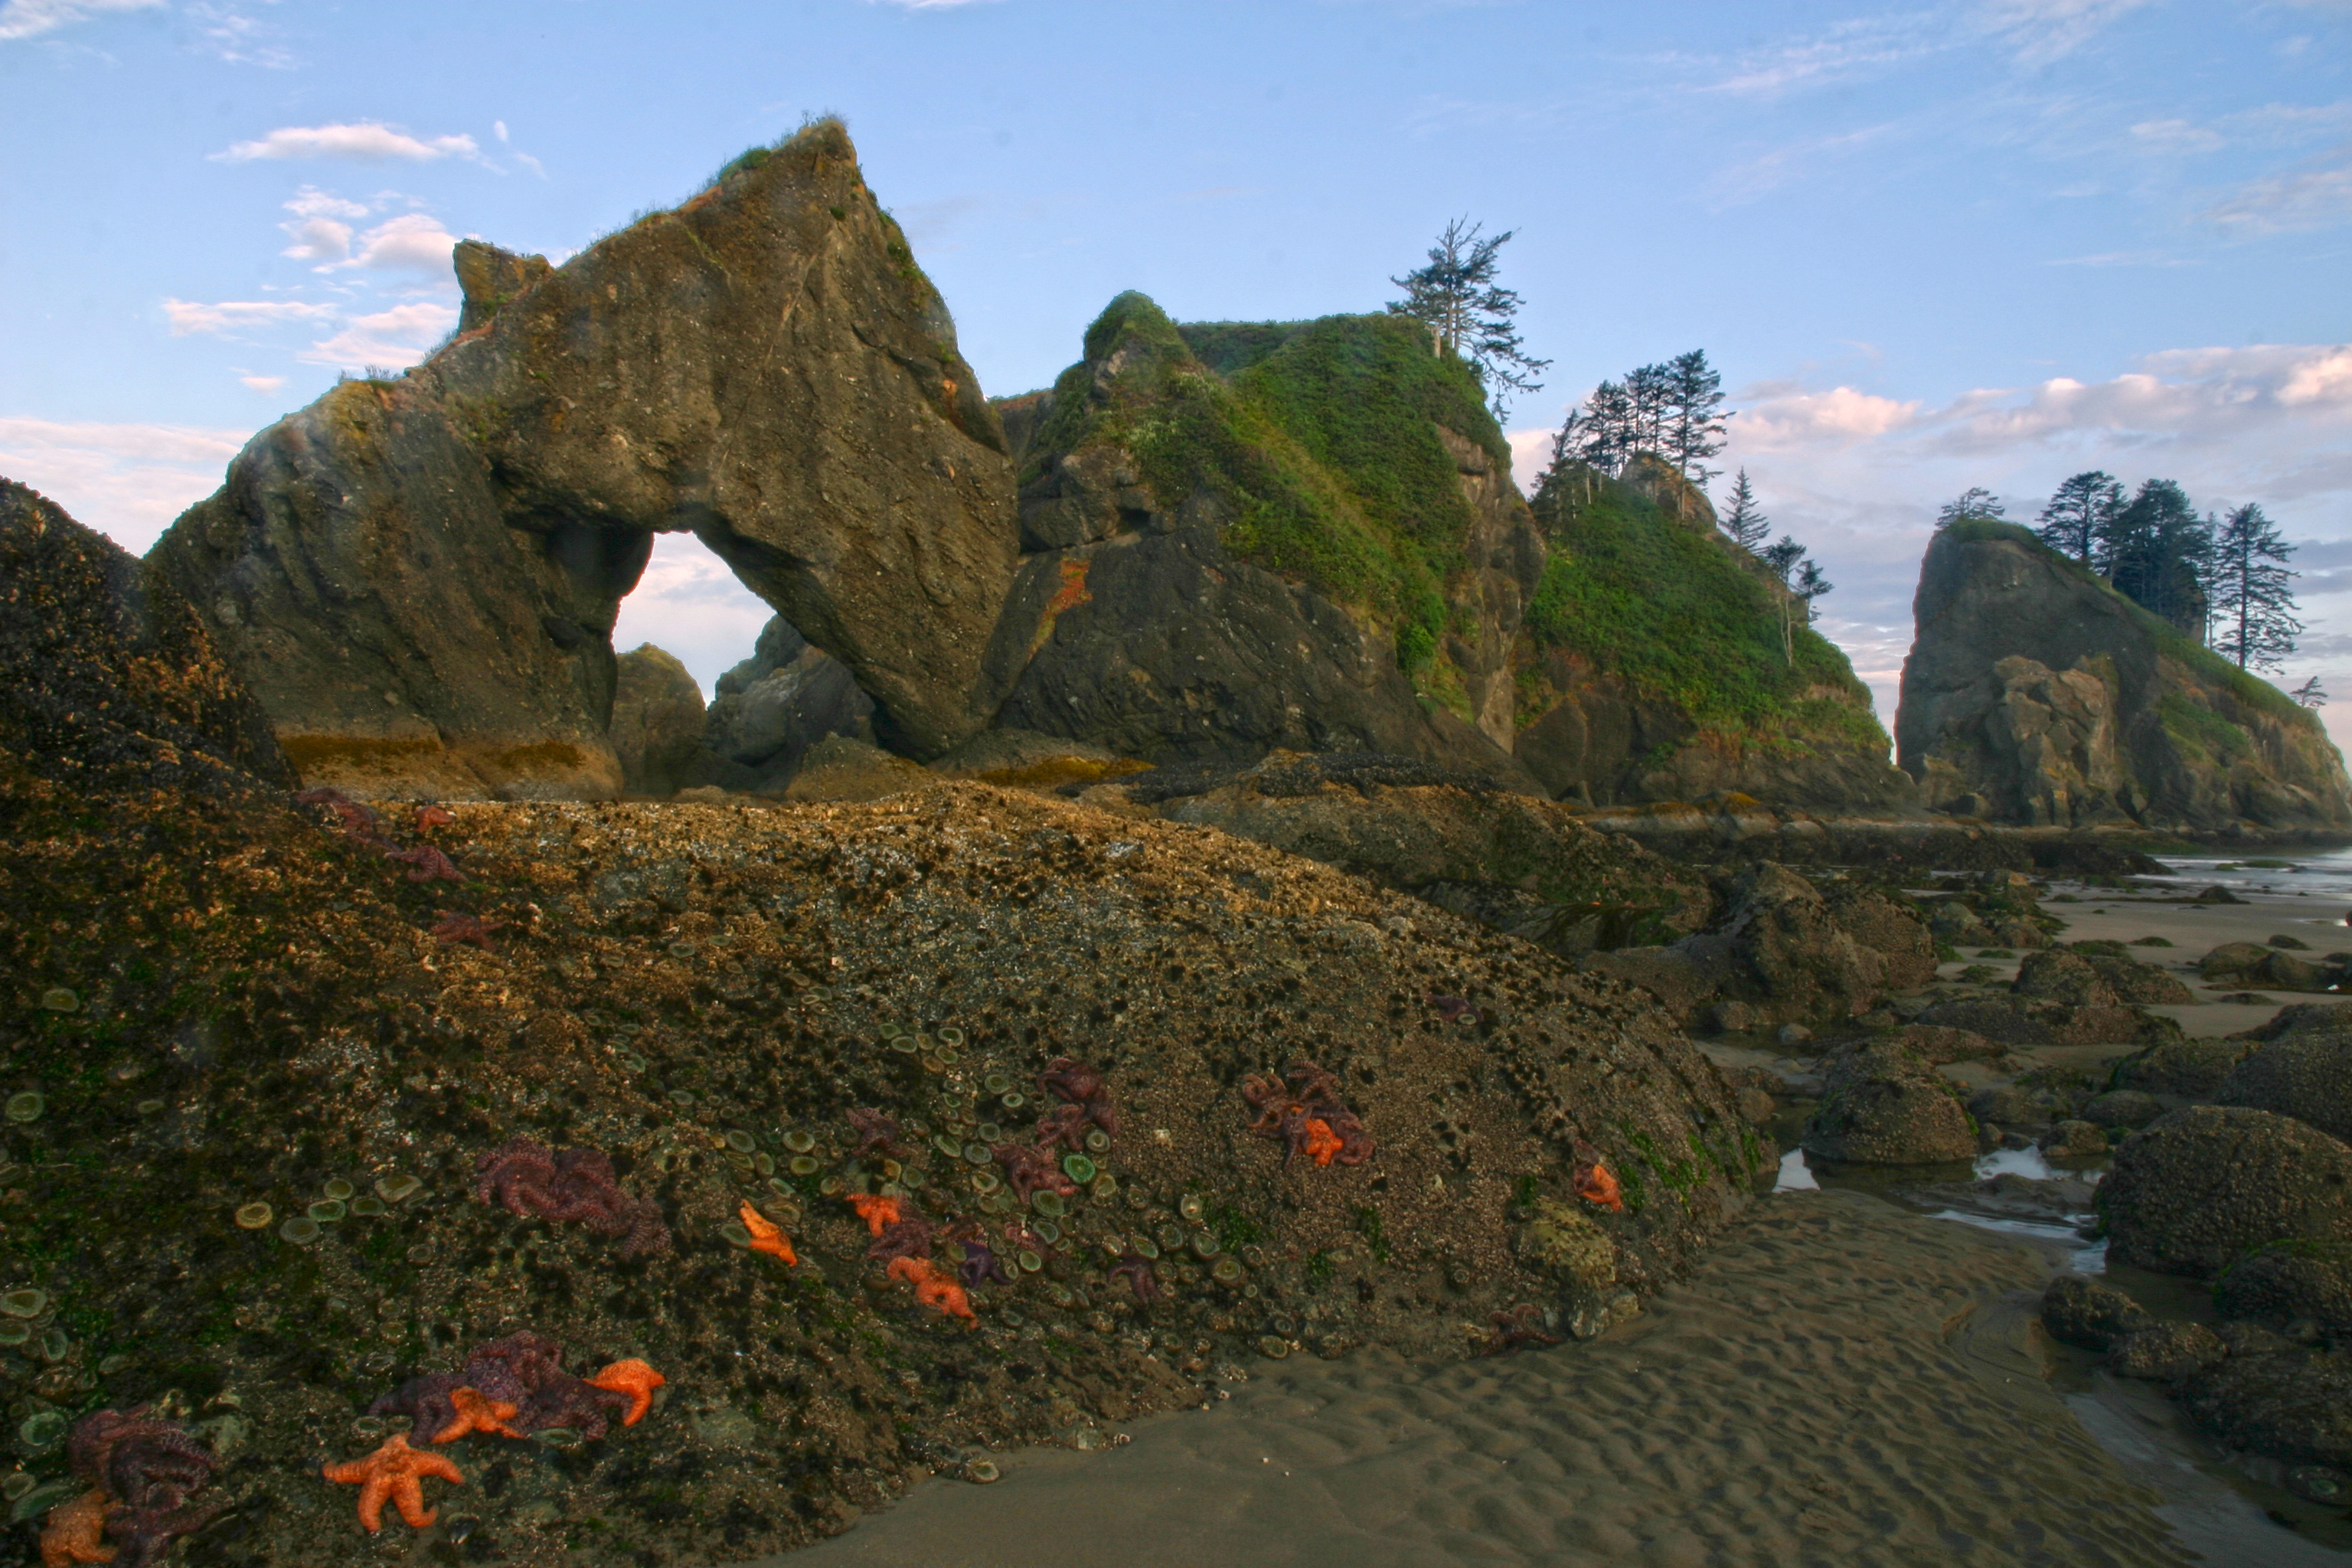 Arch and starfish.
 Boy on the beach.

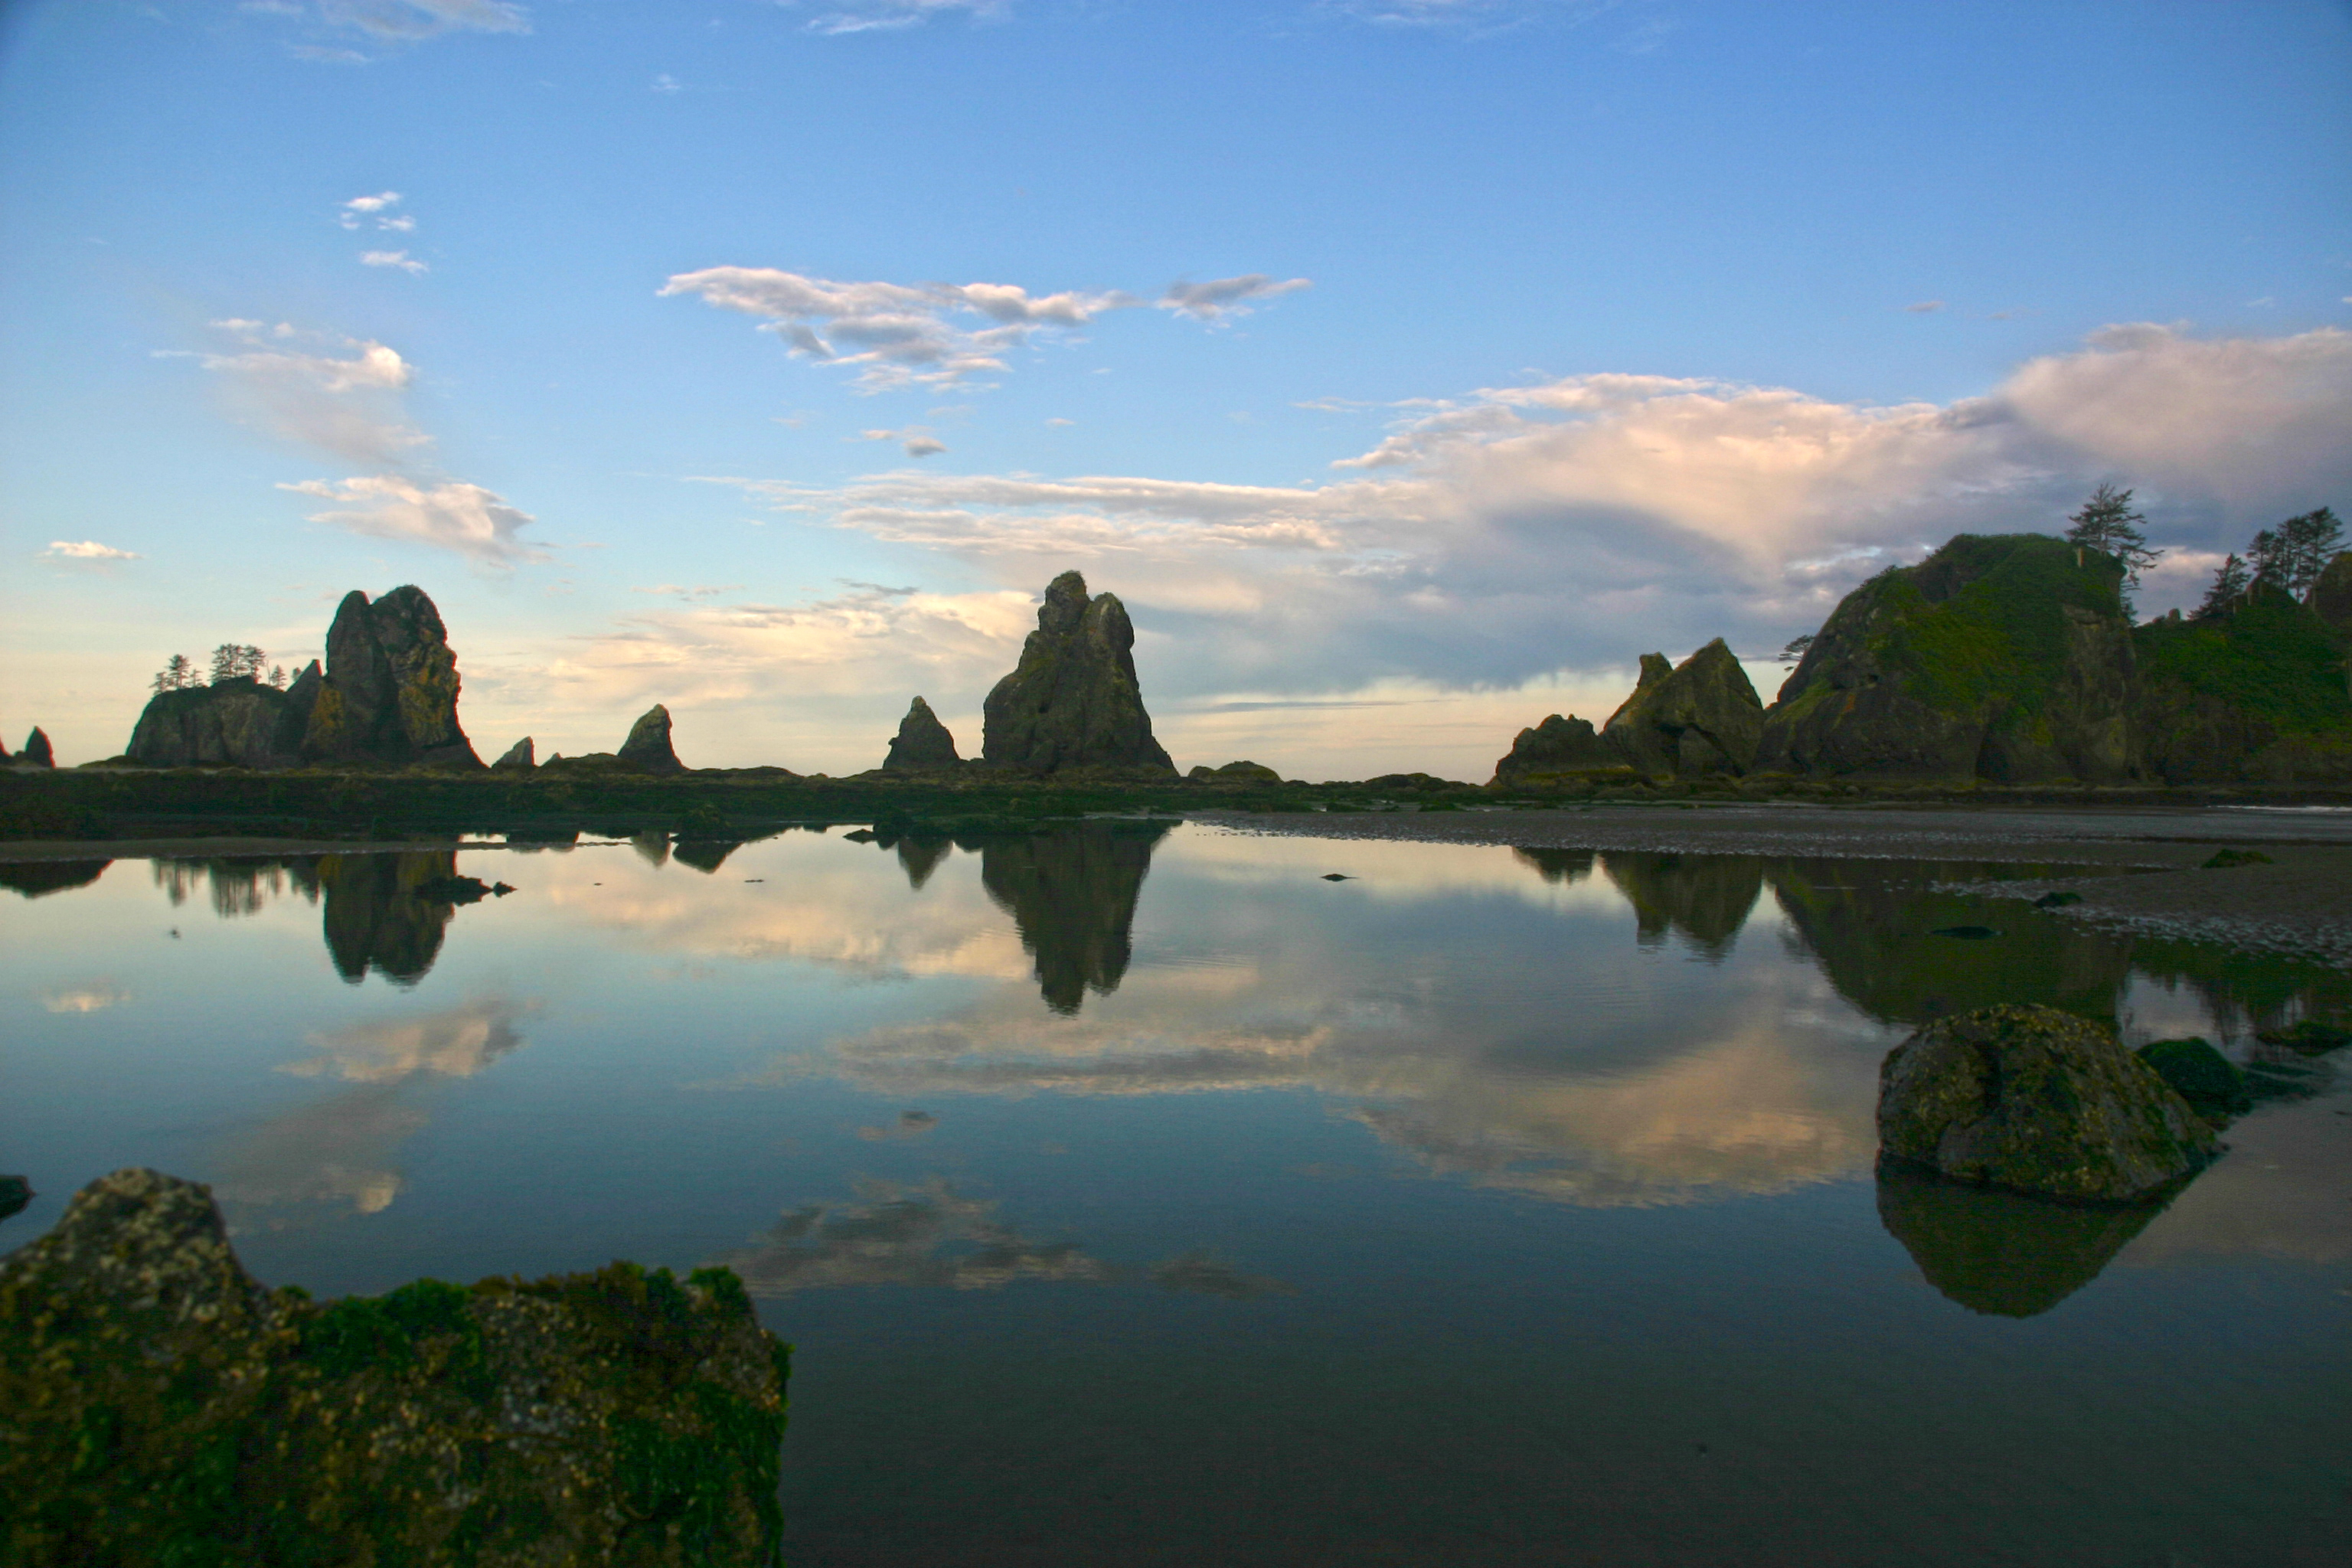 Reds and blues.
 Gulls in the morning light.
 Starfish.
 Sunset.
 Camp fires along Shi Shi Beach.
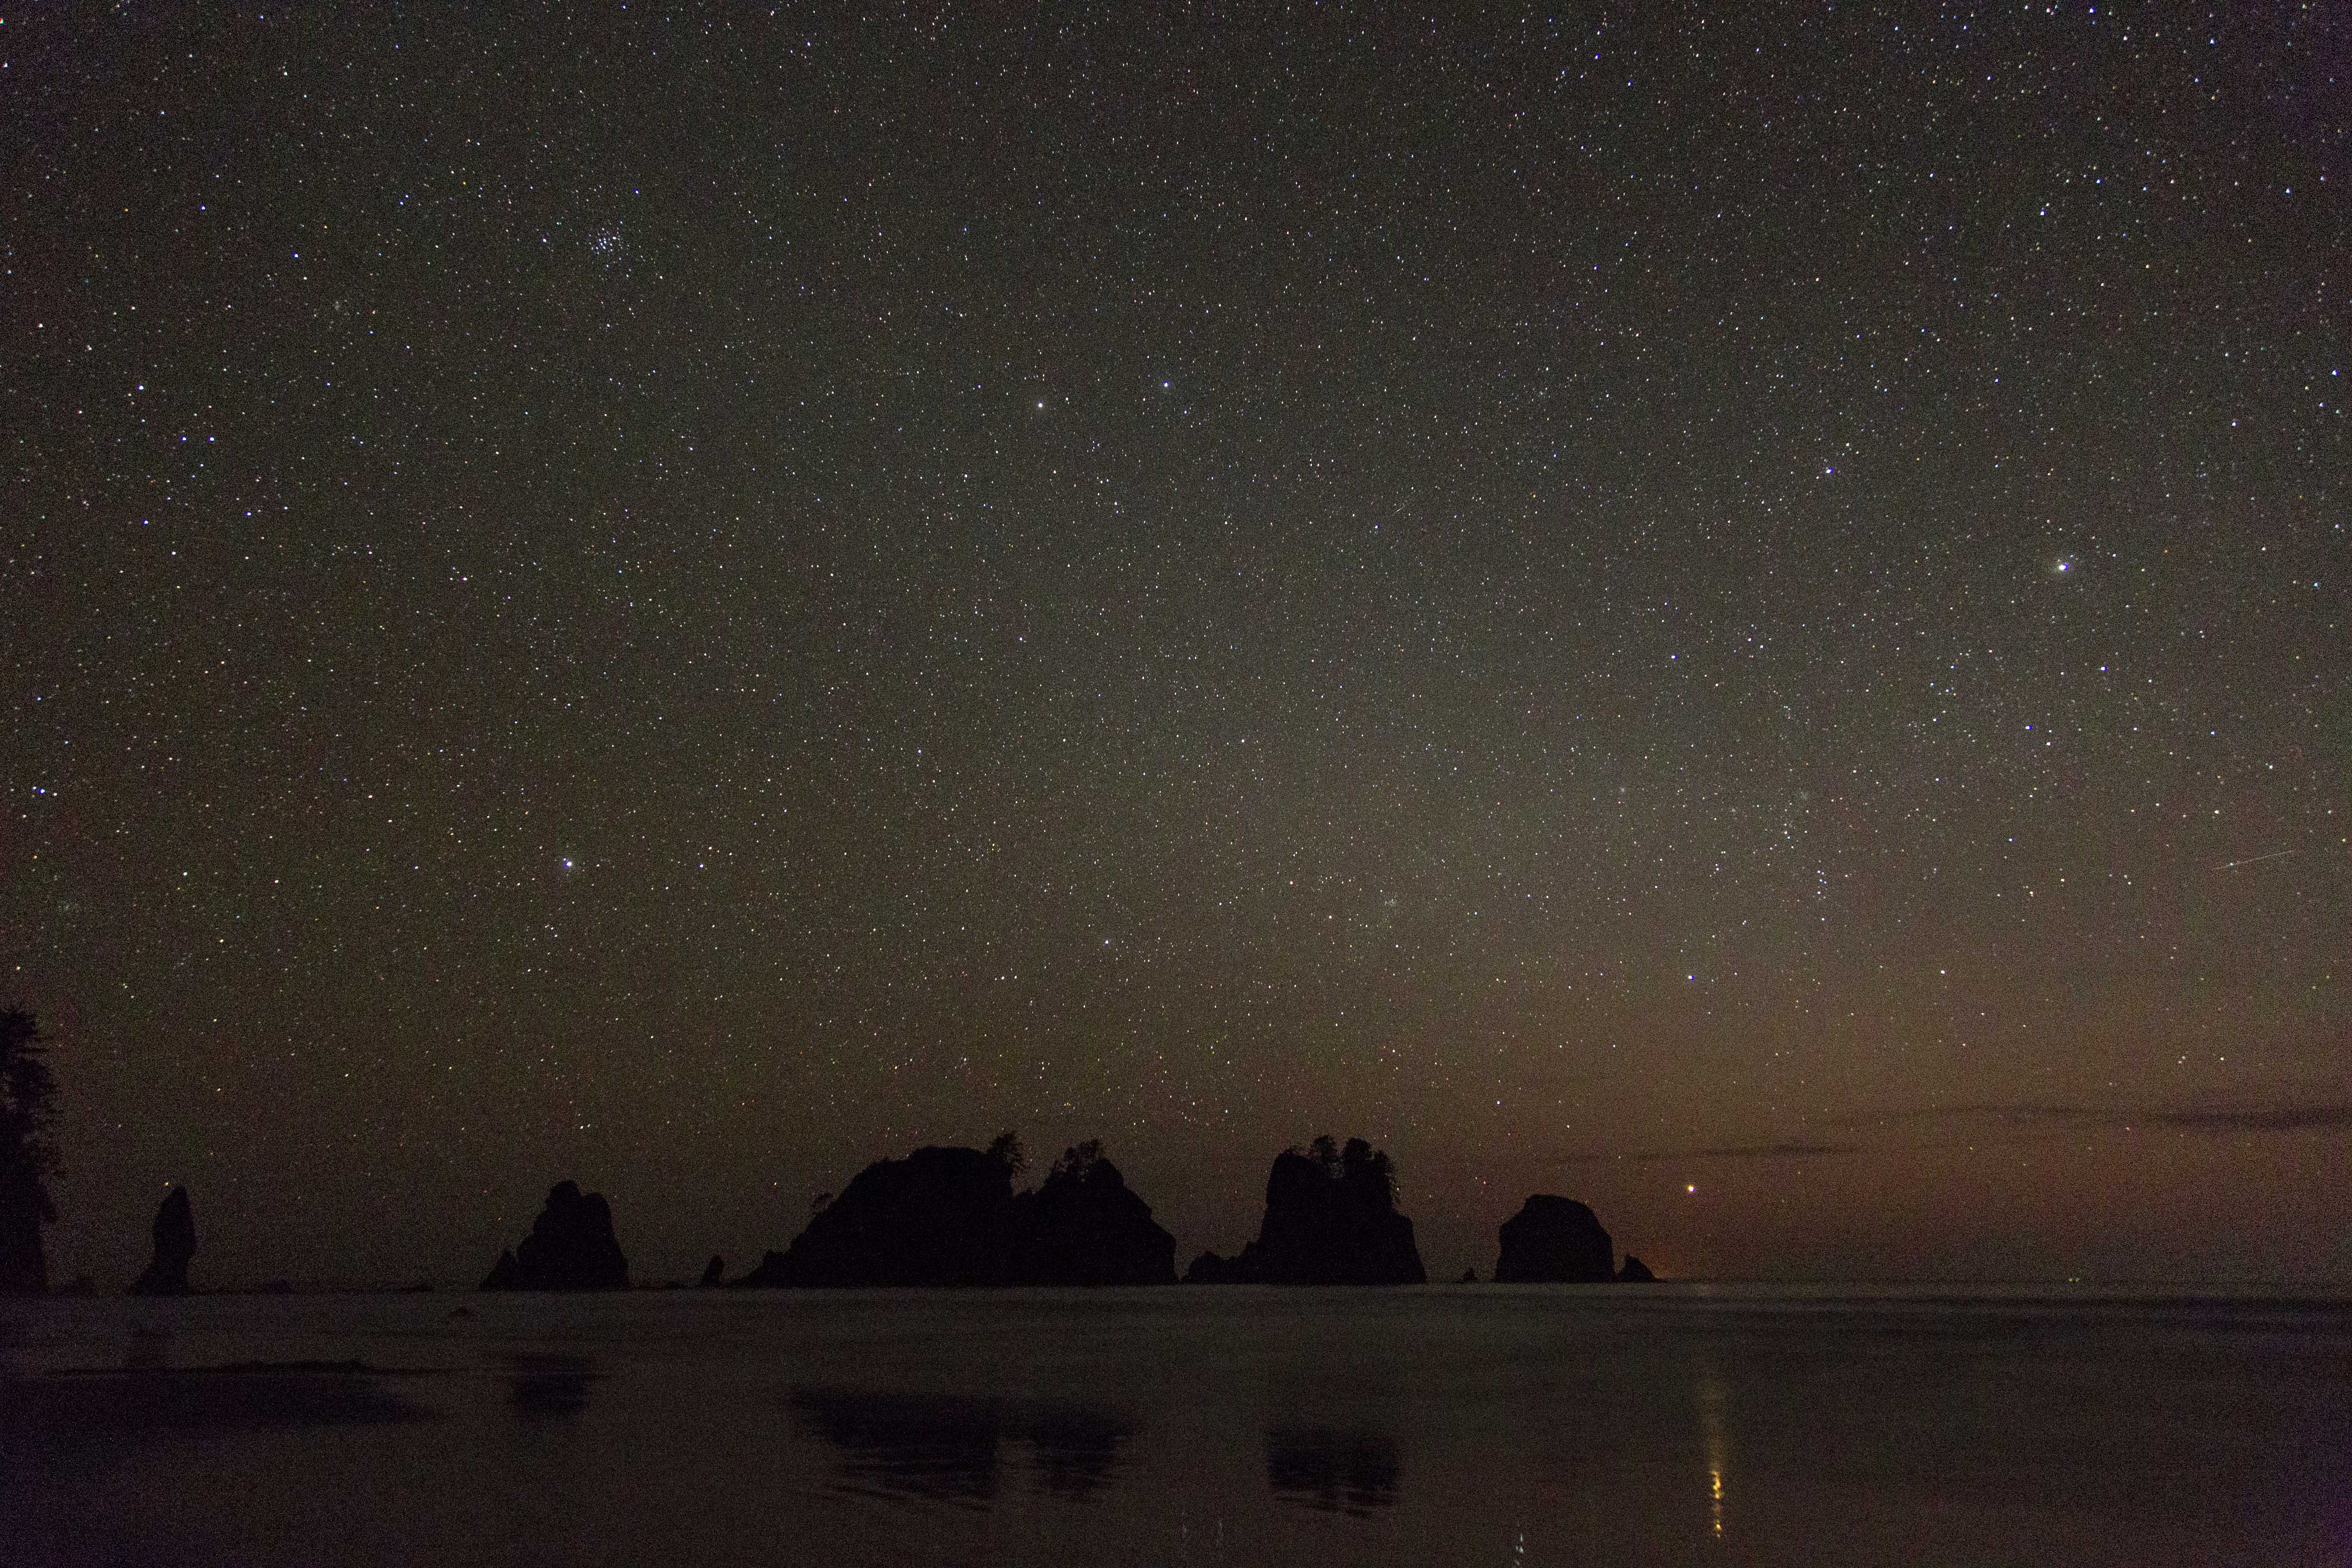 Arches under starlight.

 Sunrise, the morning after.
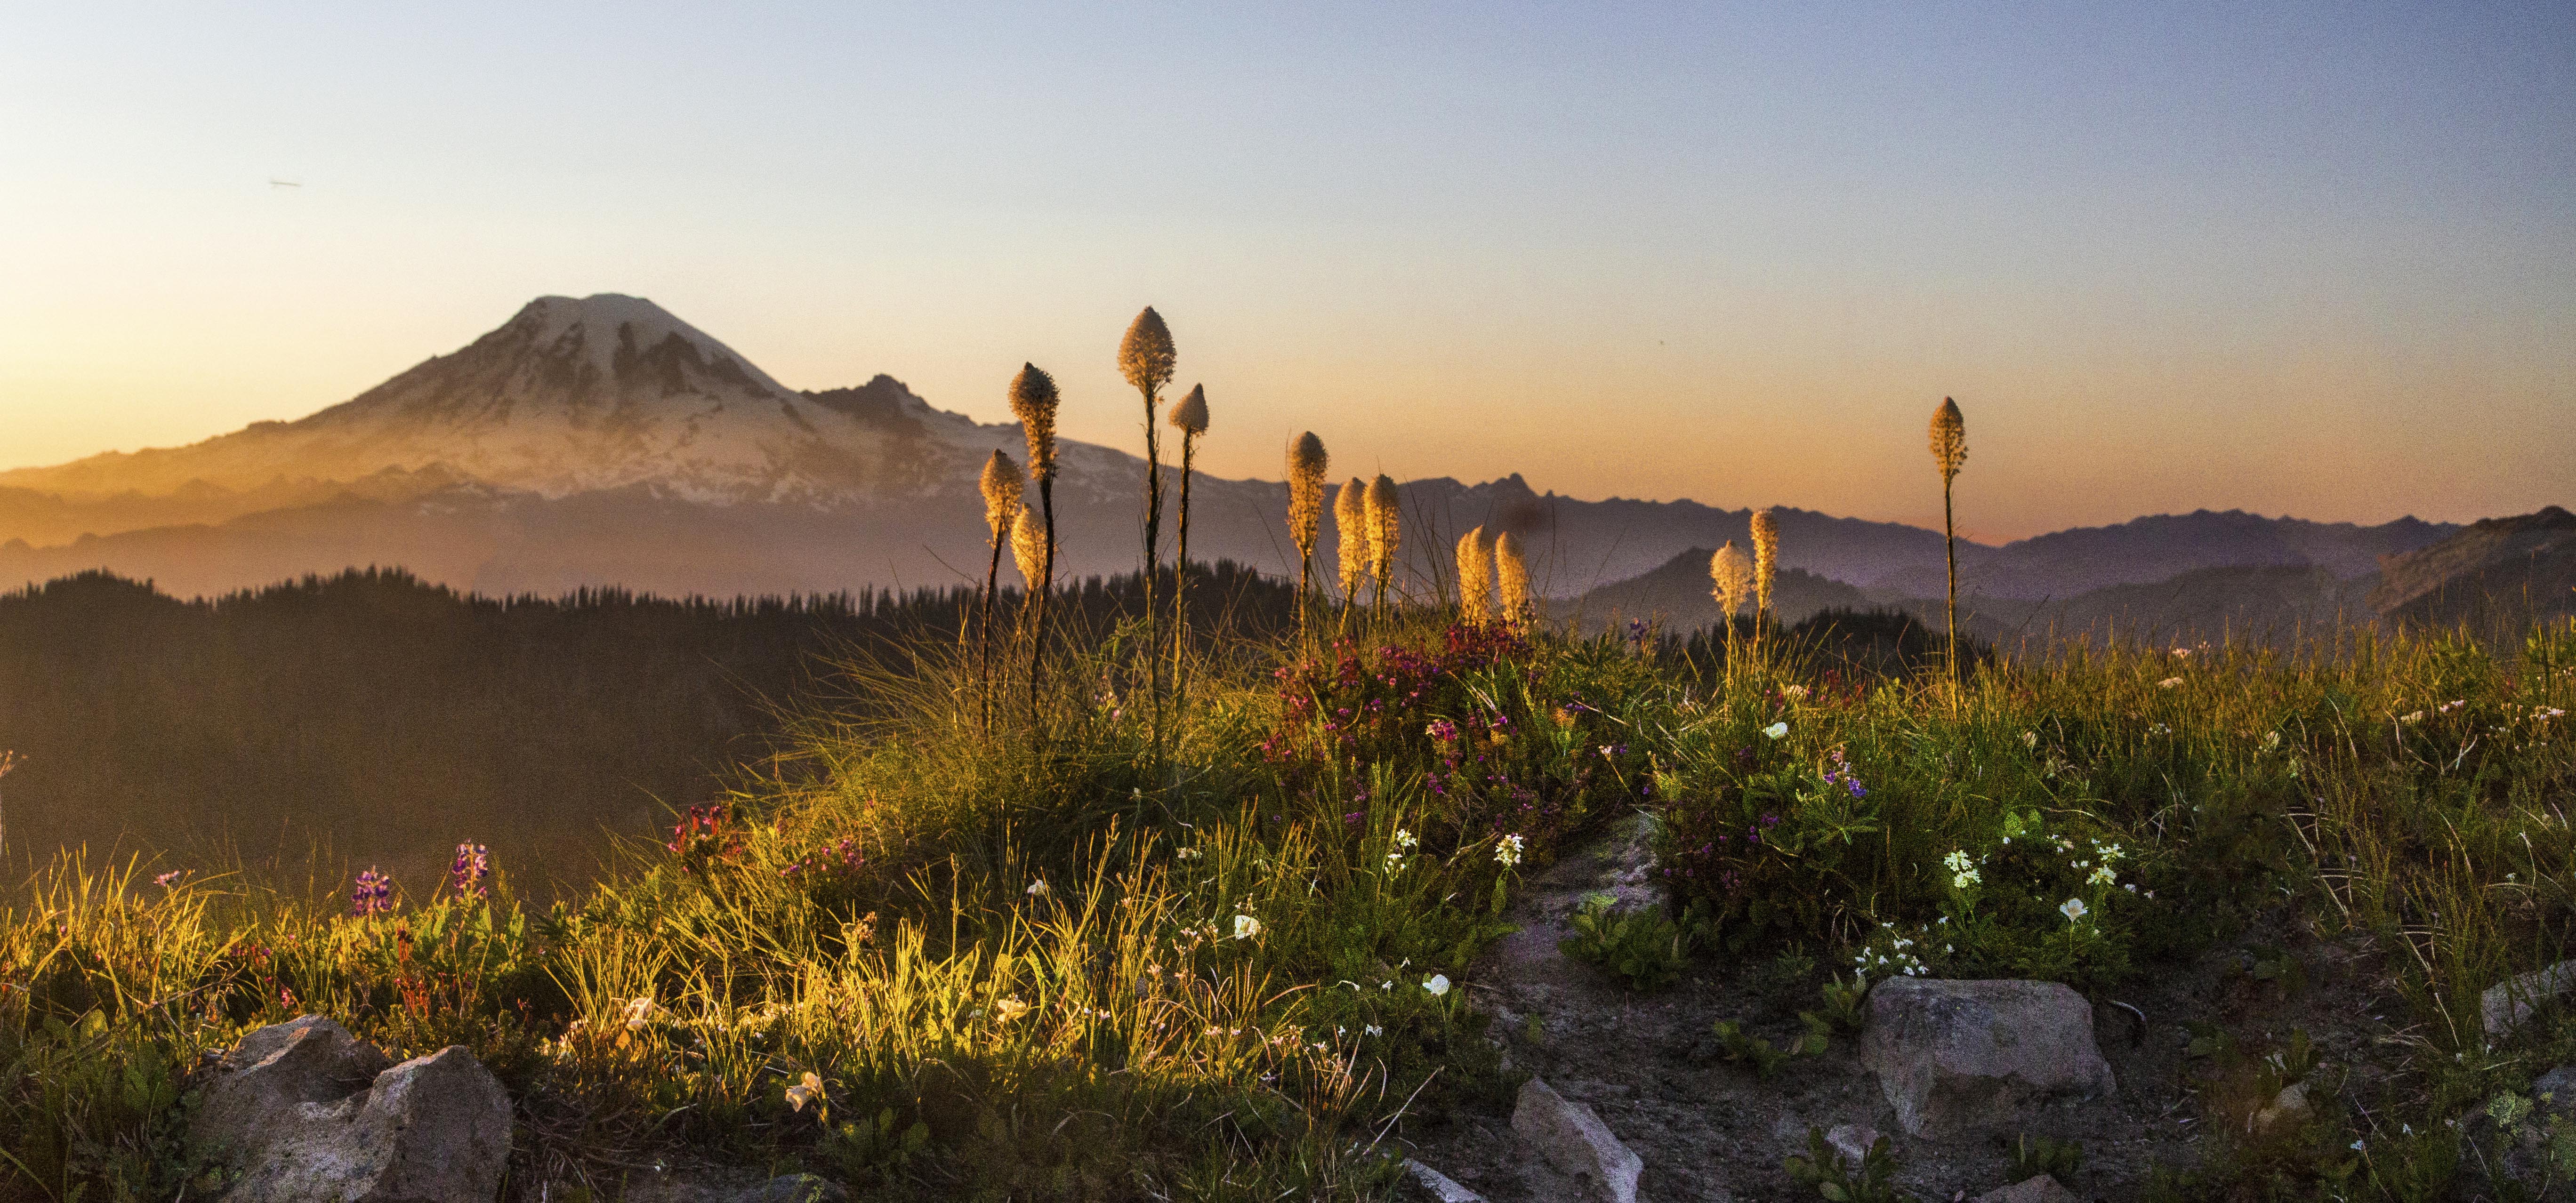
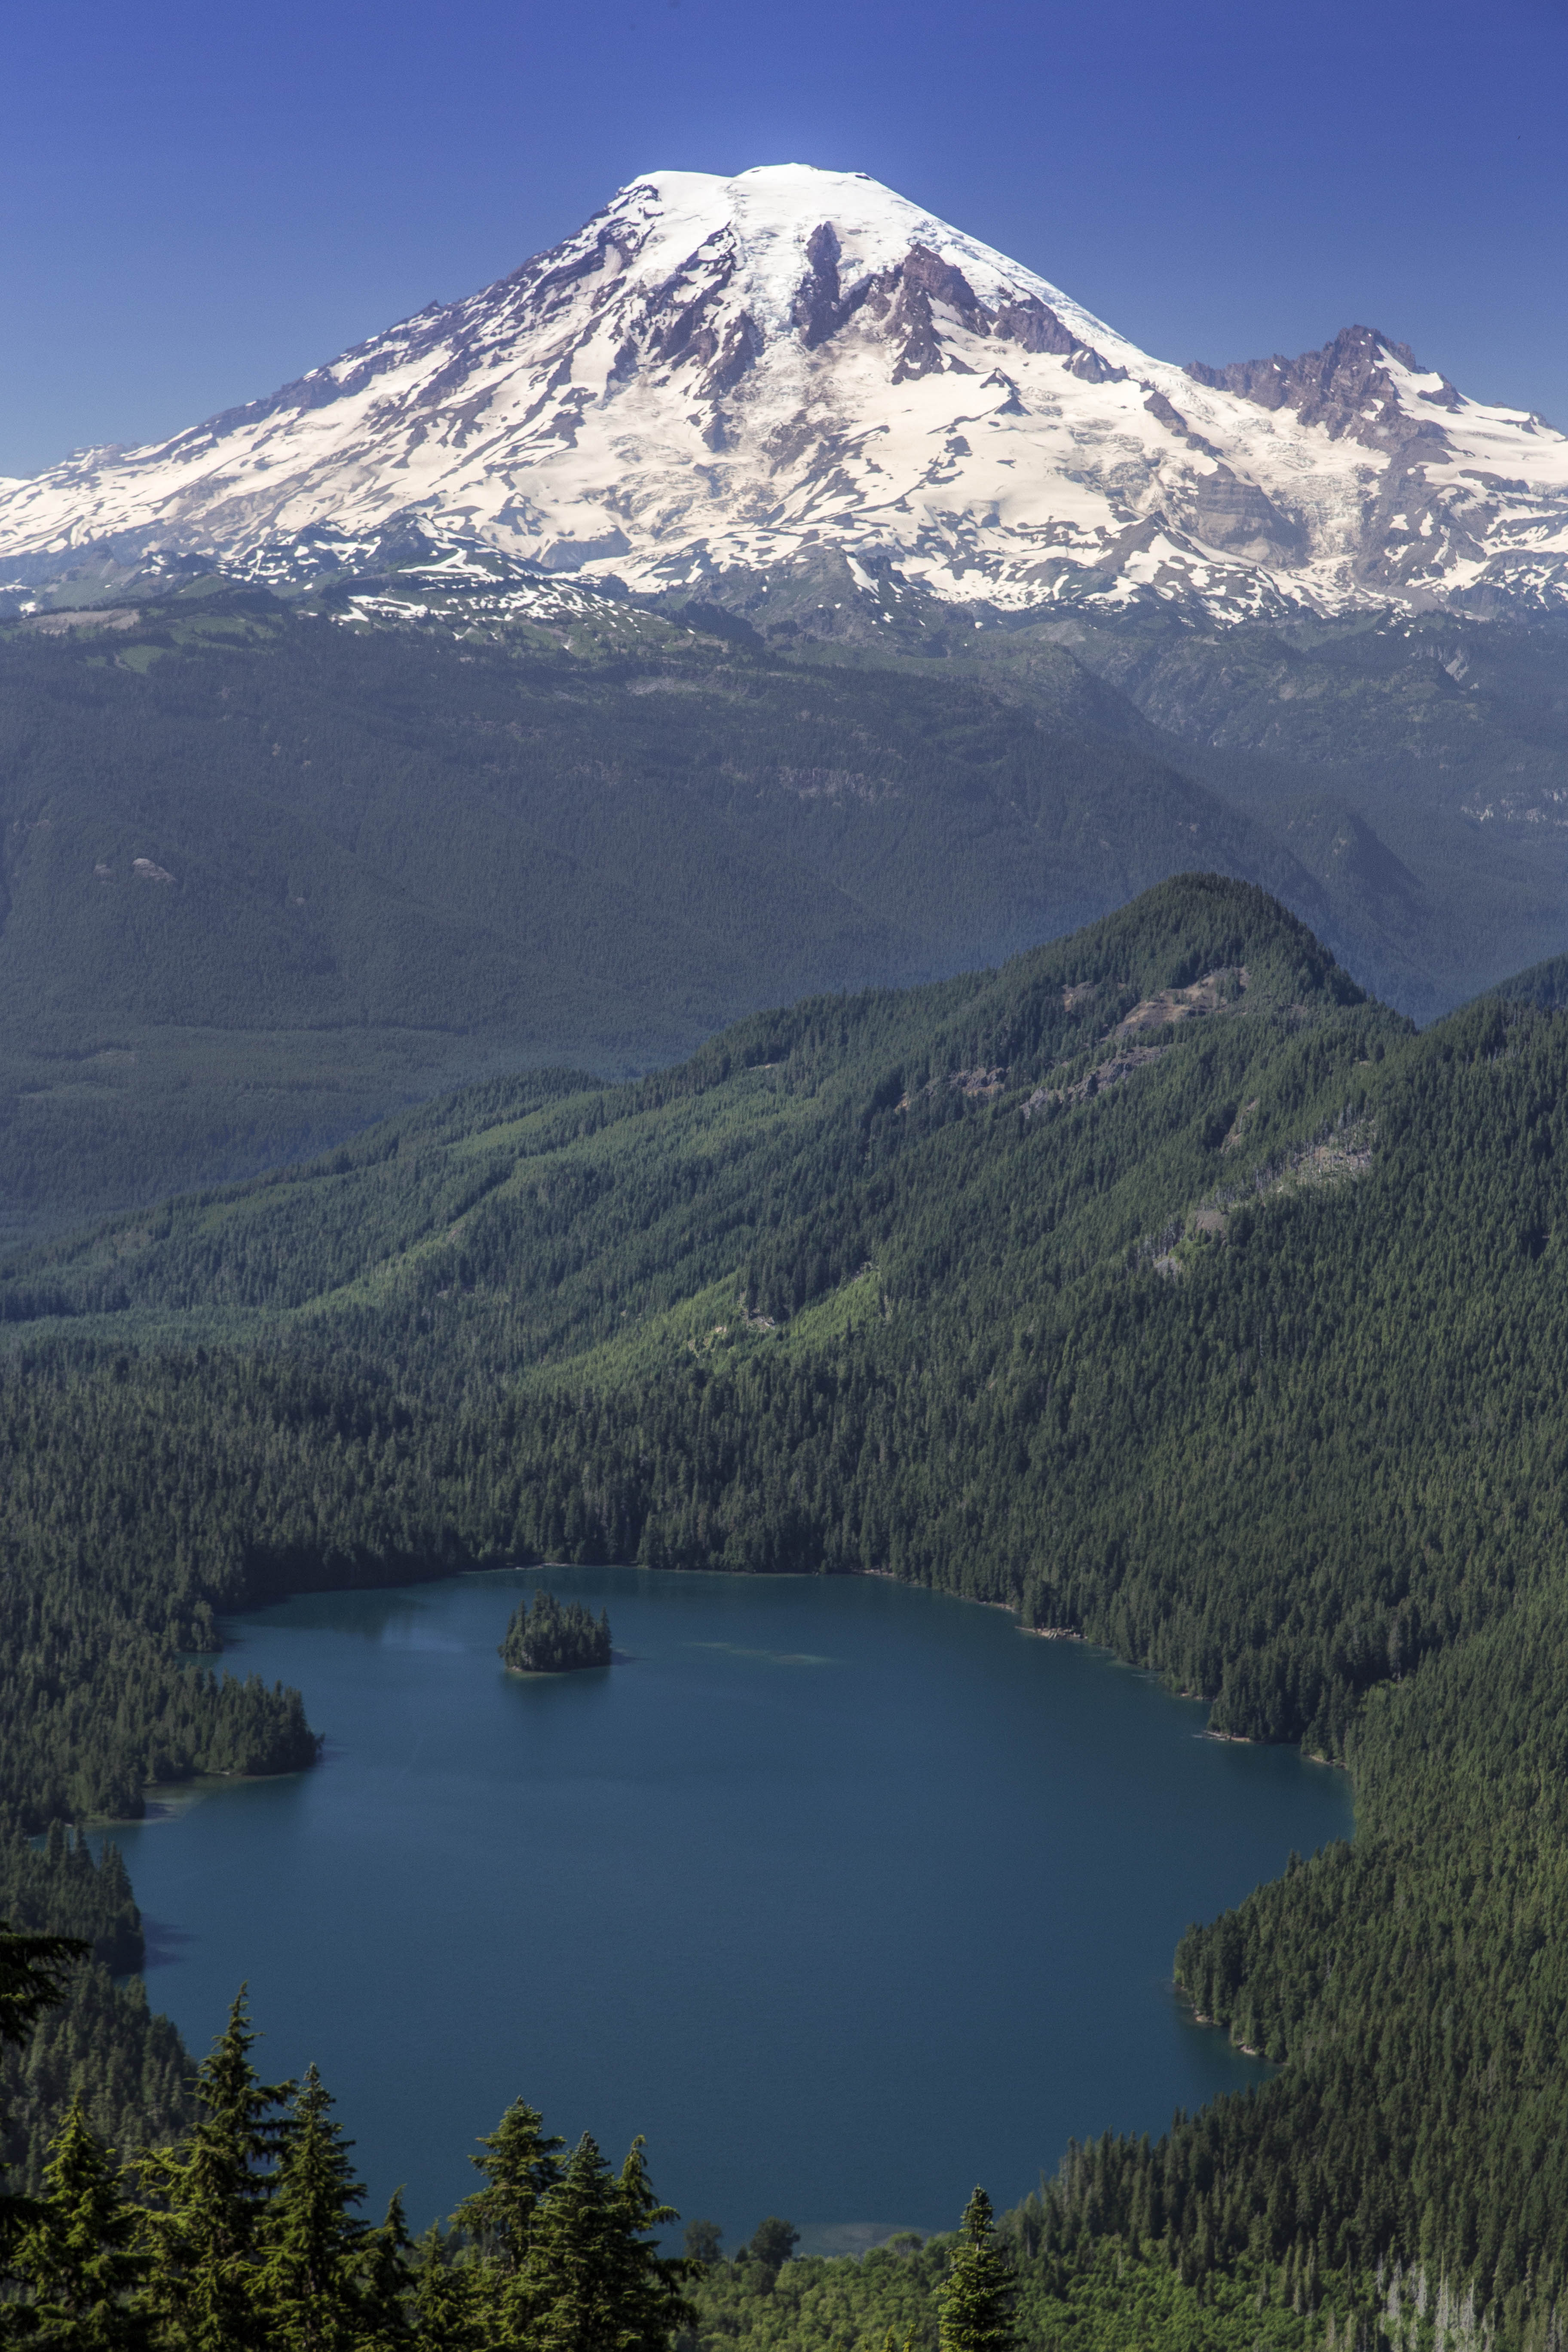
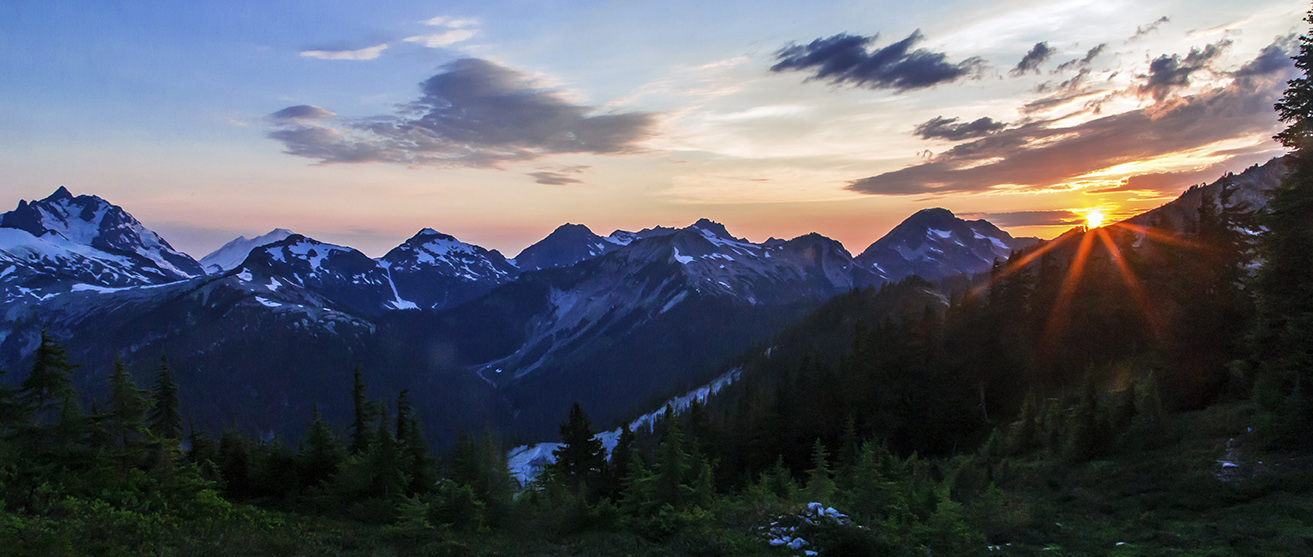
Mount Rainier: Images from Goat Rocks Wilderness
These three images of Mount Rainier were captured while hiking along the Lily Basin Trail in the Goat Rocks Wilderness. The lake with the small island is called Packwood Lake.