


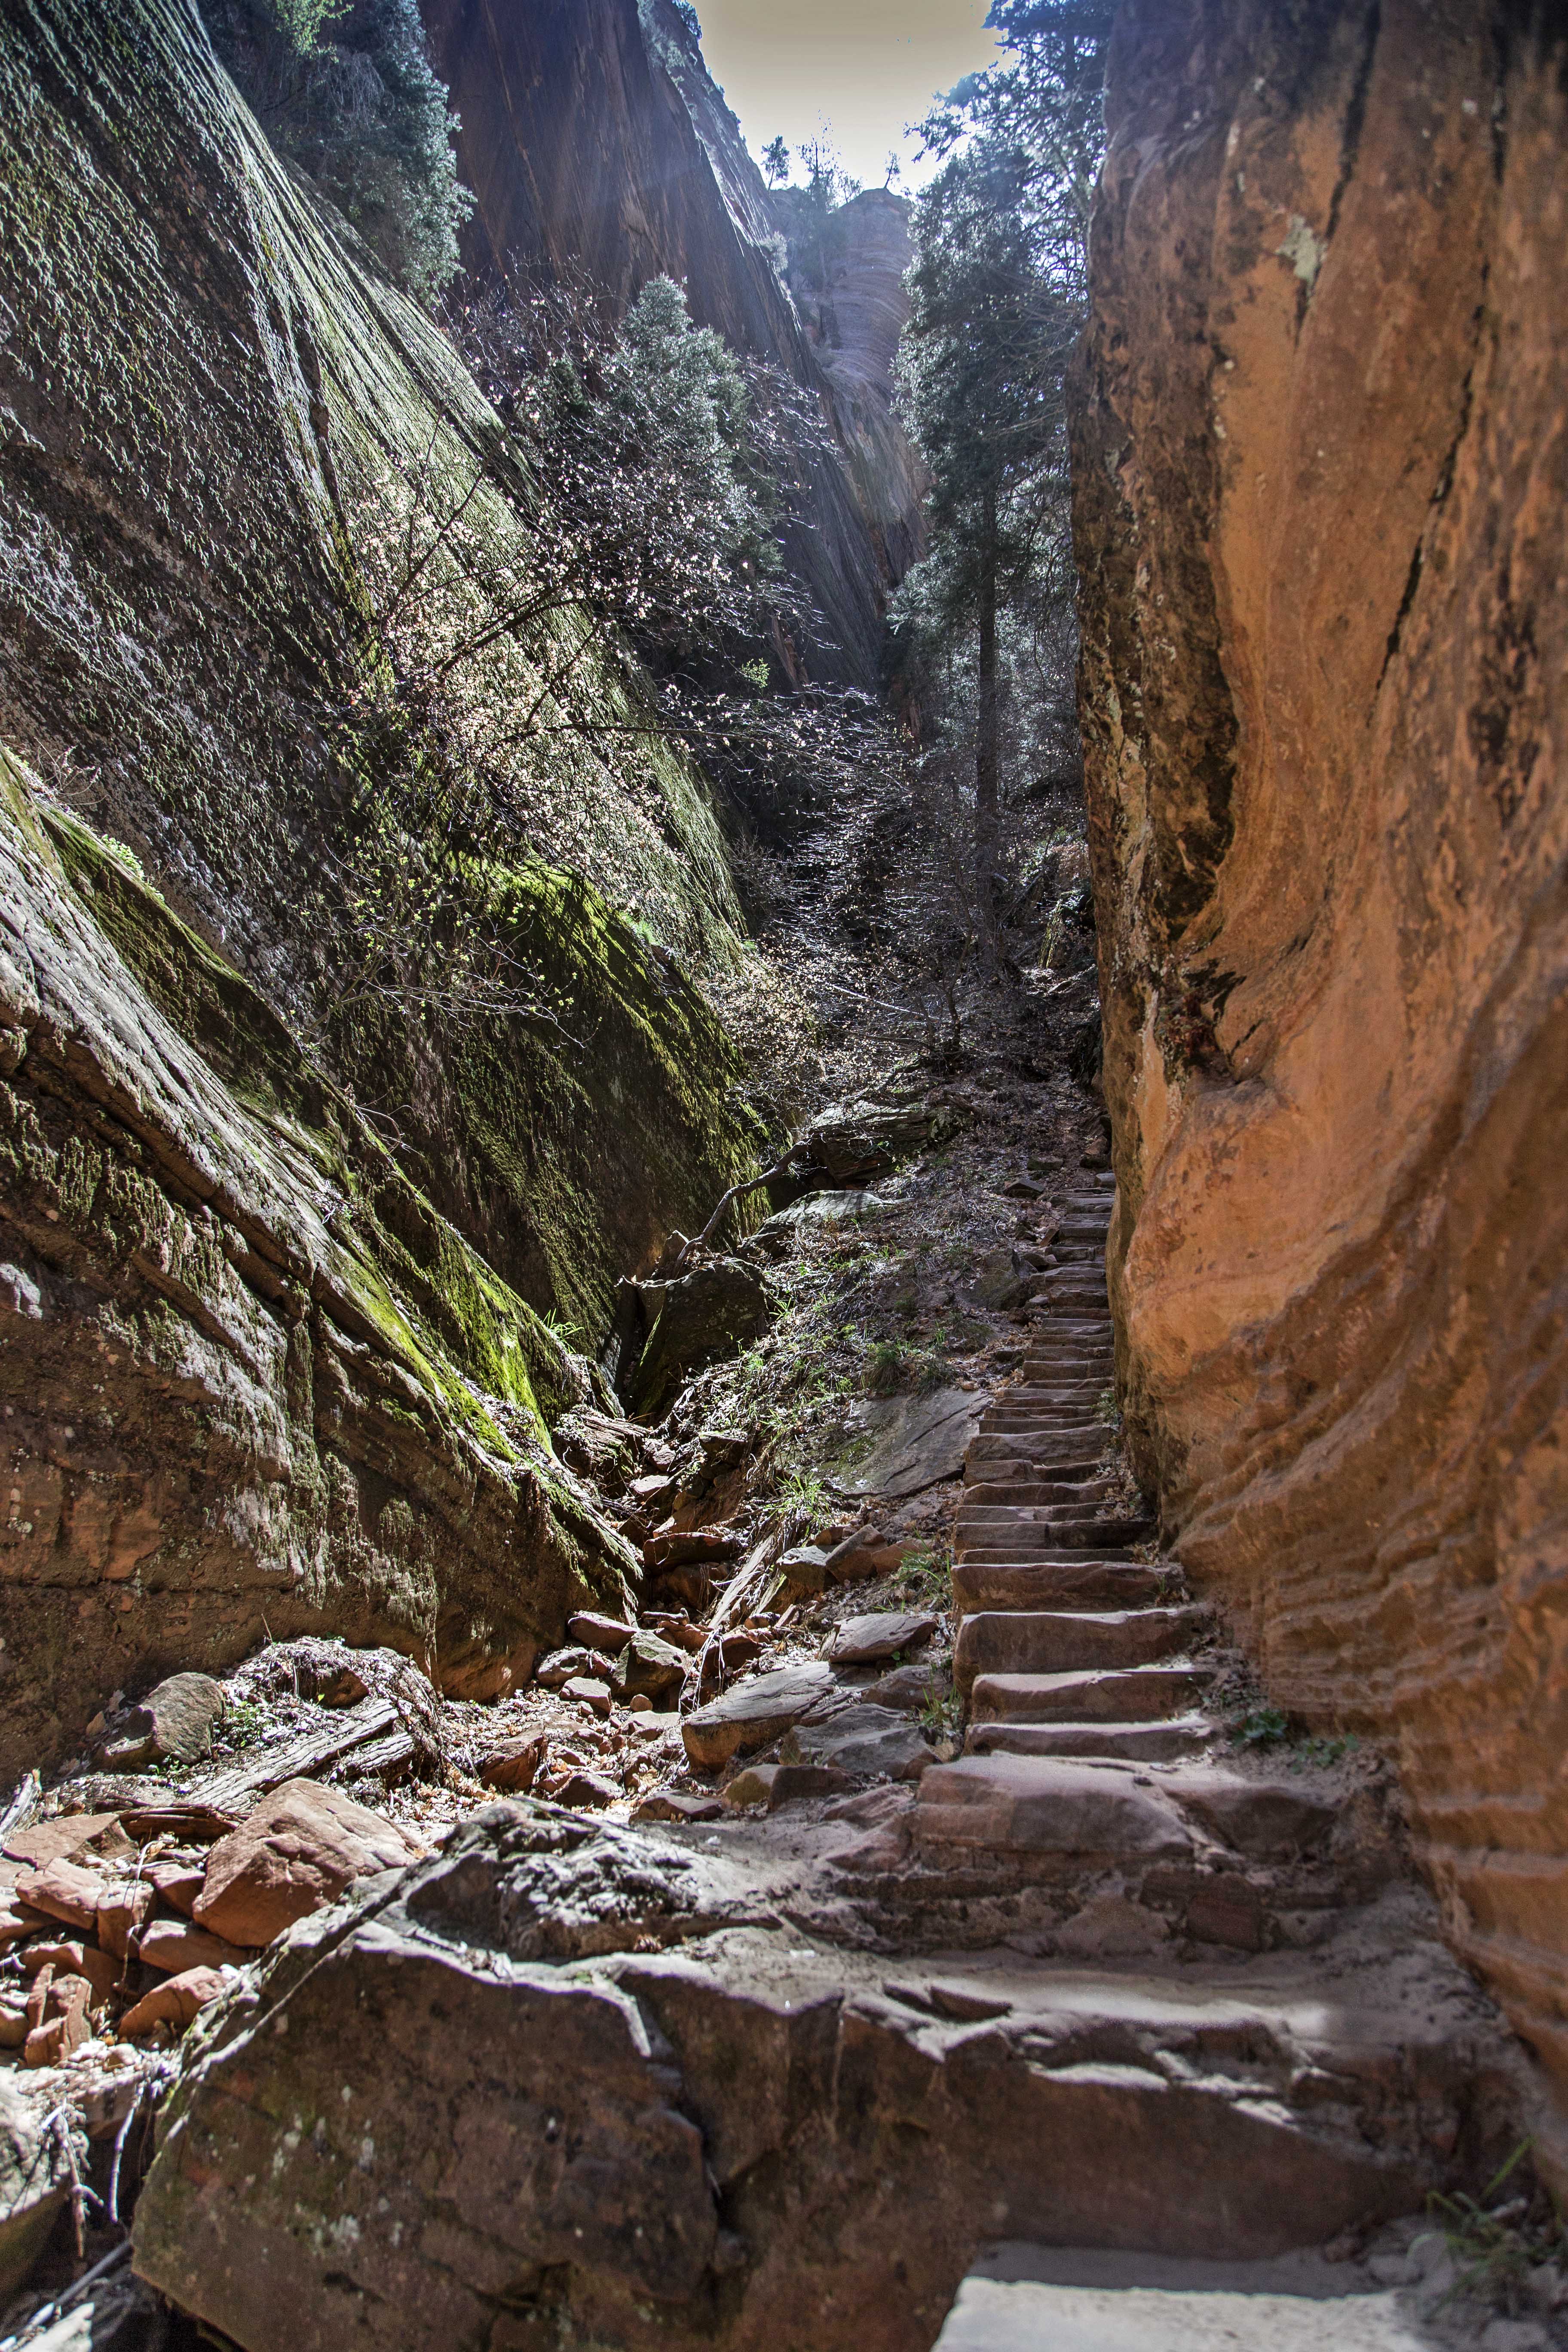
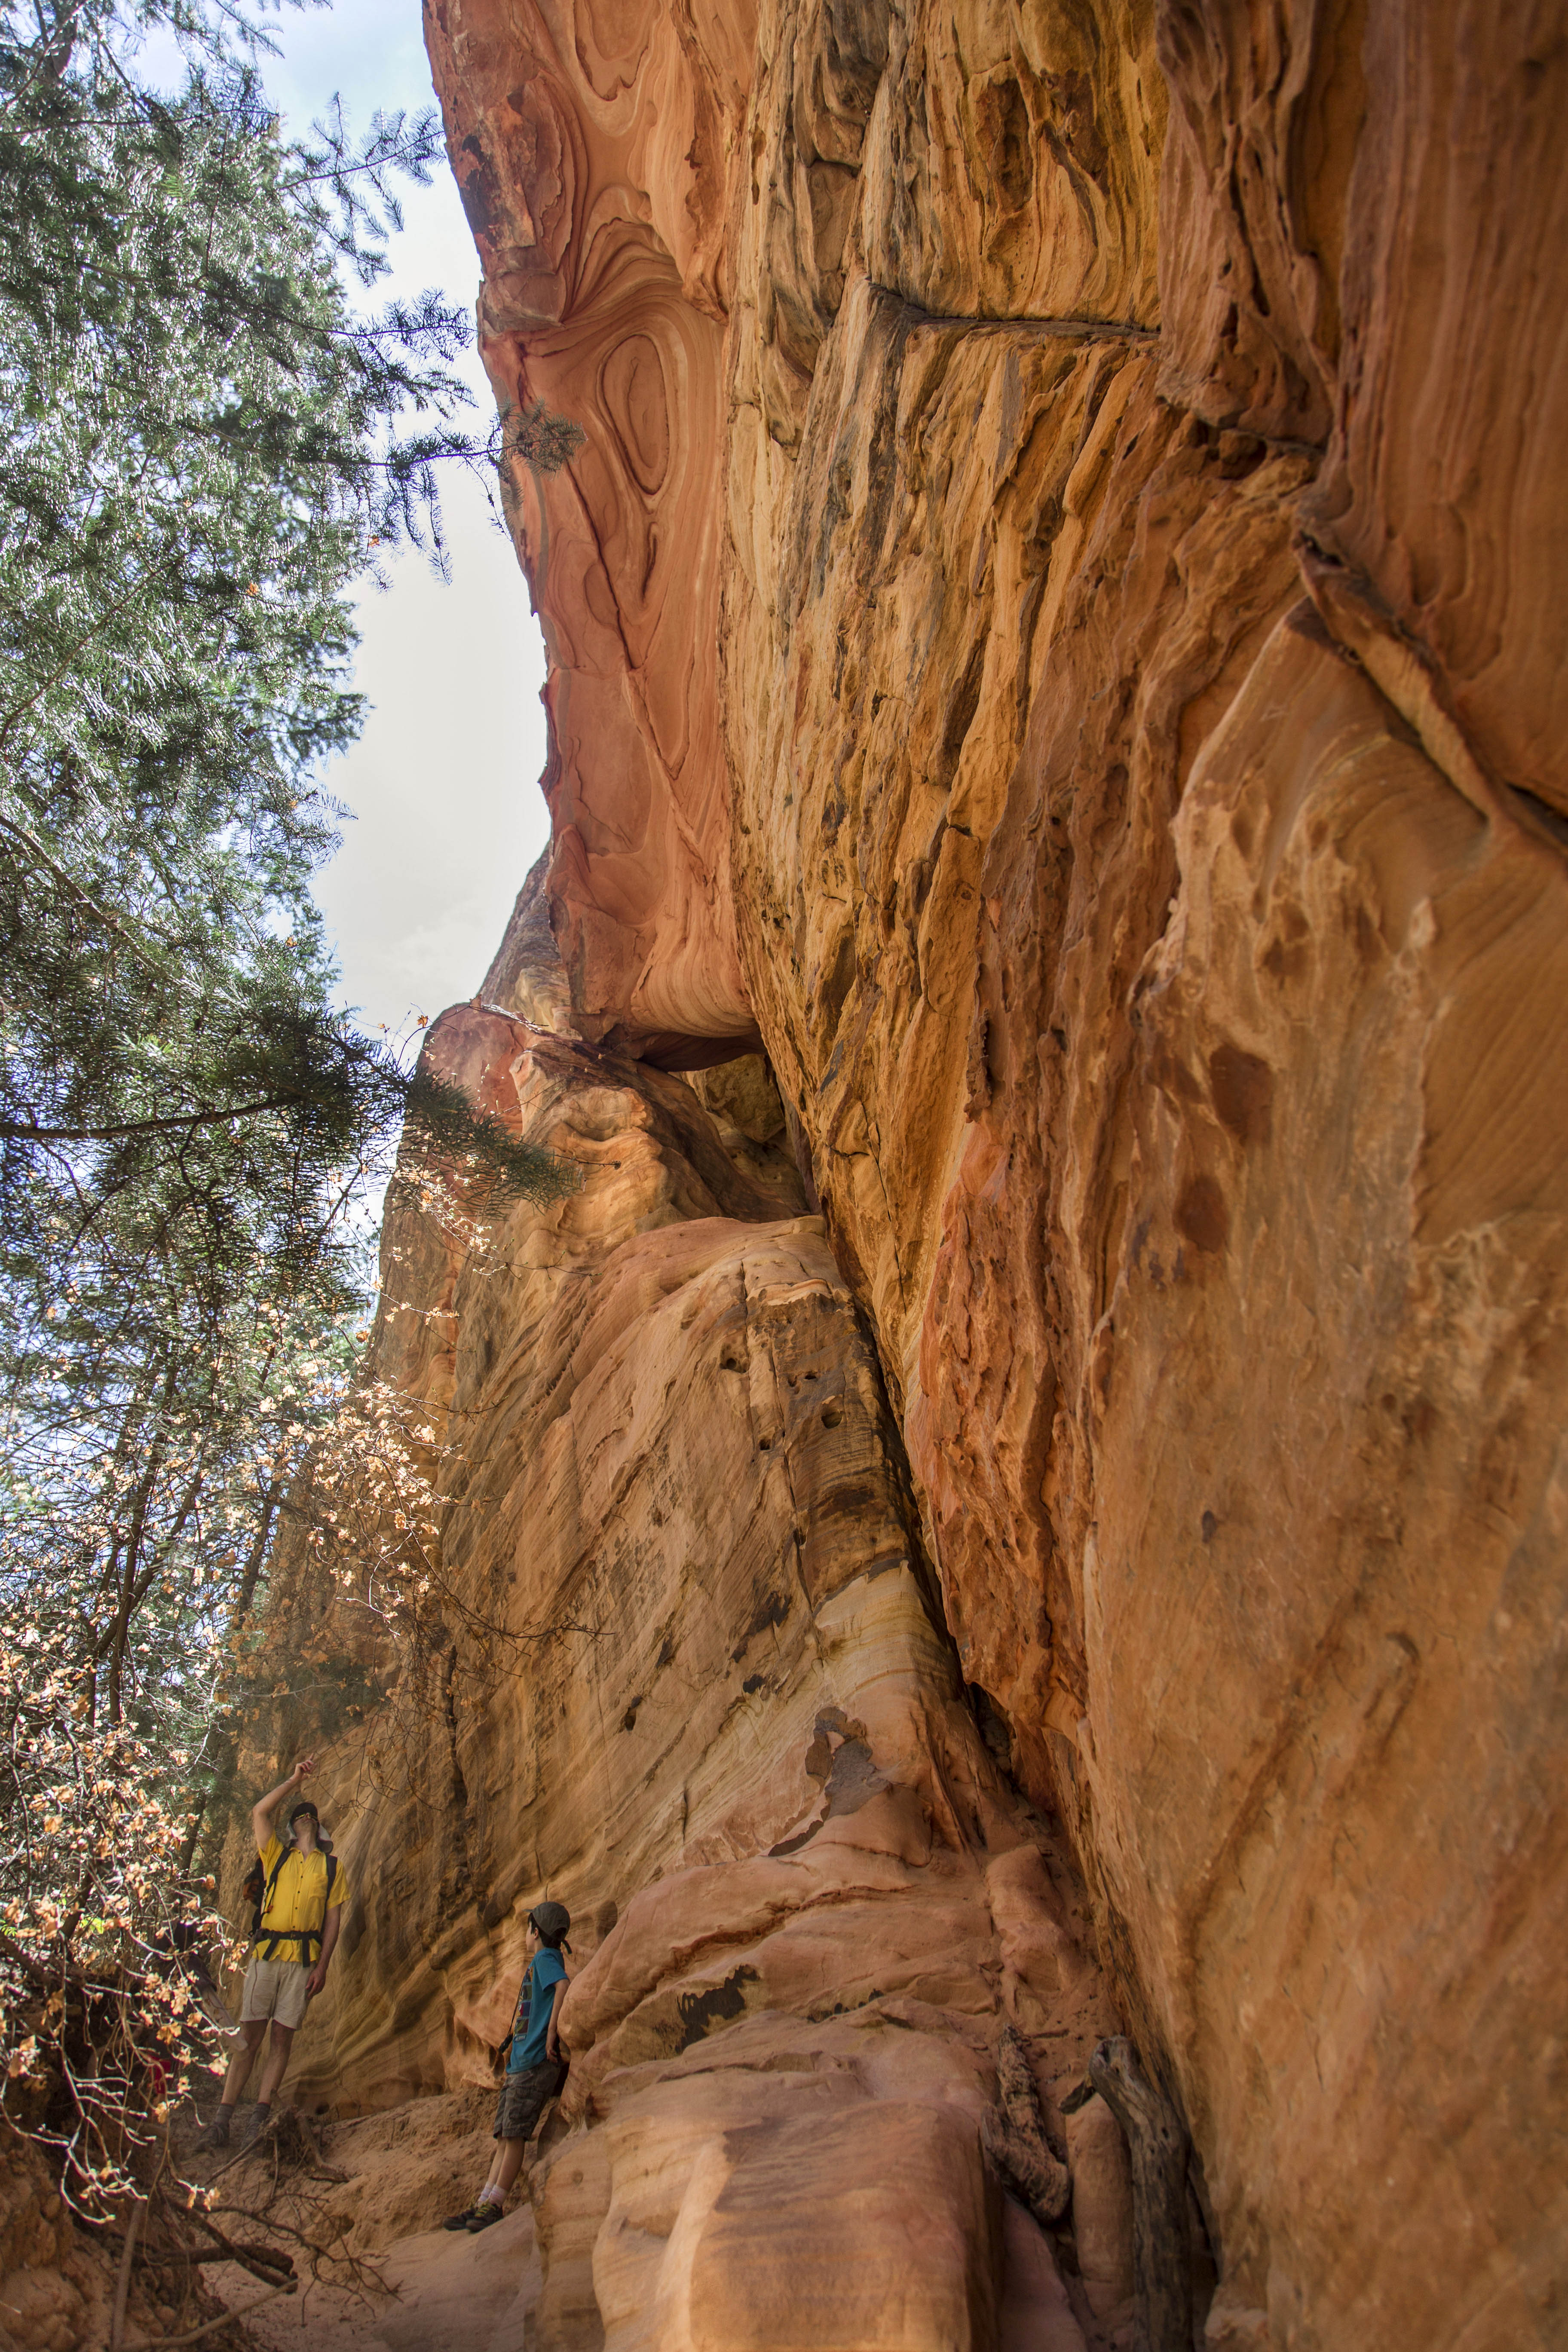
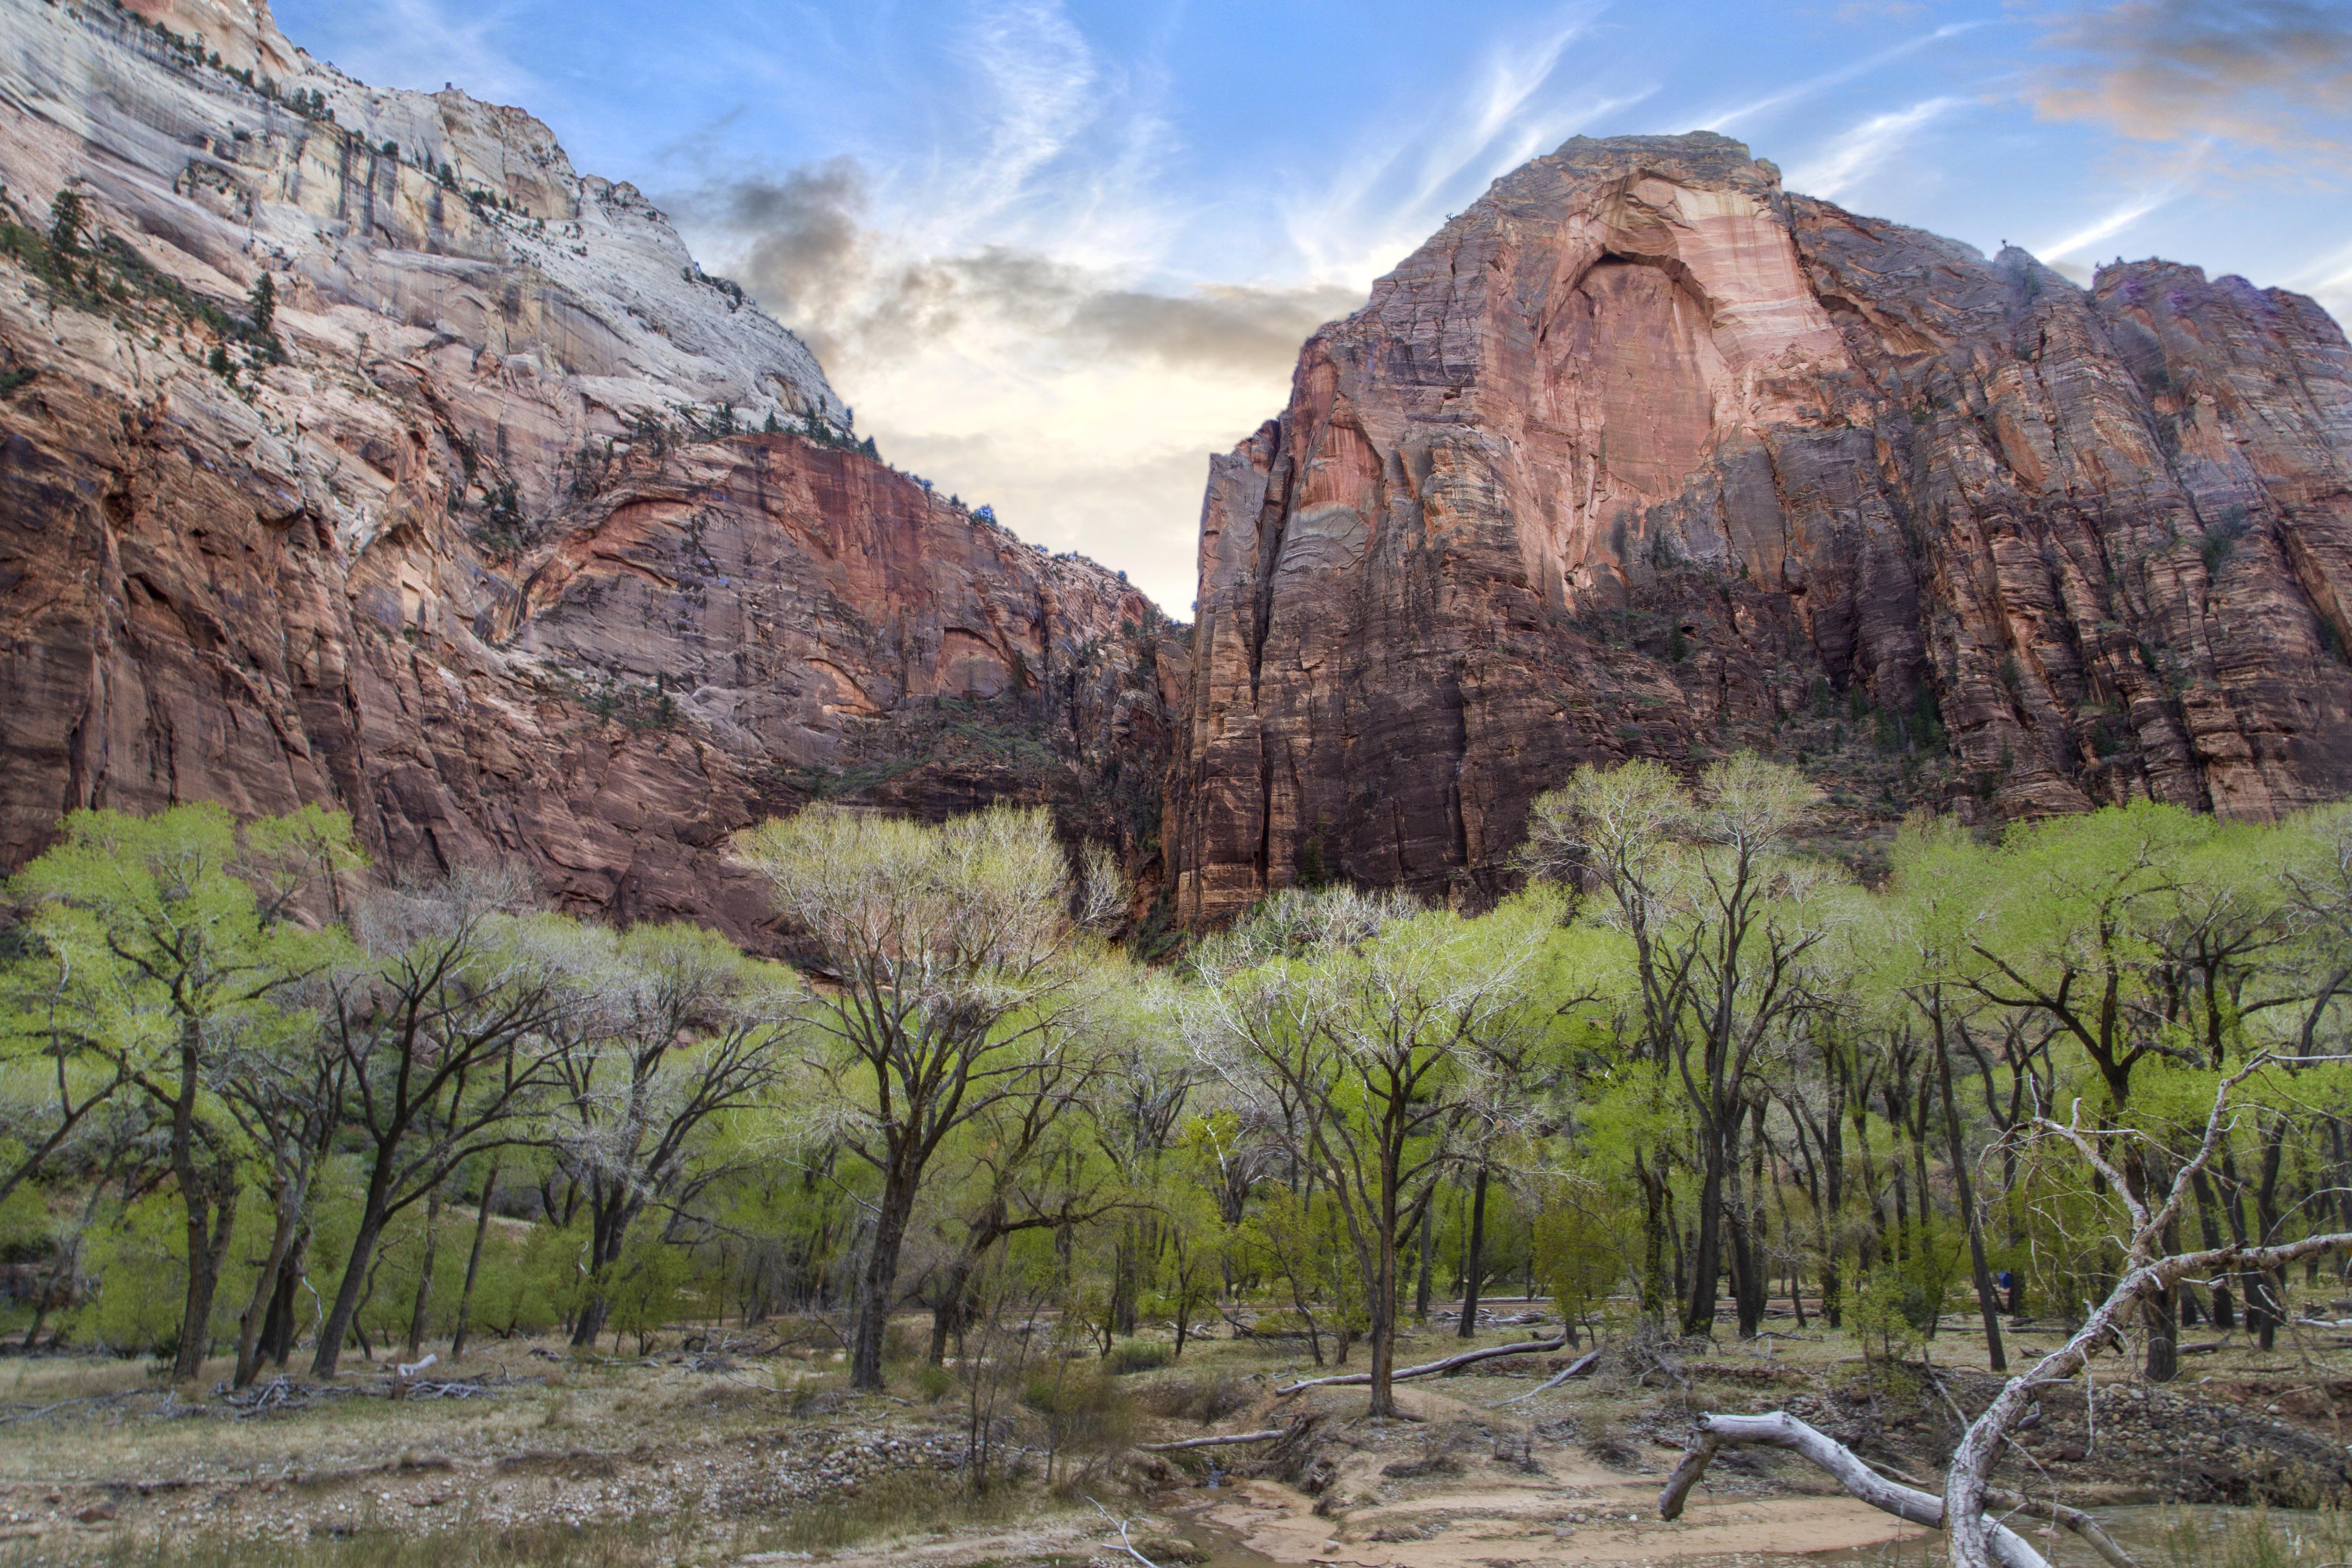
There are many hikes originating in Zion Canyon. From the visitors center you hop on a shuttle bus and ride up stream getting off at the various trail heads. About half way up is the stop for Hidden Canyon, Weeping Rock and Observation Point.
Last April we visited the park and stayed a week, doing many hikes, Hidden Canyon being one of them.
The trail starts with switchbacks, steep switchbacks!
Then the trail clings to the cliff while it swings around to a defile where there is a set of stairs.
Now the trail again hangs on the cliff while it rounds another bend.
The views start to open up of the valley below.

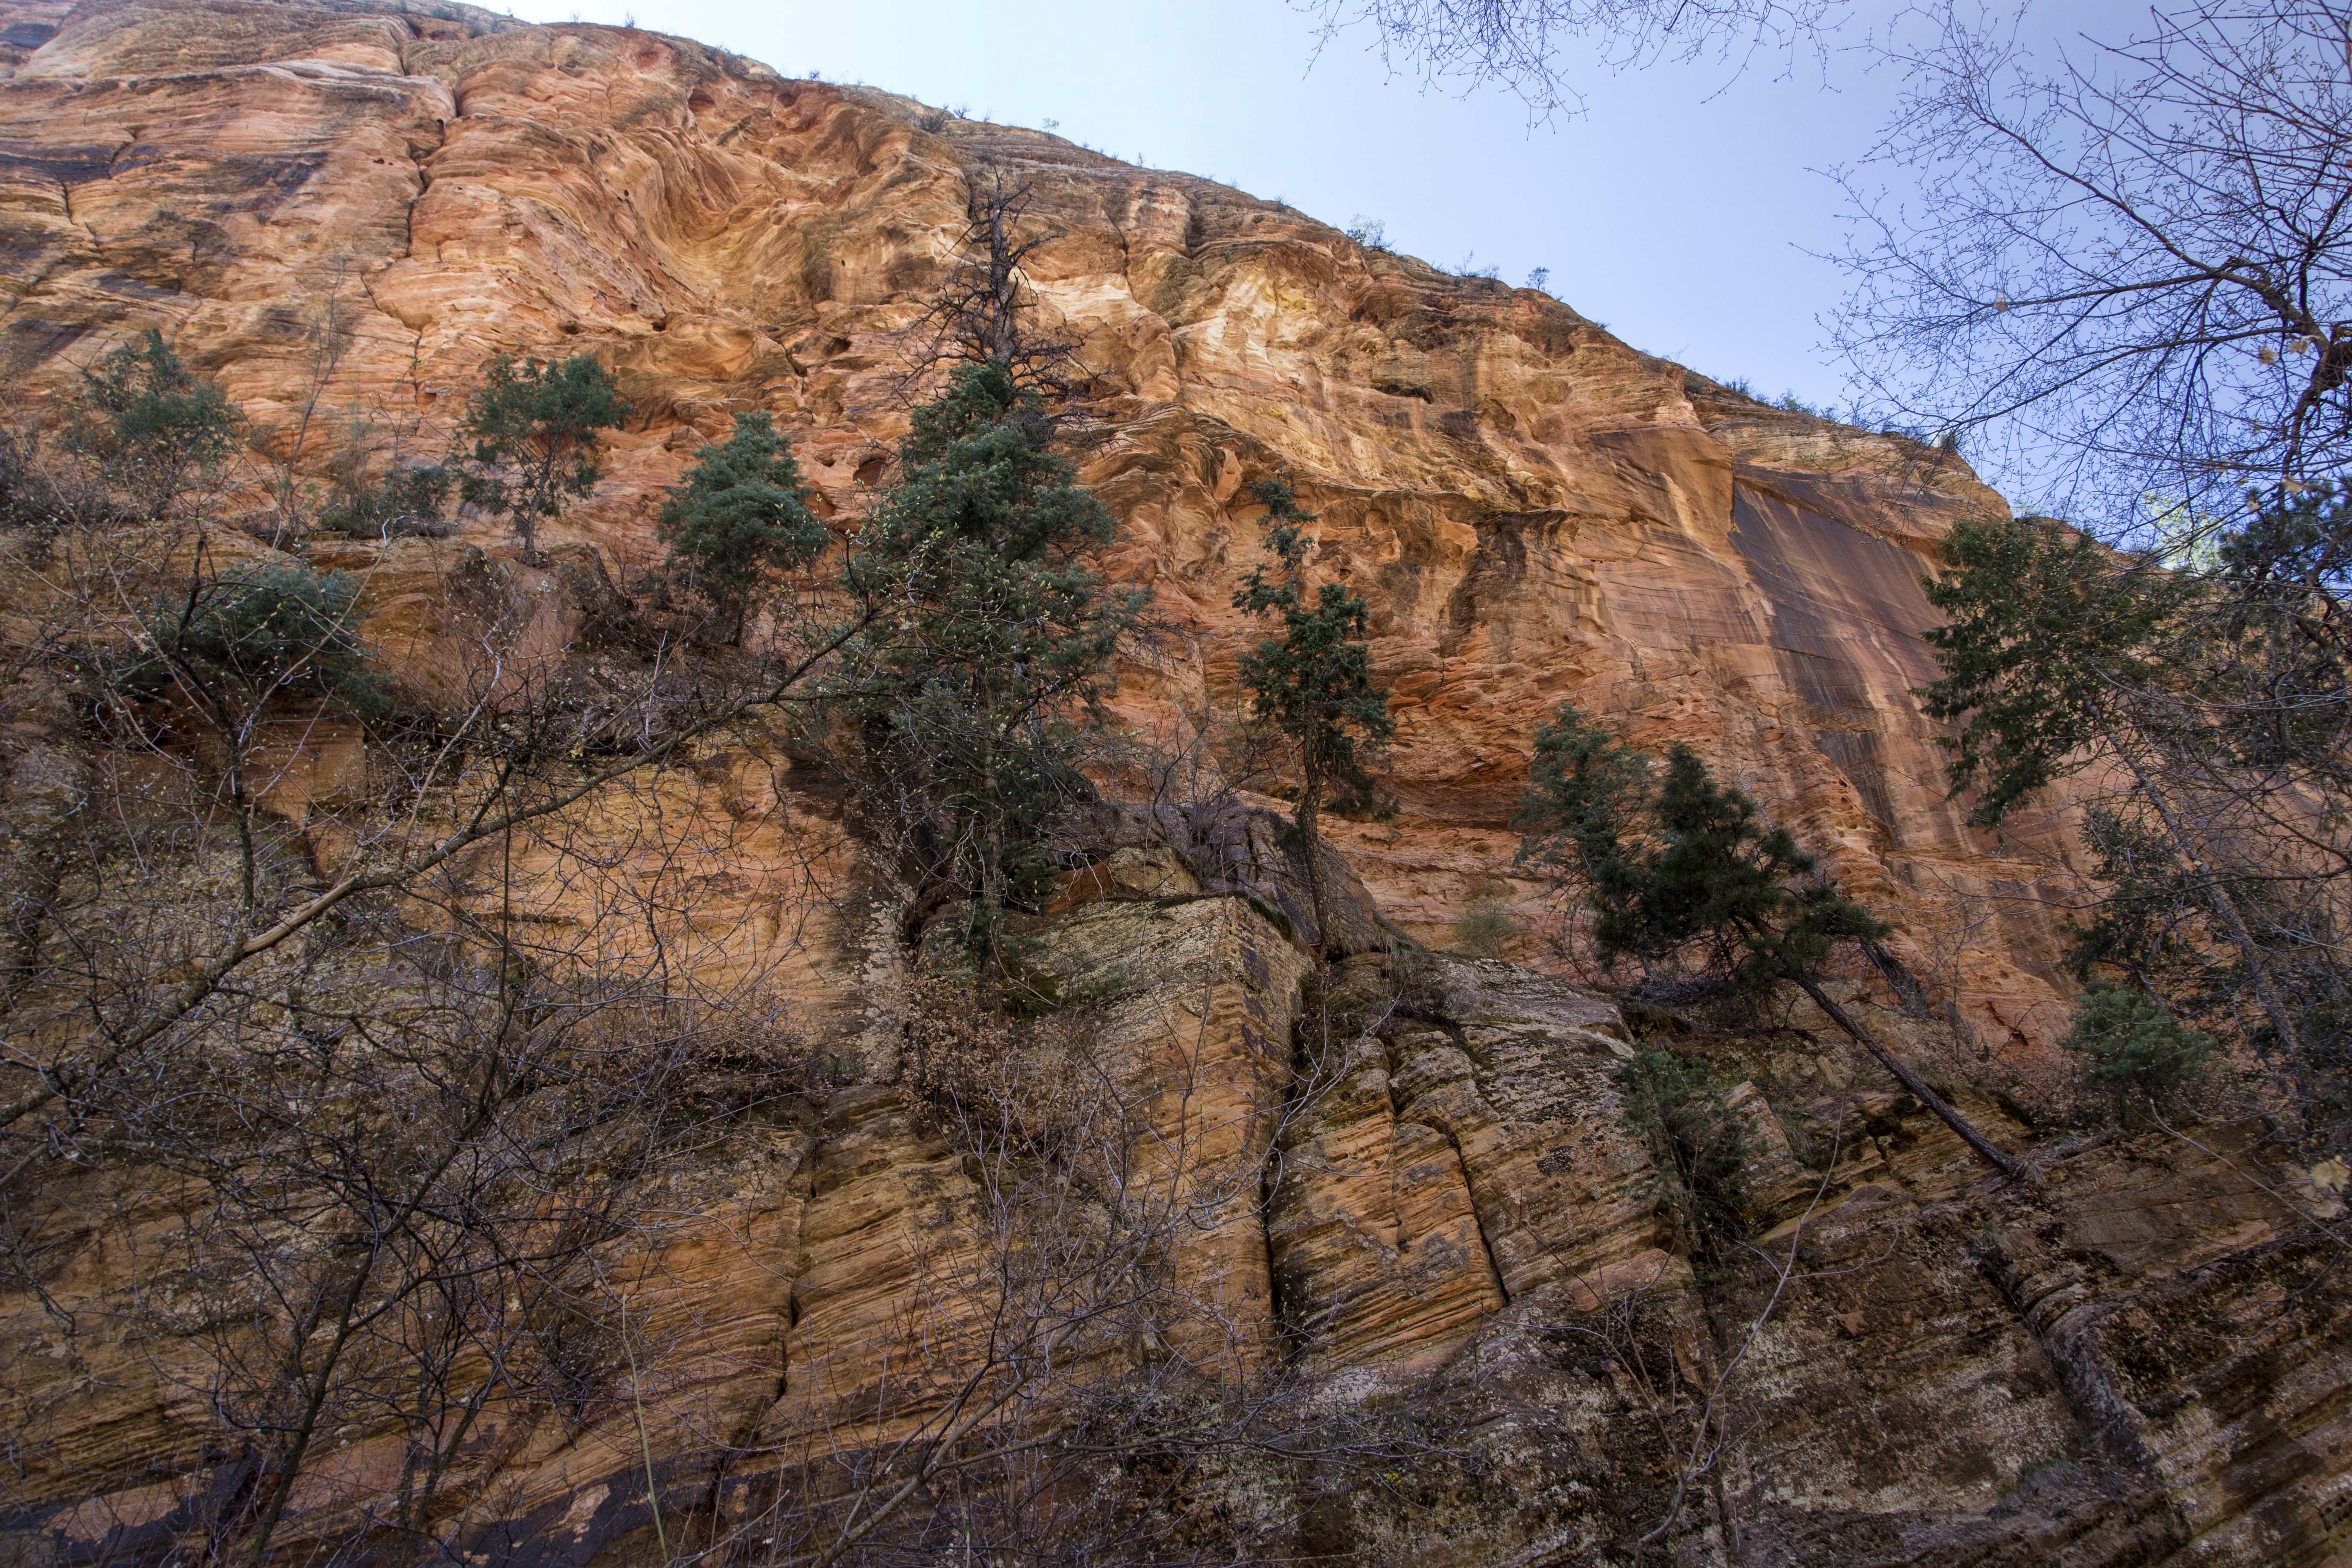
Now the trail plunges into the canyon, the narrow trail is full of amazing rock, fantastically colored and shaped.

On the way back we veered off and up to a high point of the ridge to see the valley below before heading back…

Between mundane tasks like work and exercise I try to entertain myself by studying PS books and navigating the mental fog to apply new techniques for image manipulation.
My most recent “new” technique are the brushes in Camera RAW.
Here is an image in its untouched state: 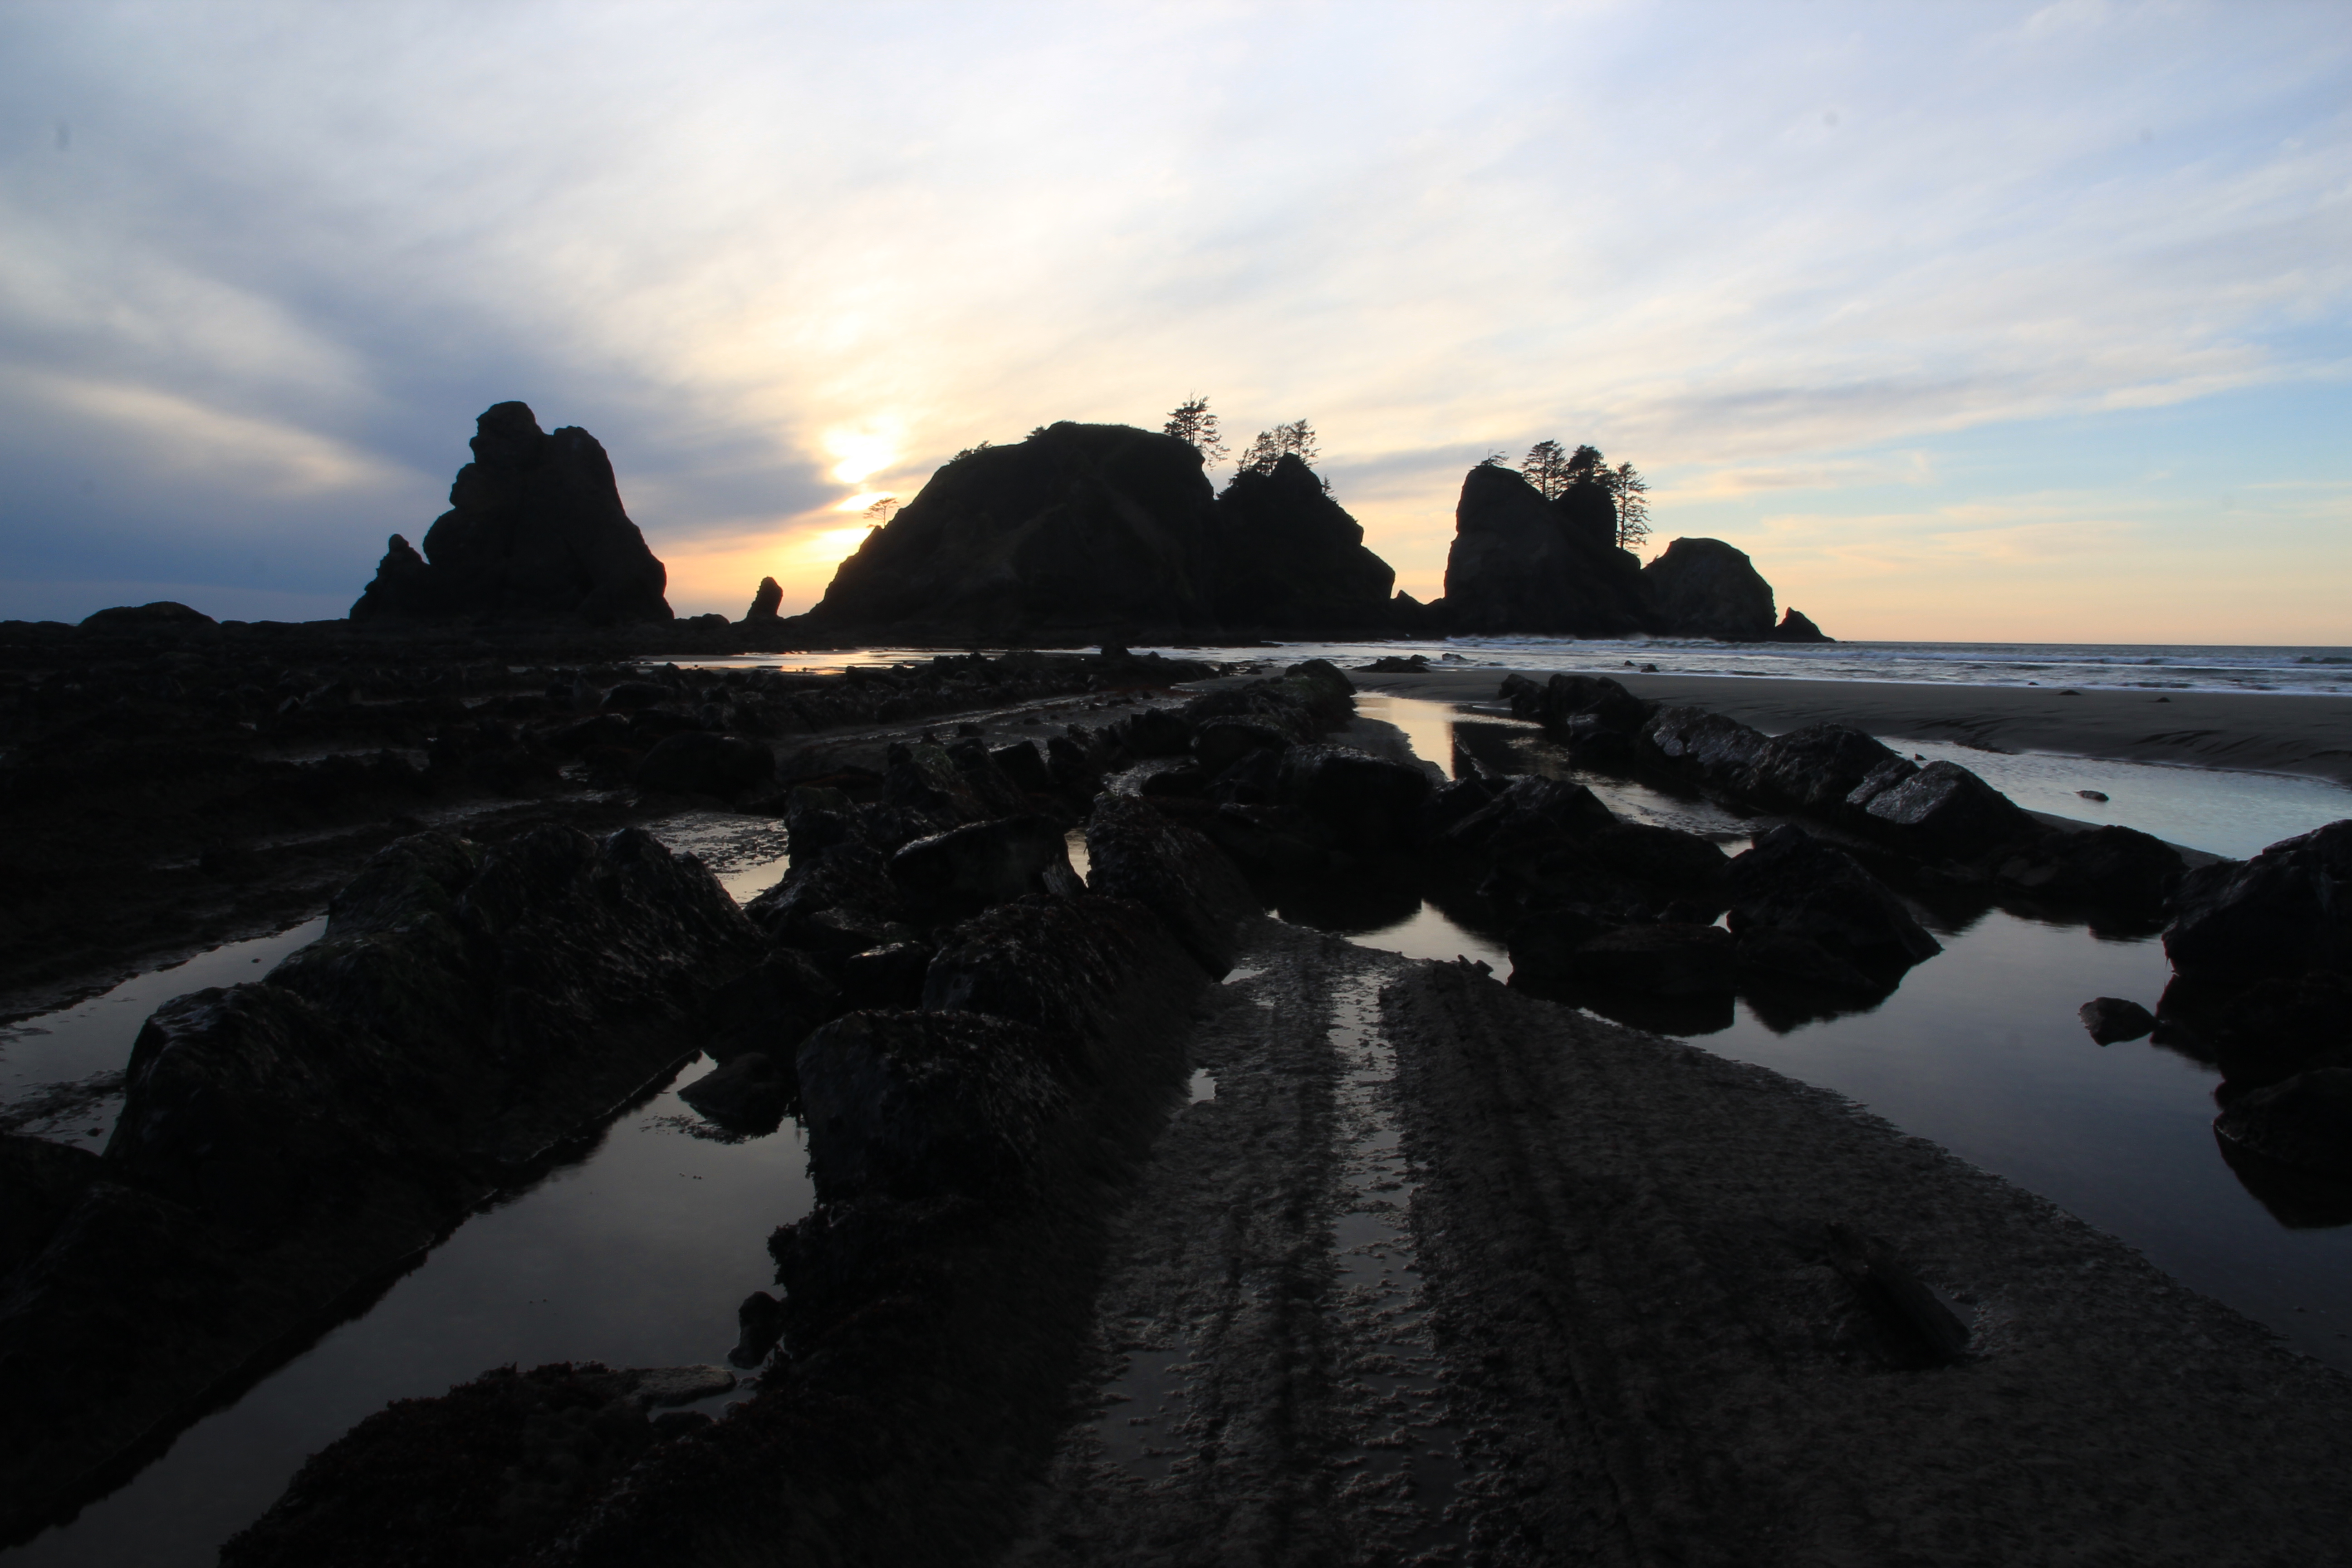
And here is the finished version.

After opening the image in Camera RAW and hitting “auto” for the exposure setting almost all the additional changes were made with the brushes, altering saturation, clarity, contrast and exposure on various sections, one at a time.
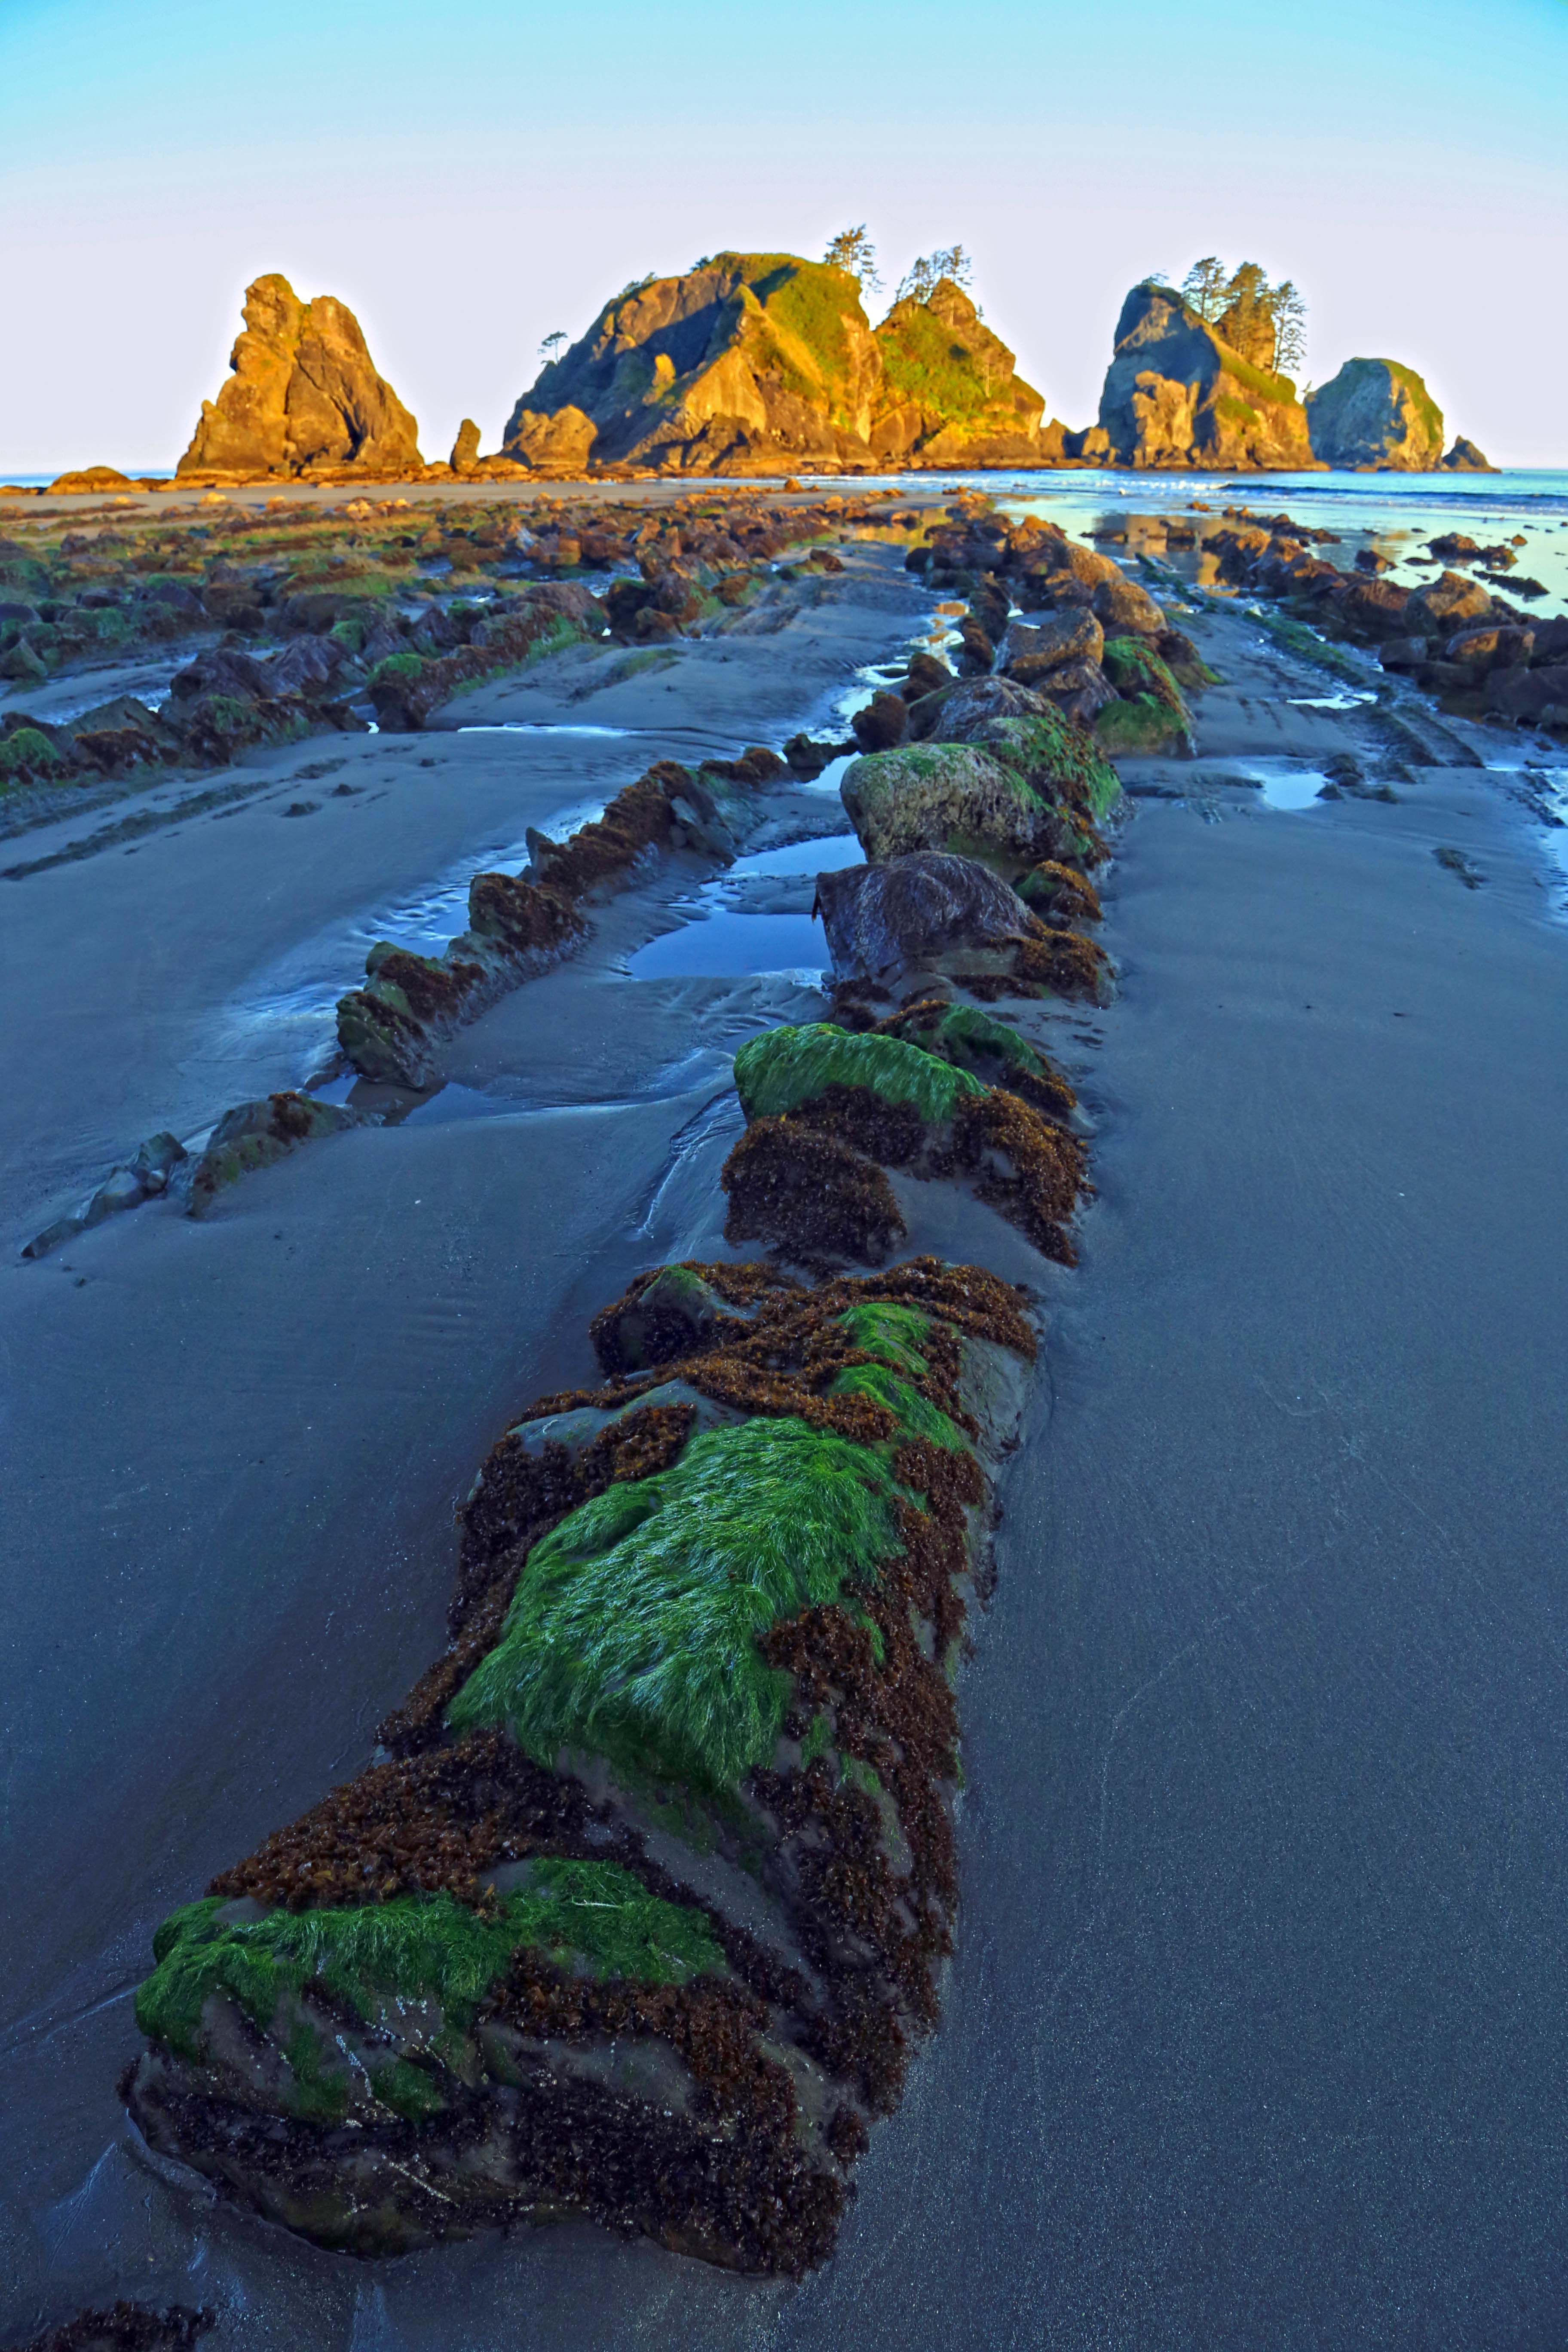
Its a new way to bring out colors and textures. The image is taken at Point of the Arches, Olympic National Park.
These two shots are from Sahale Glacier Camp in North Cascades National Park. Each image below is composed of 2 shots photomerged in CS 6. I opened the two images to be connected in Camera Raw and synchronized my changes, lightening and darkening the sky and foreground with brushes and then used the automated photomerge option. A first for me and I am pleased with the results!


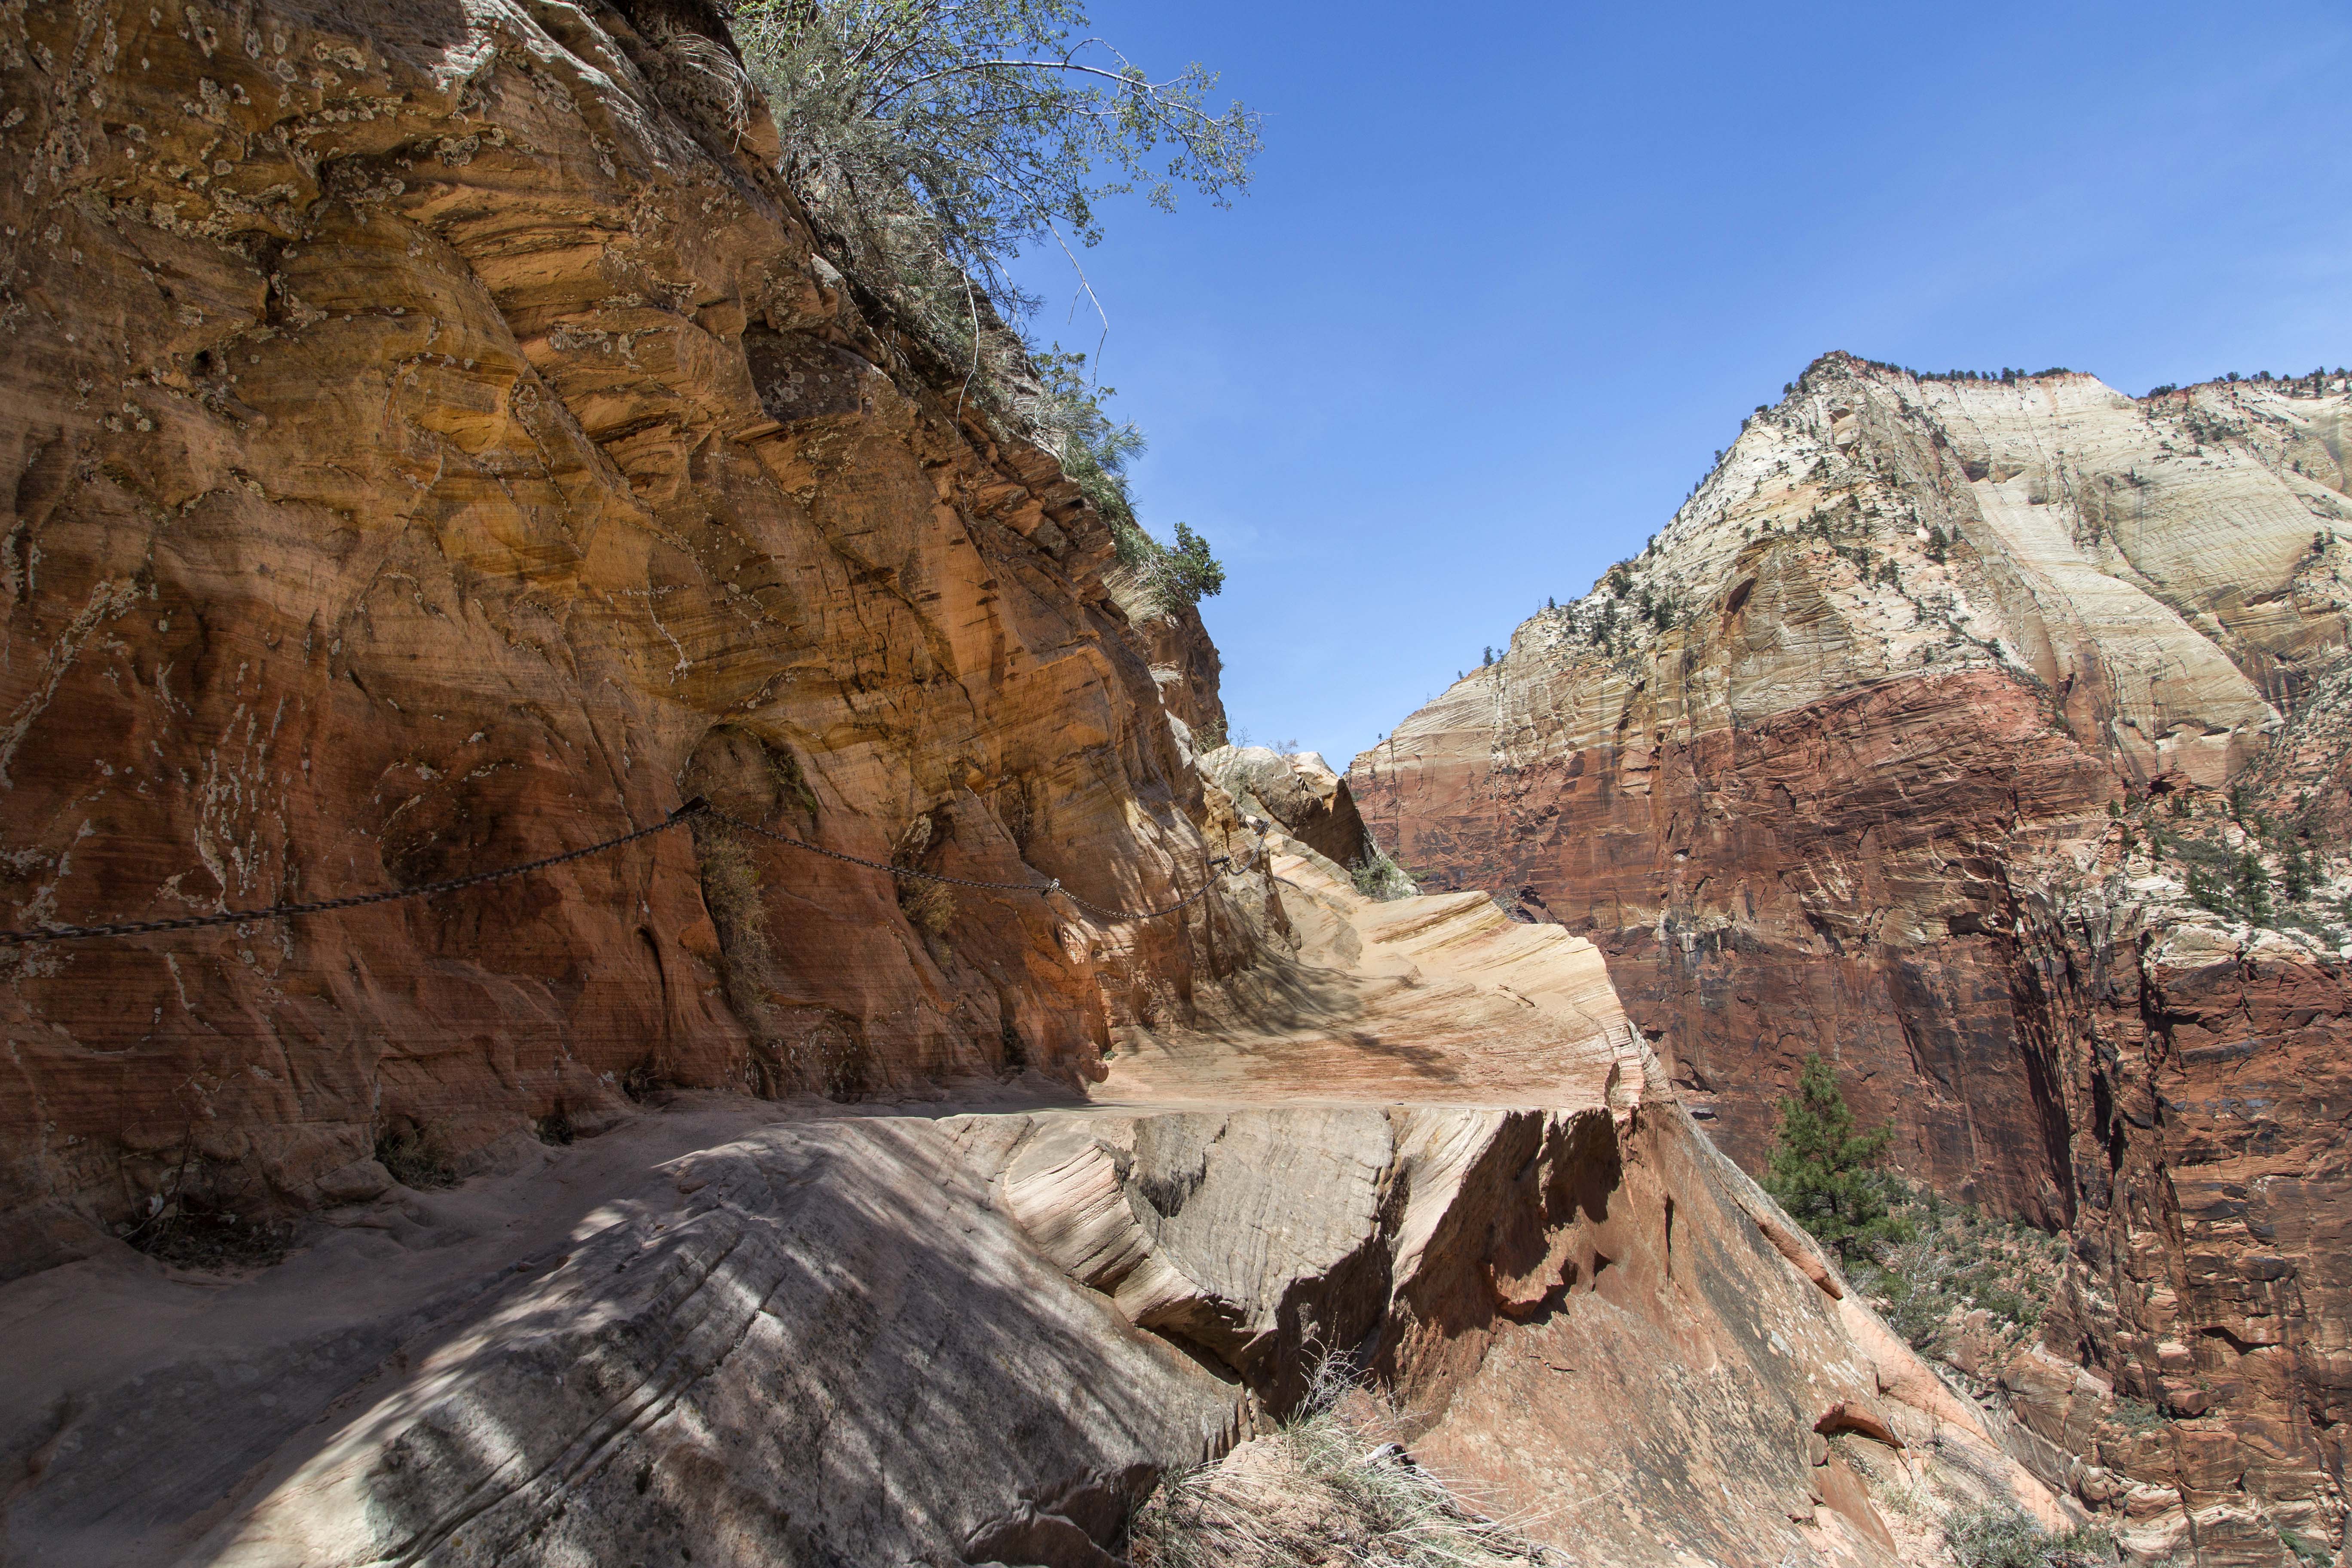
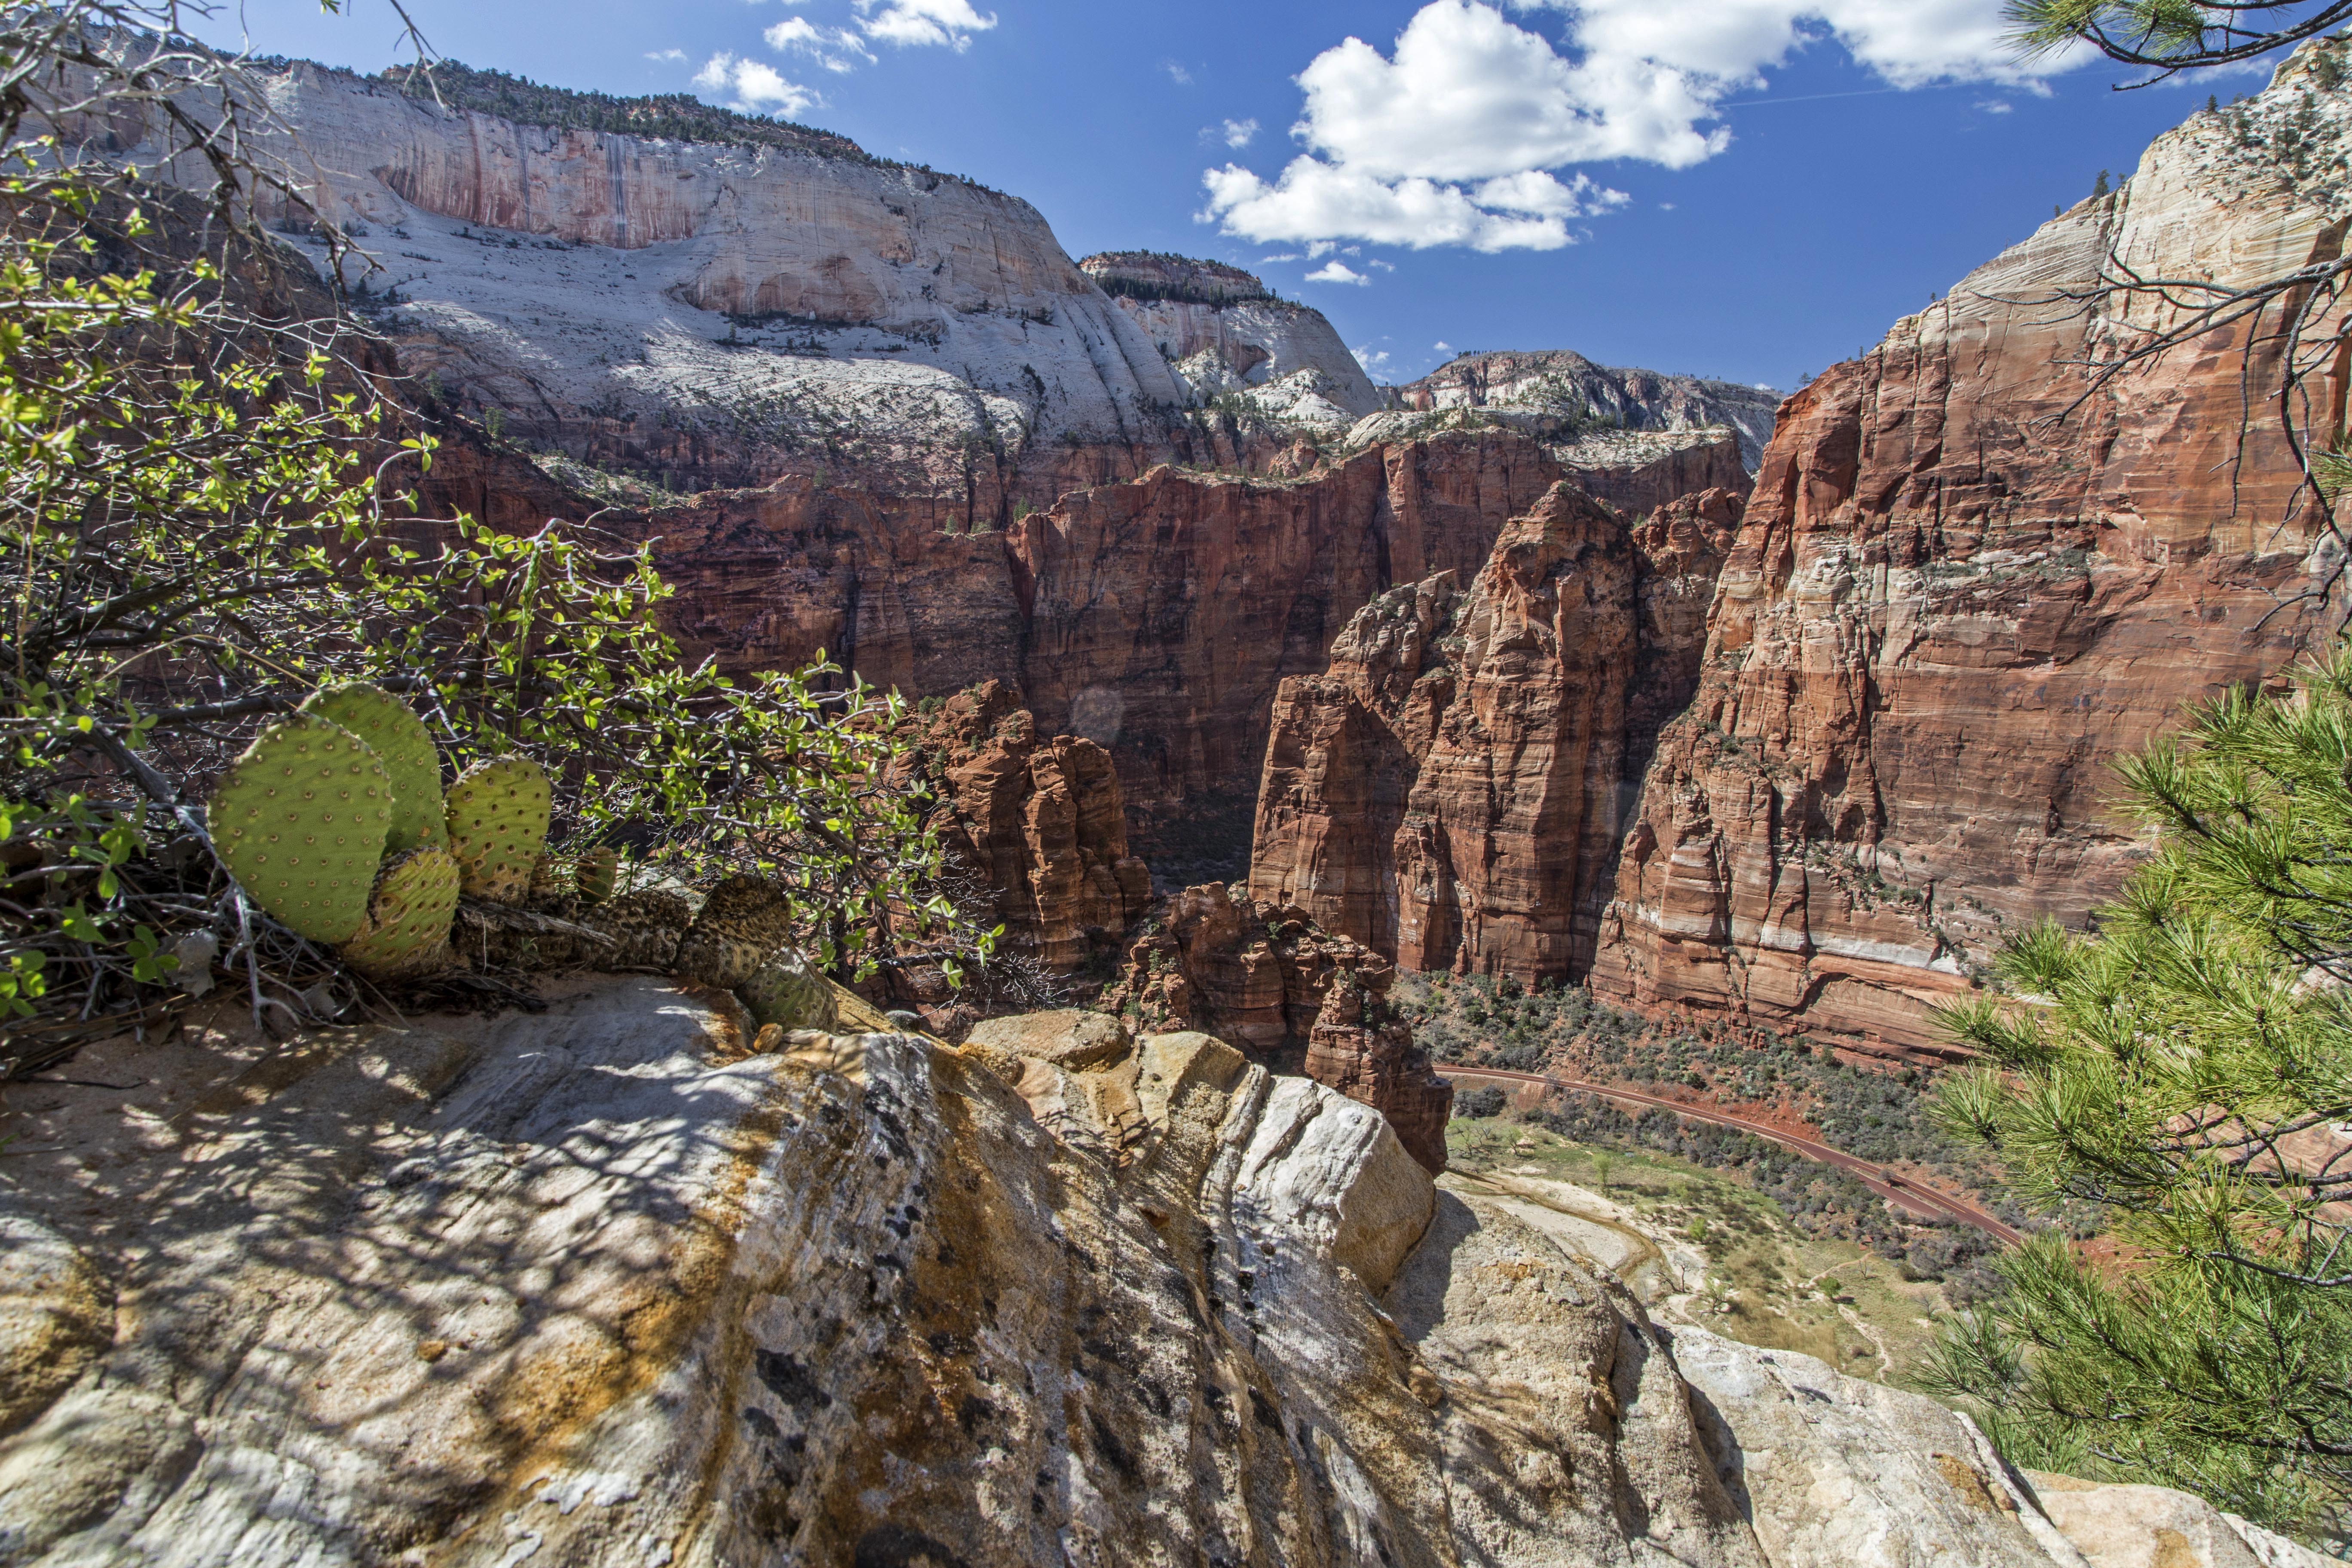
Last April I made a week-long sojourn to Zion National Park in Utah. We camped at the Watchman Camp ground.

On the first days hike we rode the shuttle bus up the valley…
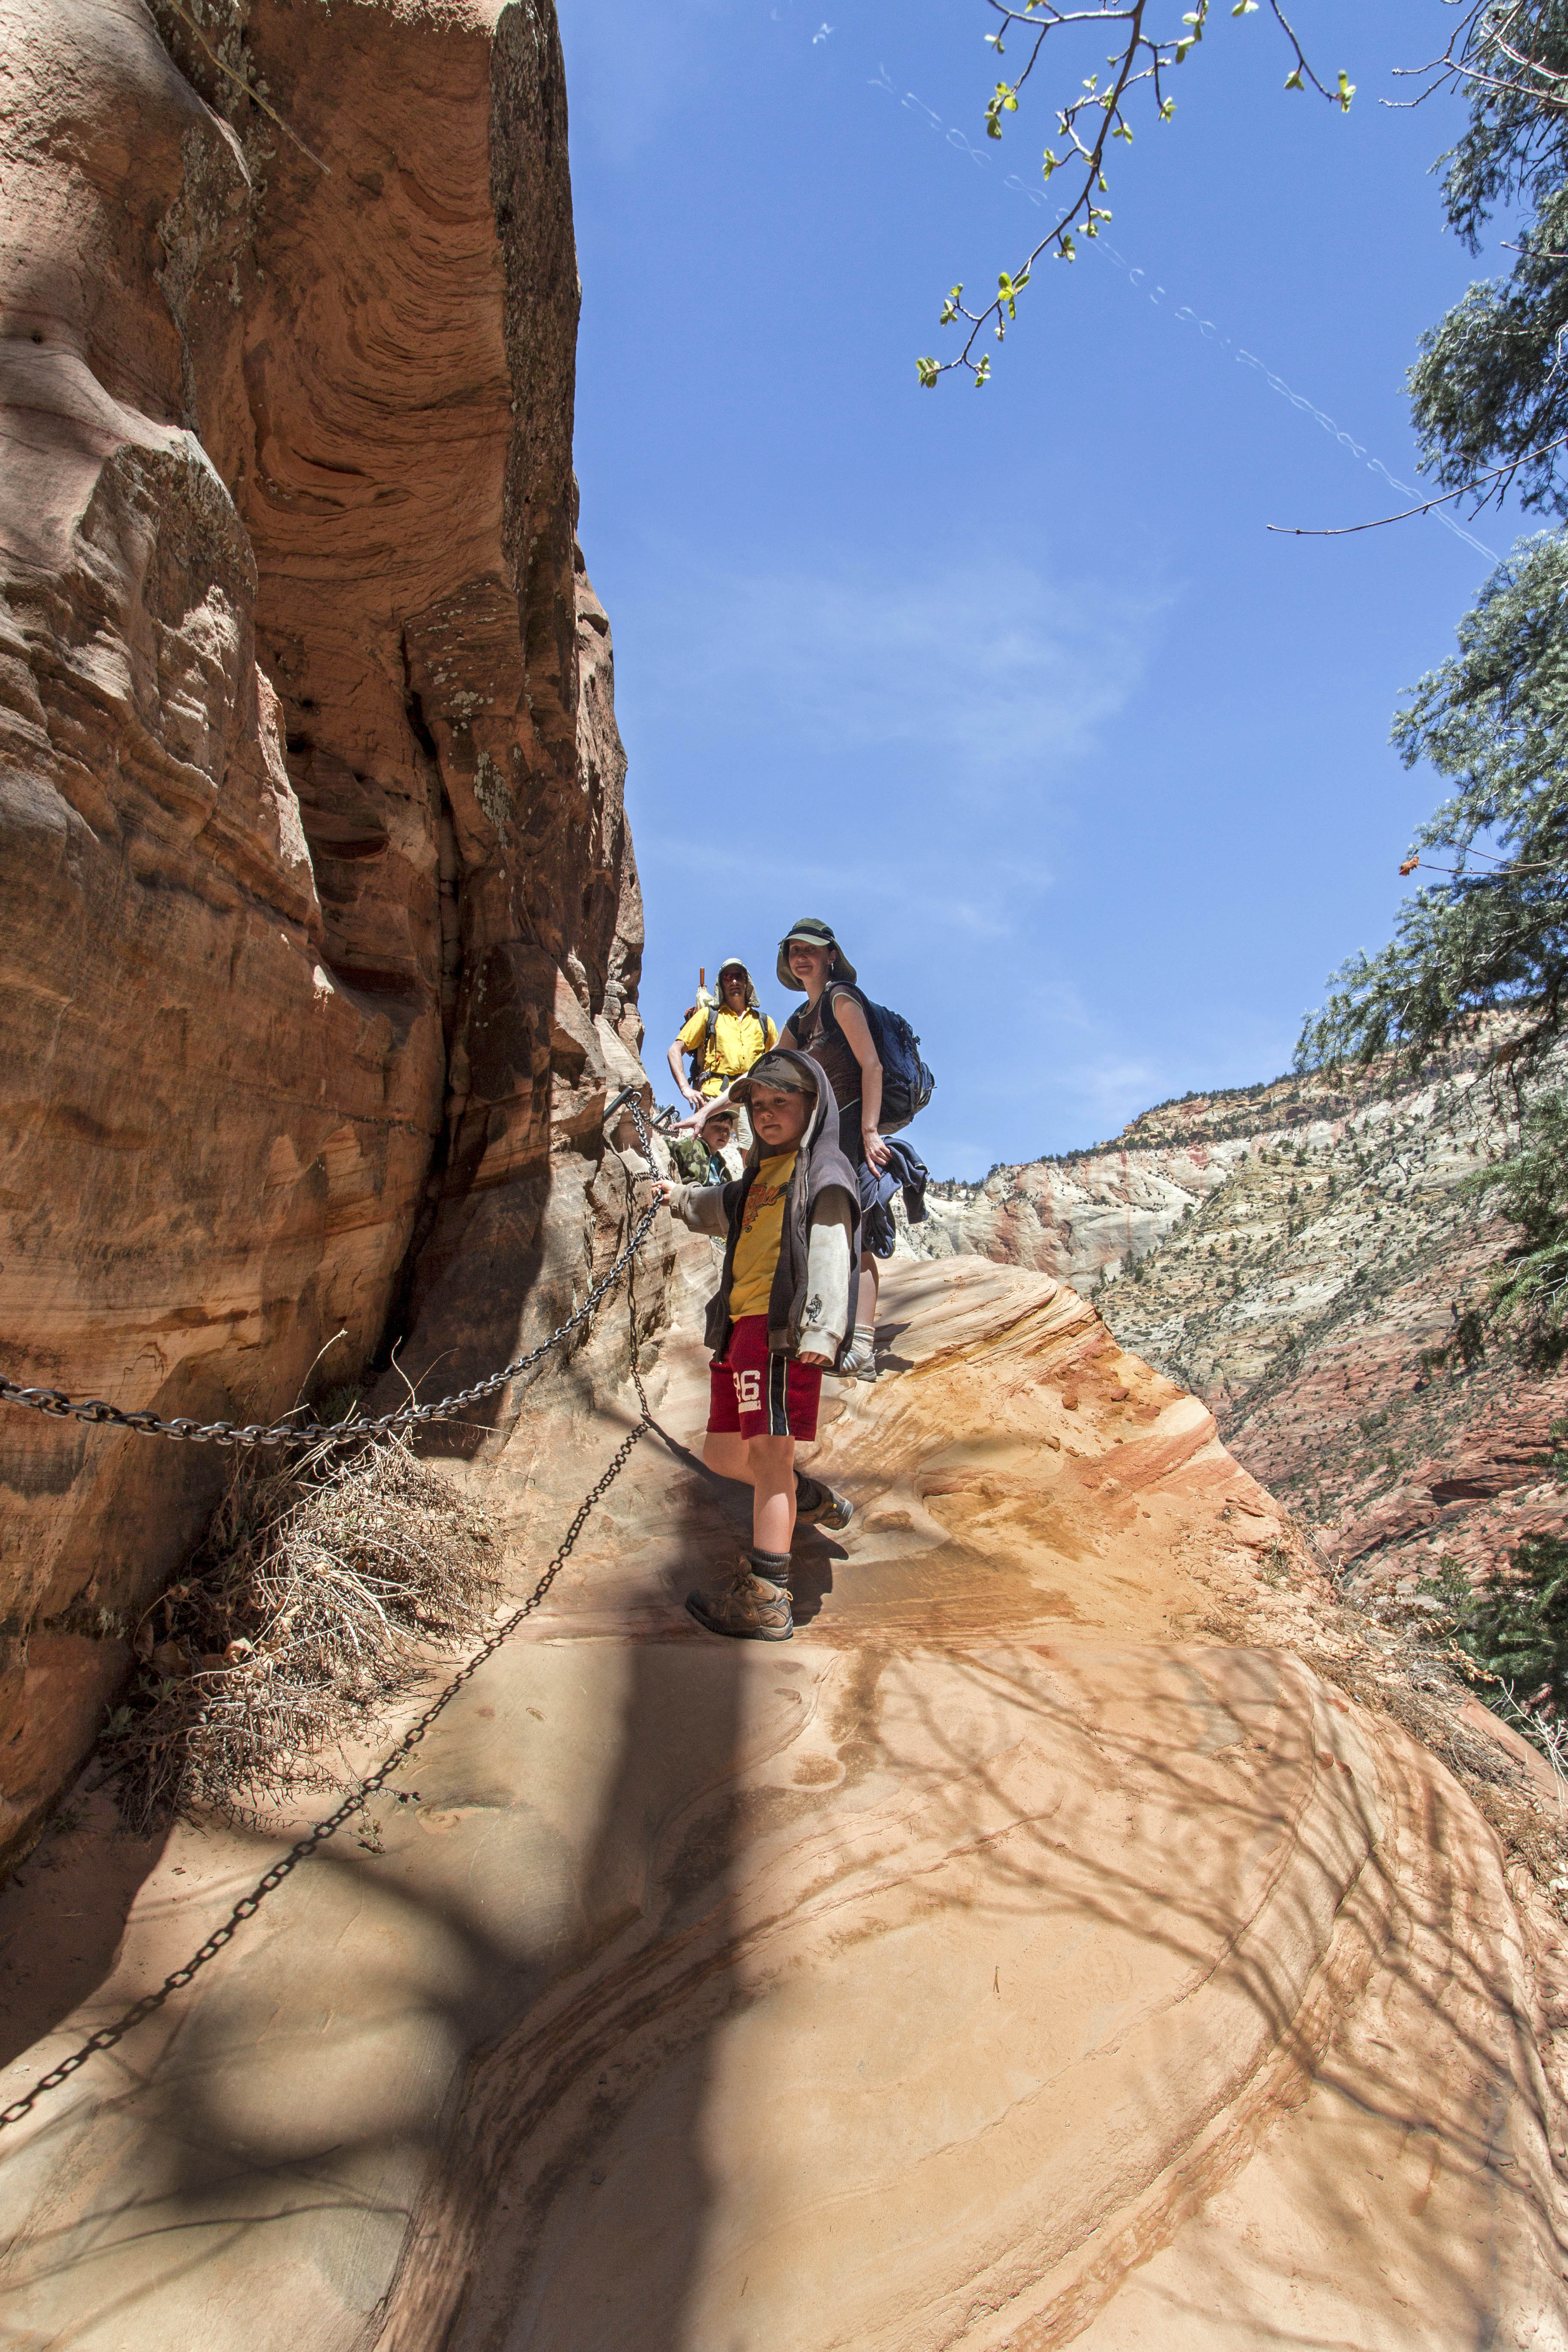
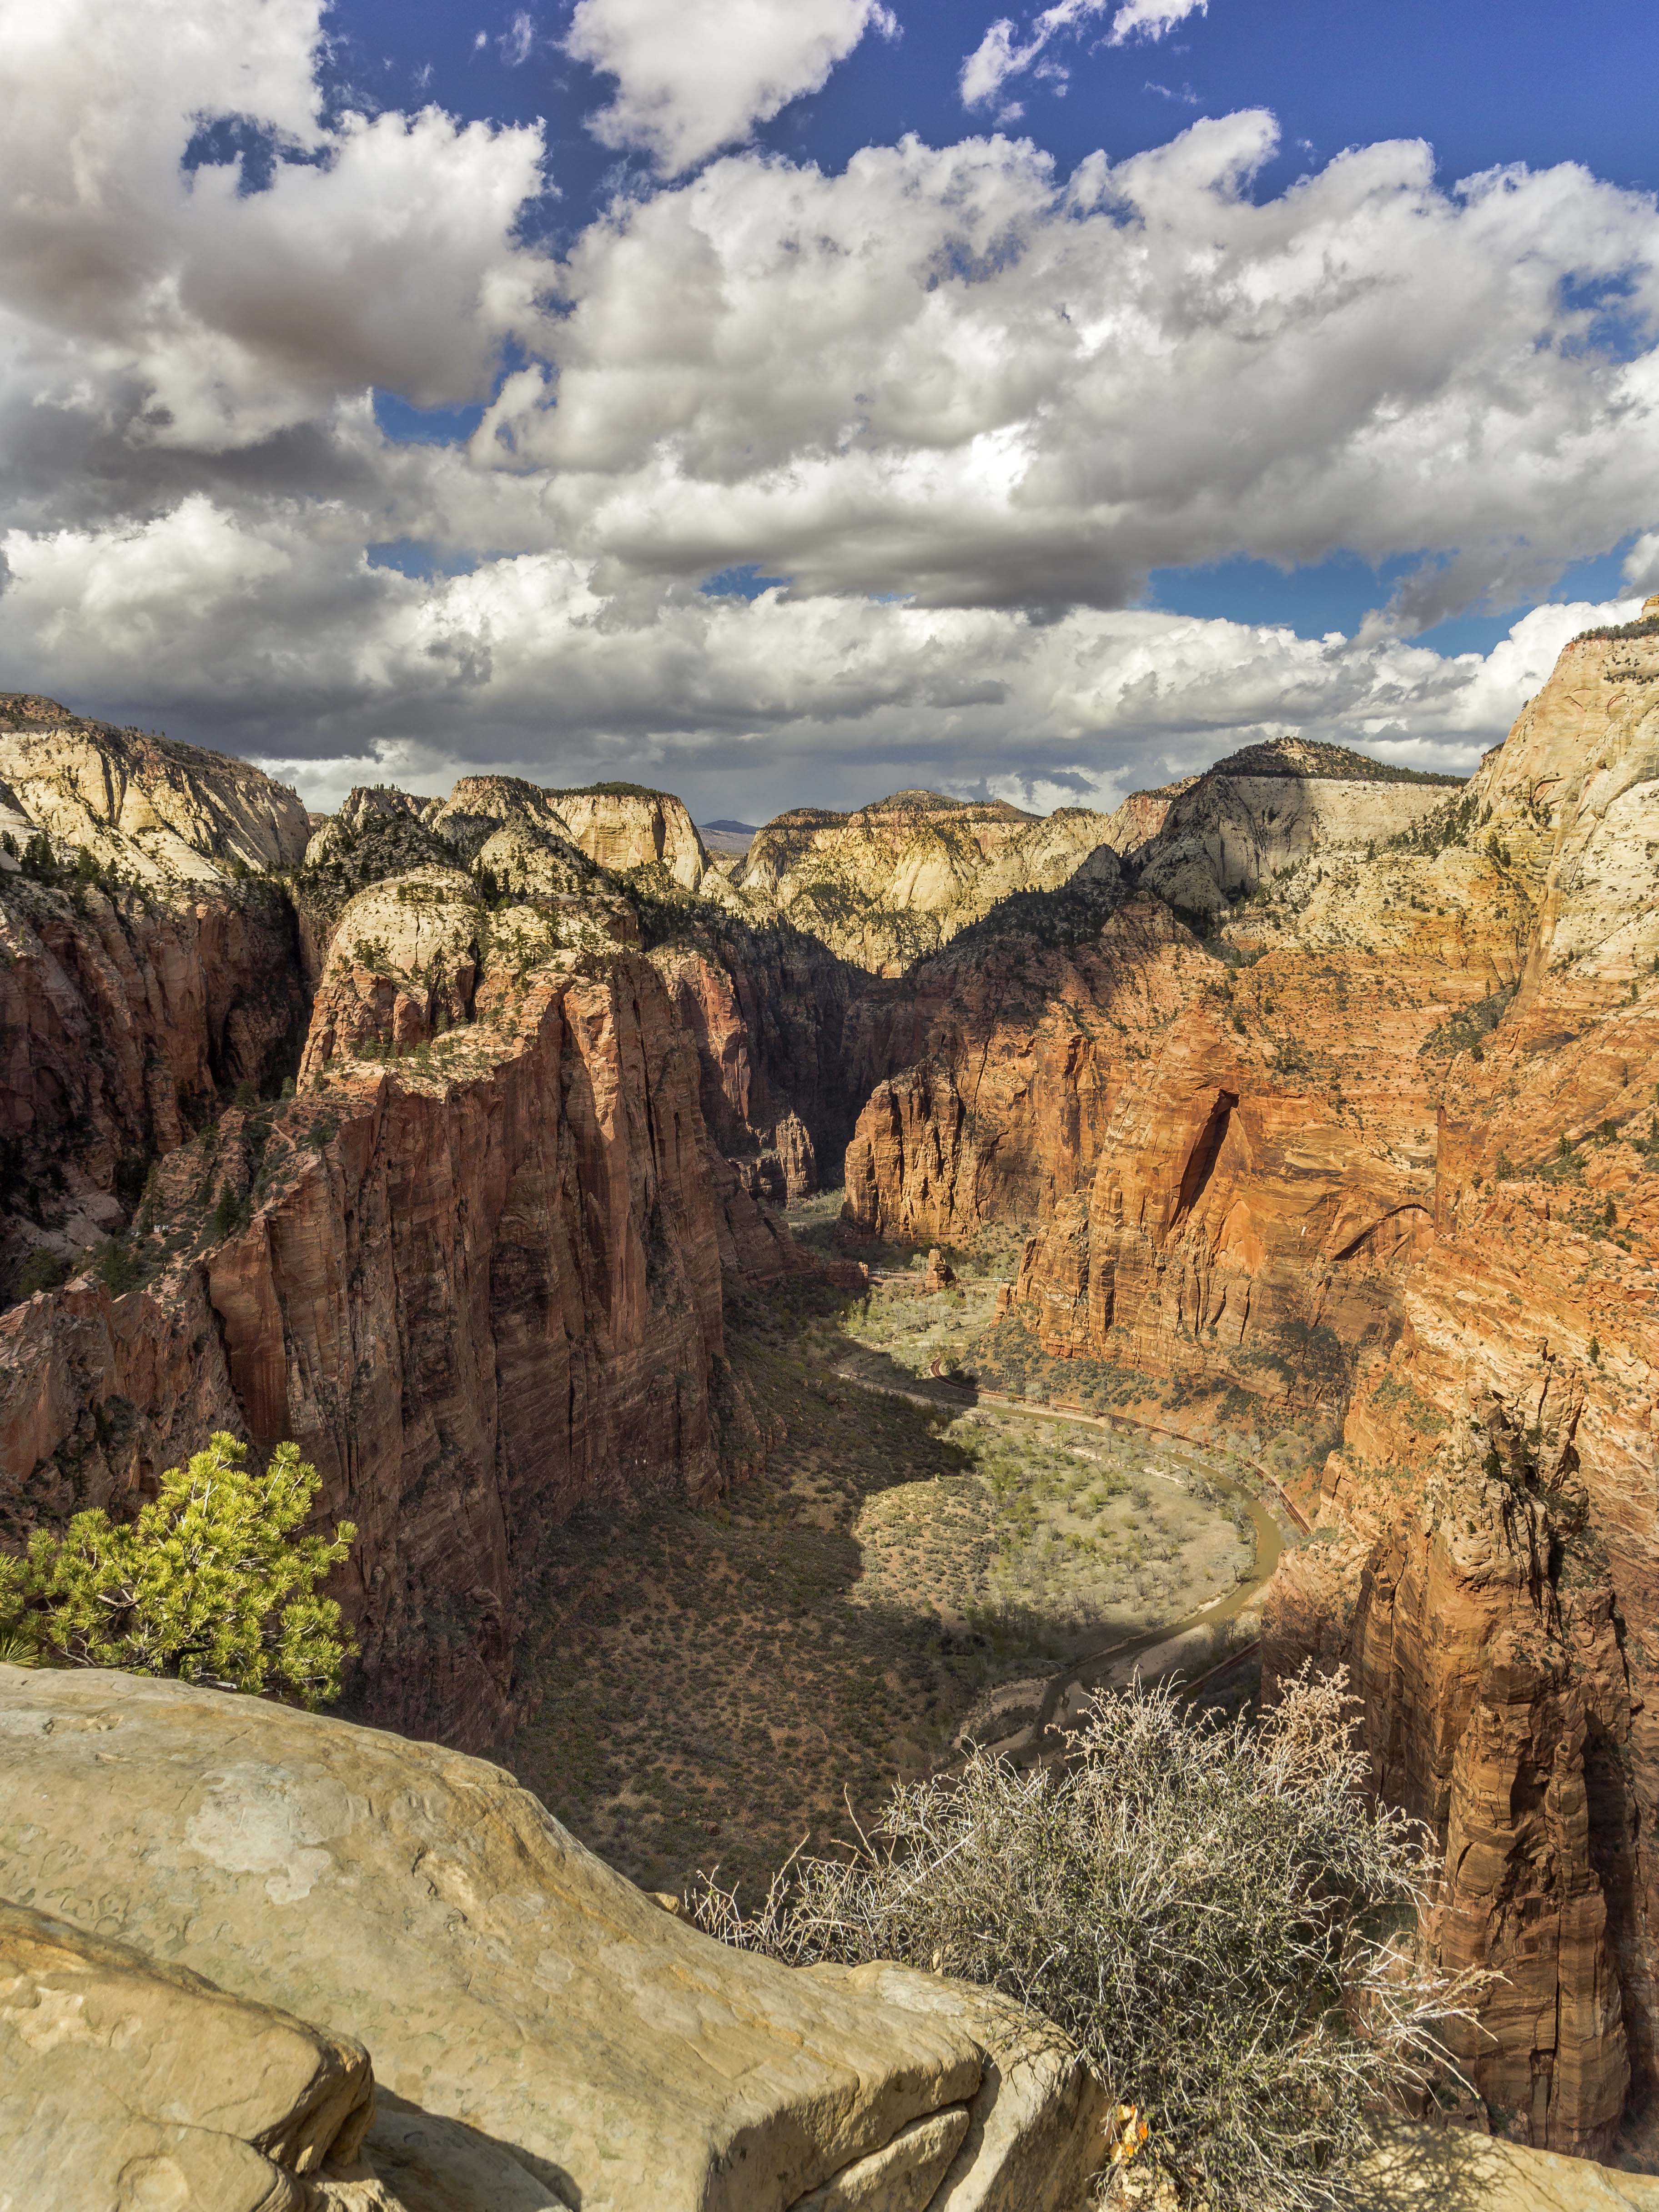
and hiked up to Angle’s Landing.
The hike is about 2 miles and 1,600 ft of elevation gain. The hike takes you up a series of switchbacks and then through Echo Canyon.
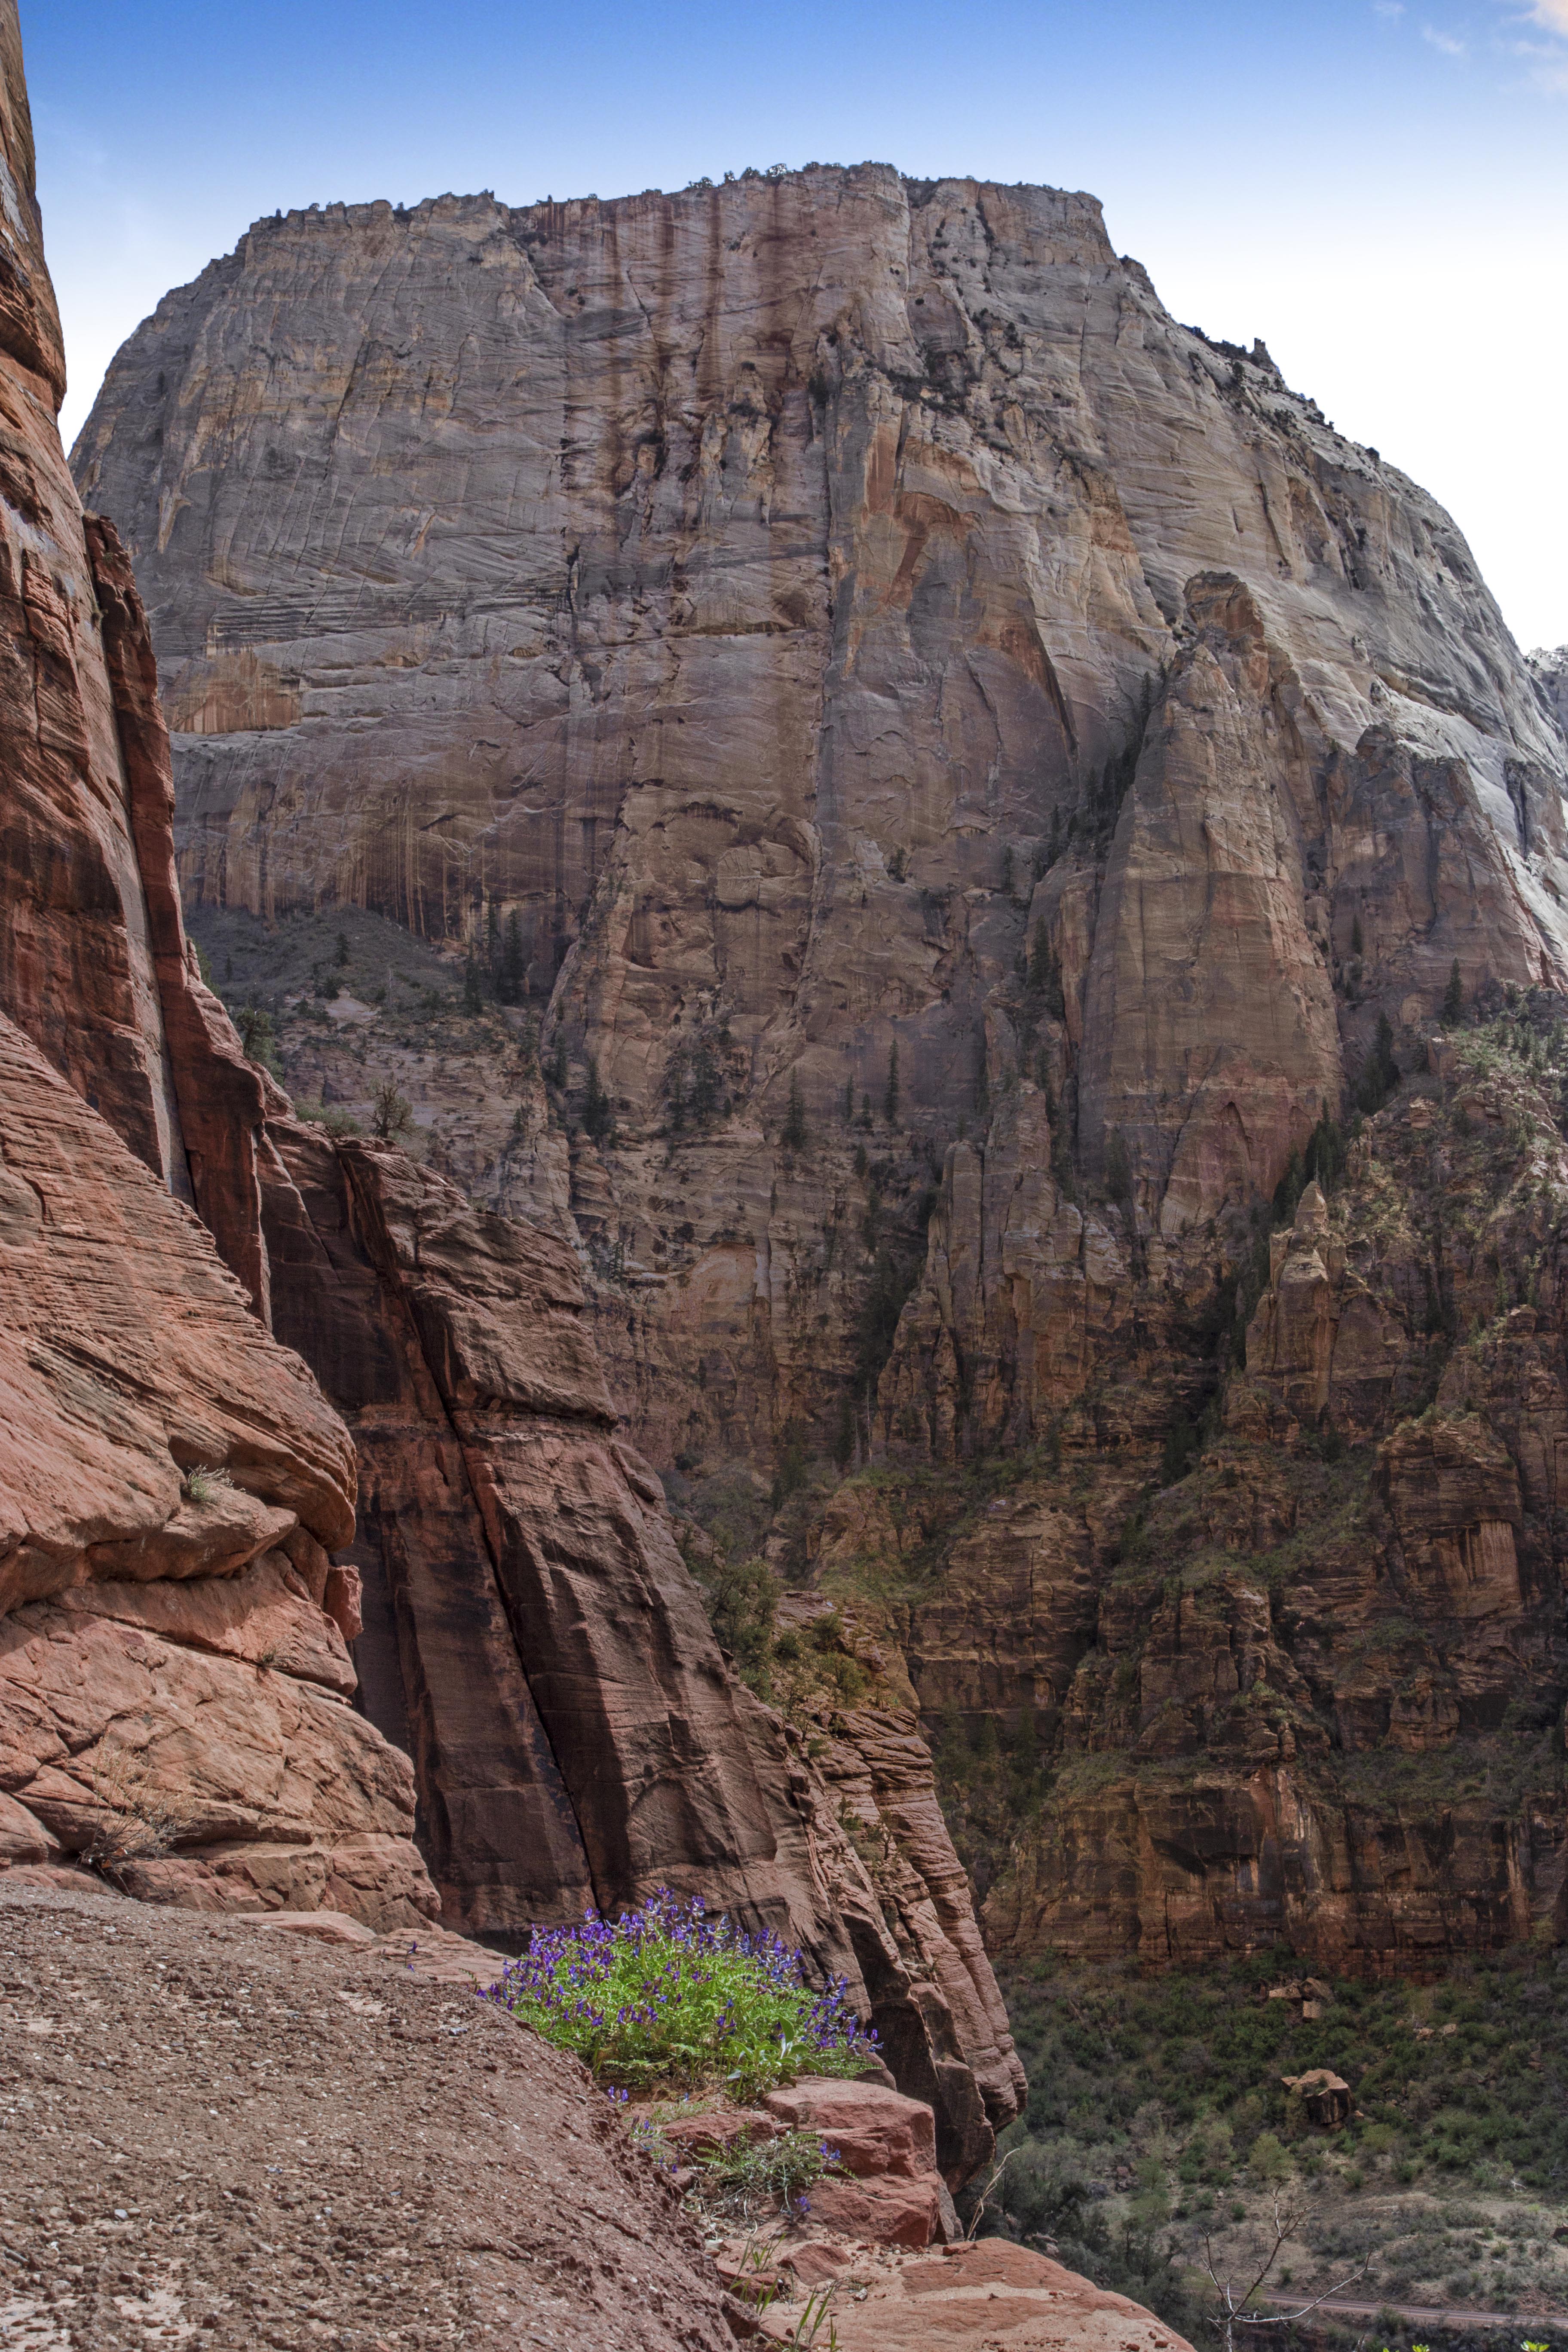
More steep switchbacks leave you on a plateau where you can catch your breath before the last steep pitch along a knife’s edge to the top…


The view down the valley is breathtaking.
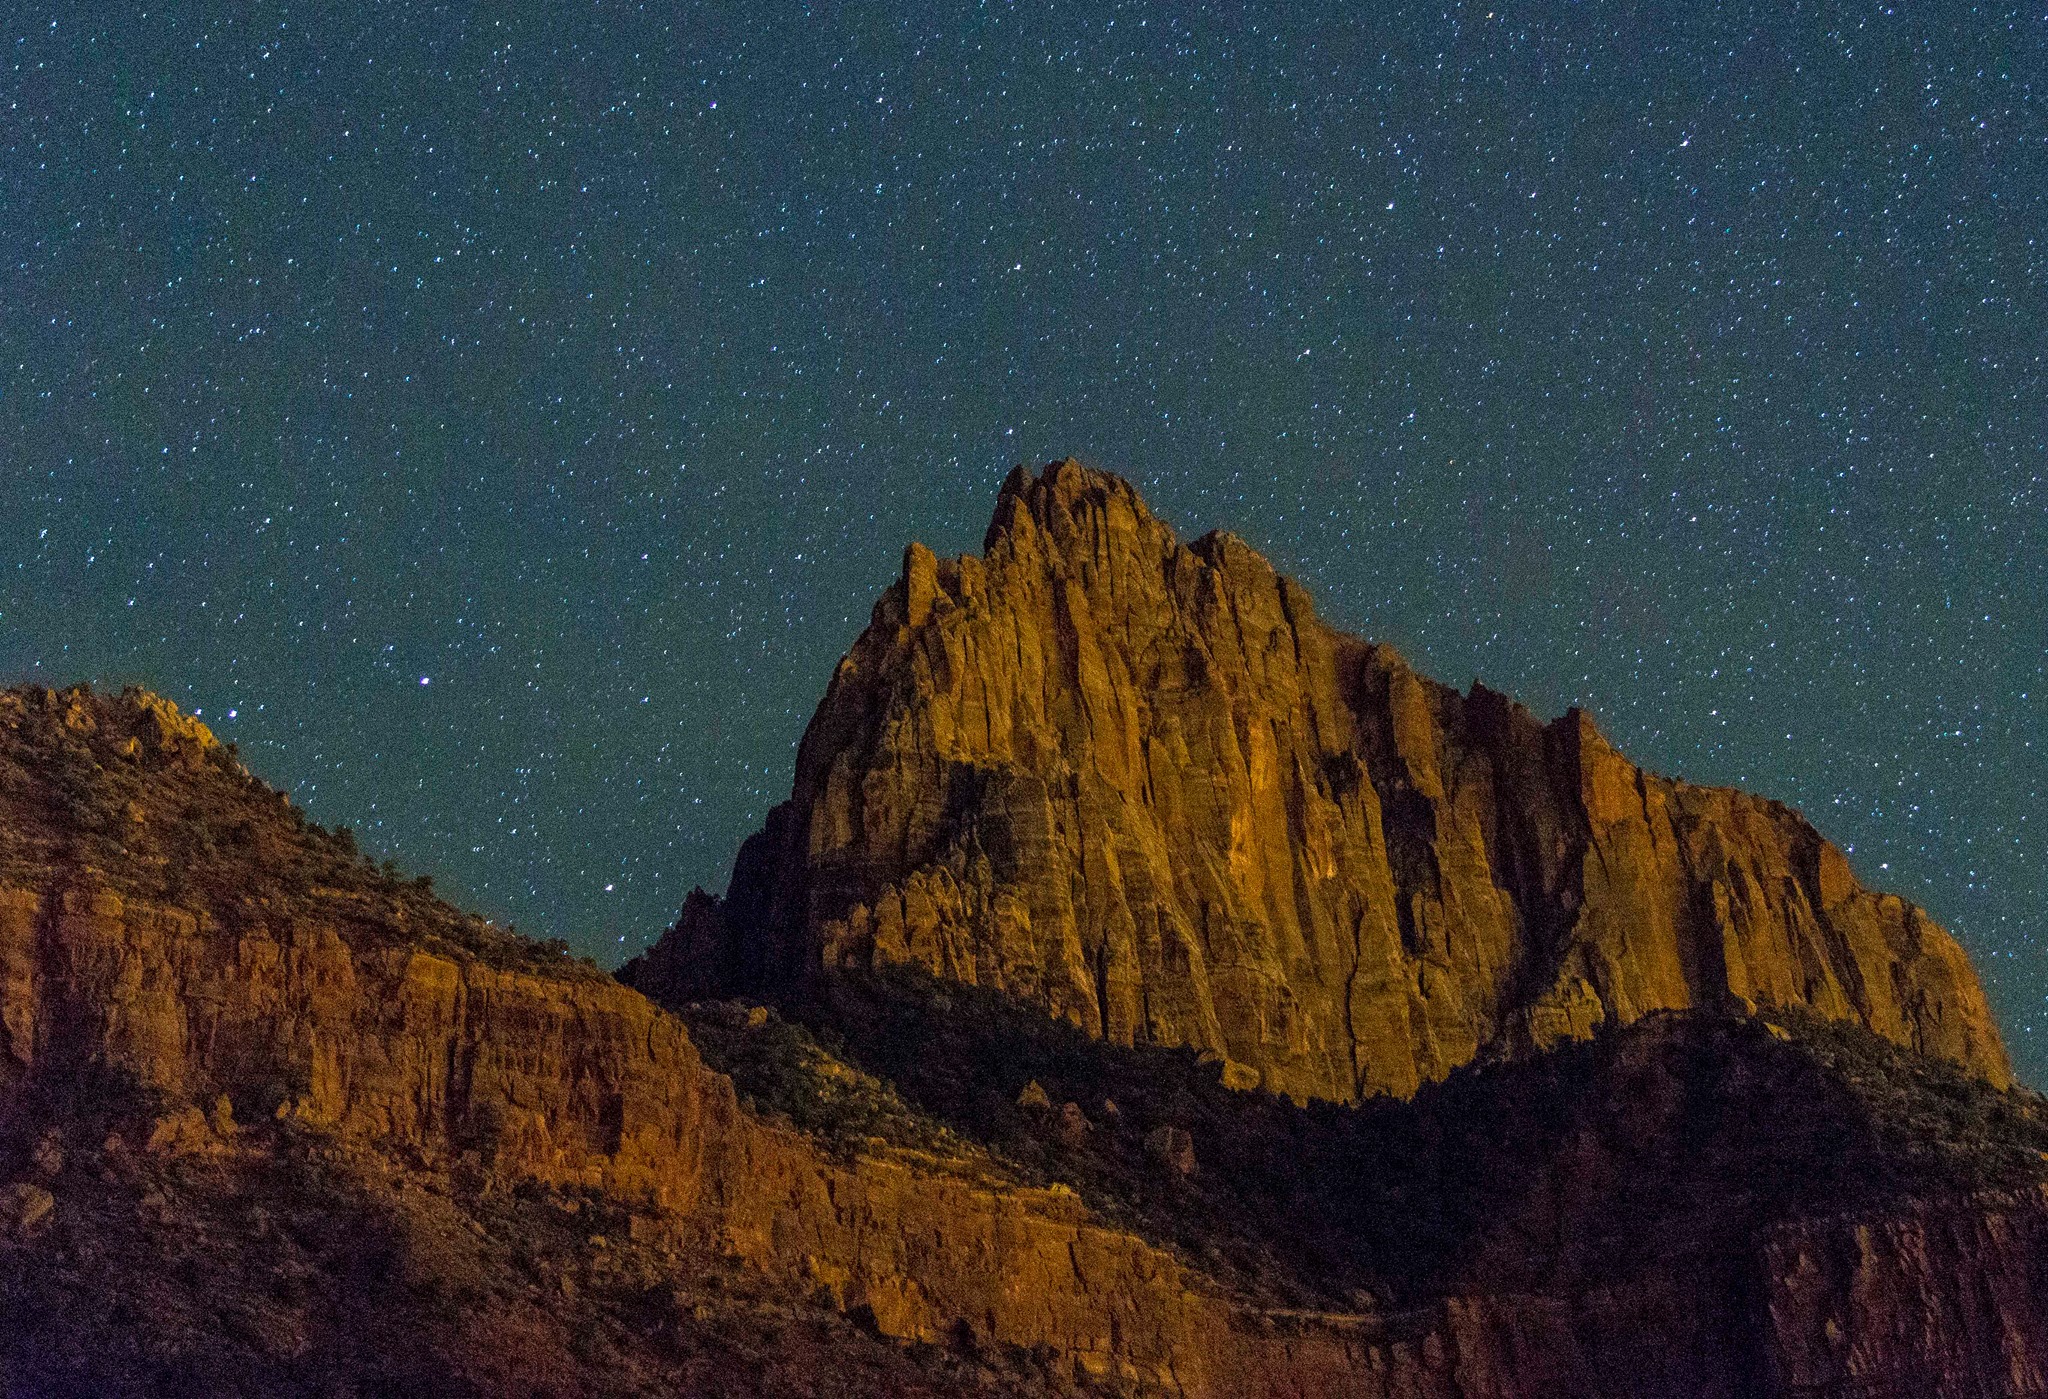
The Watchman provided a sweet backdrop for the stars at night.
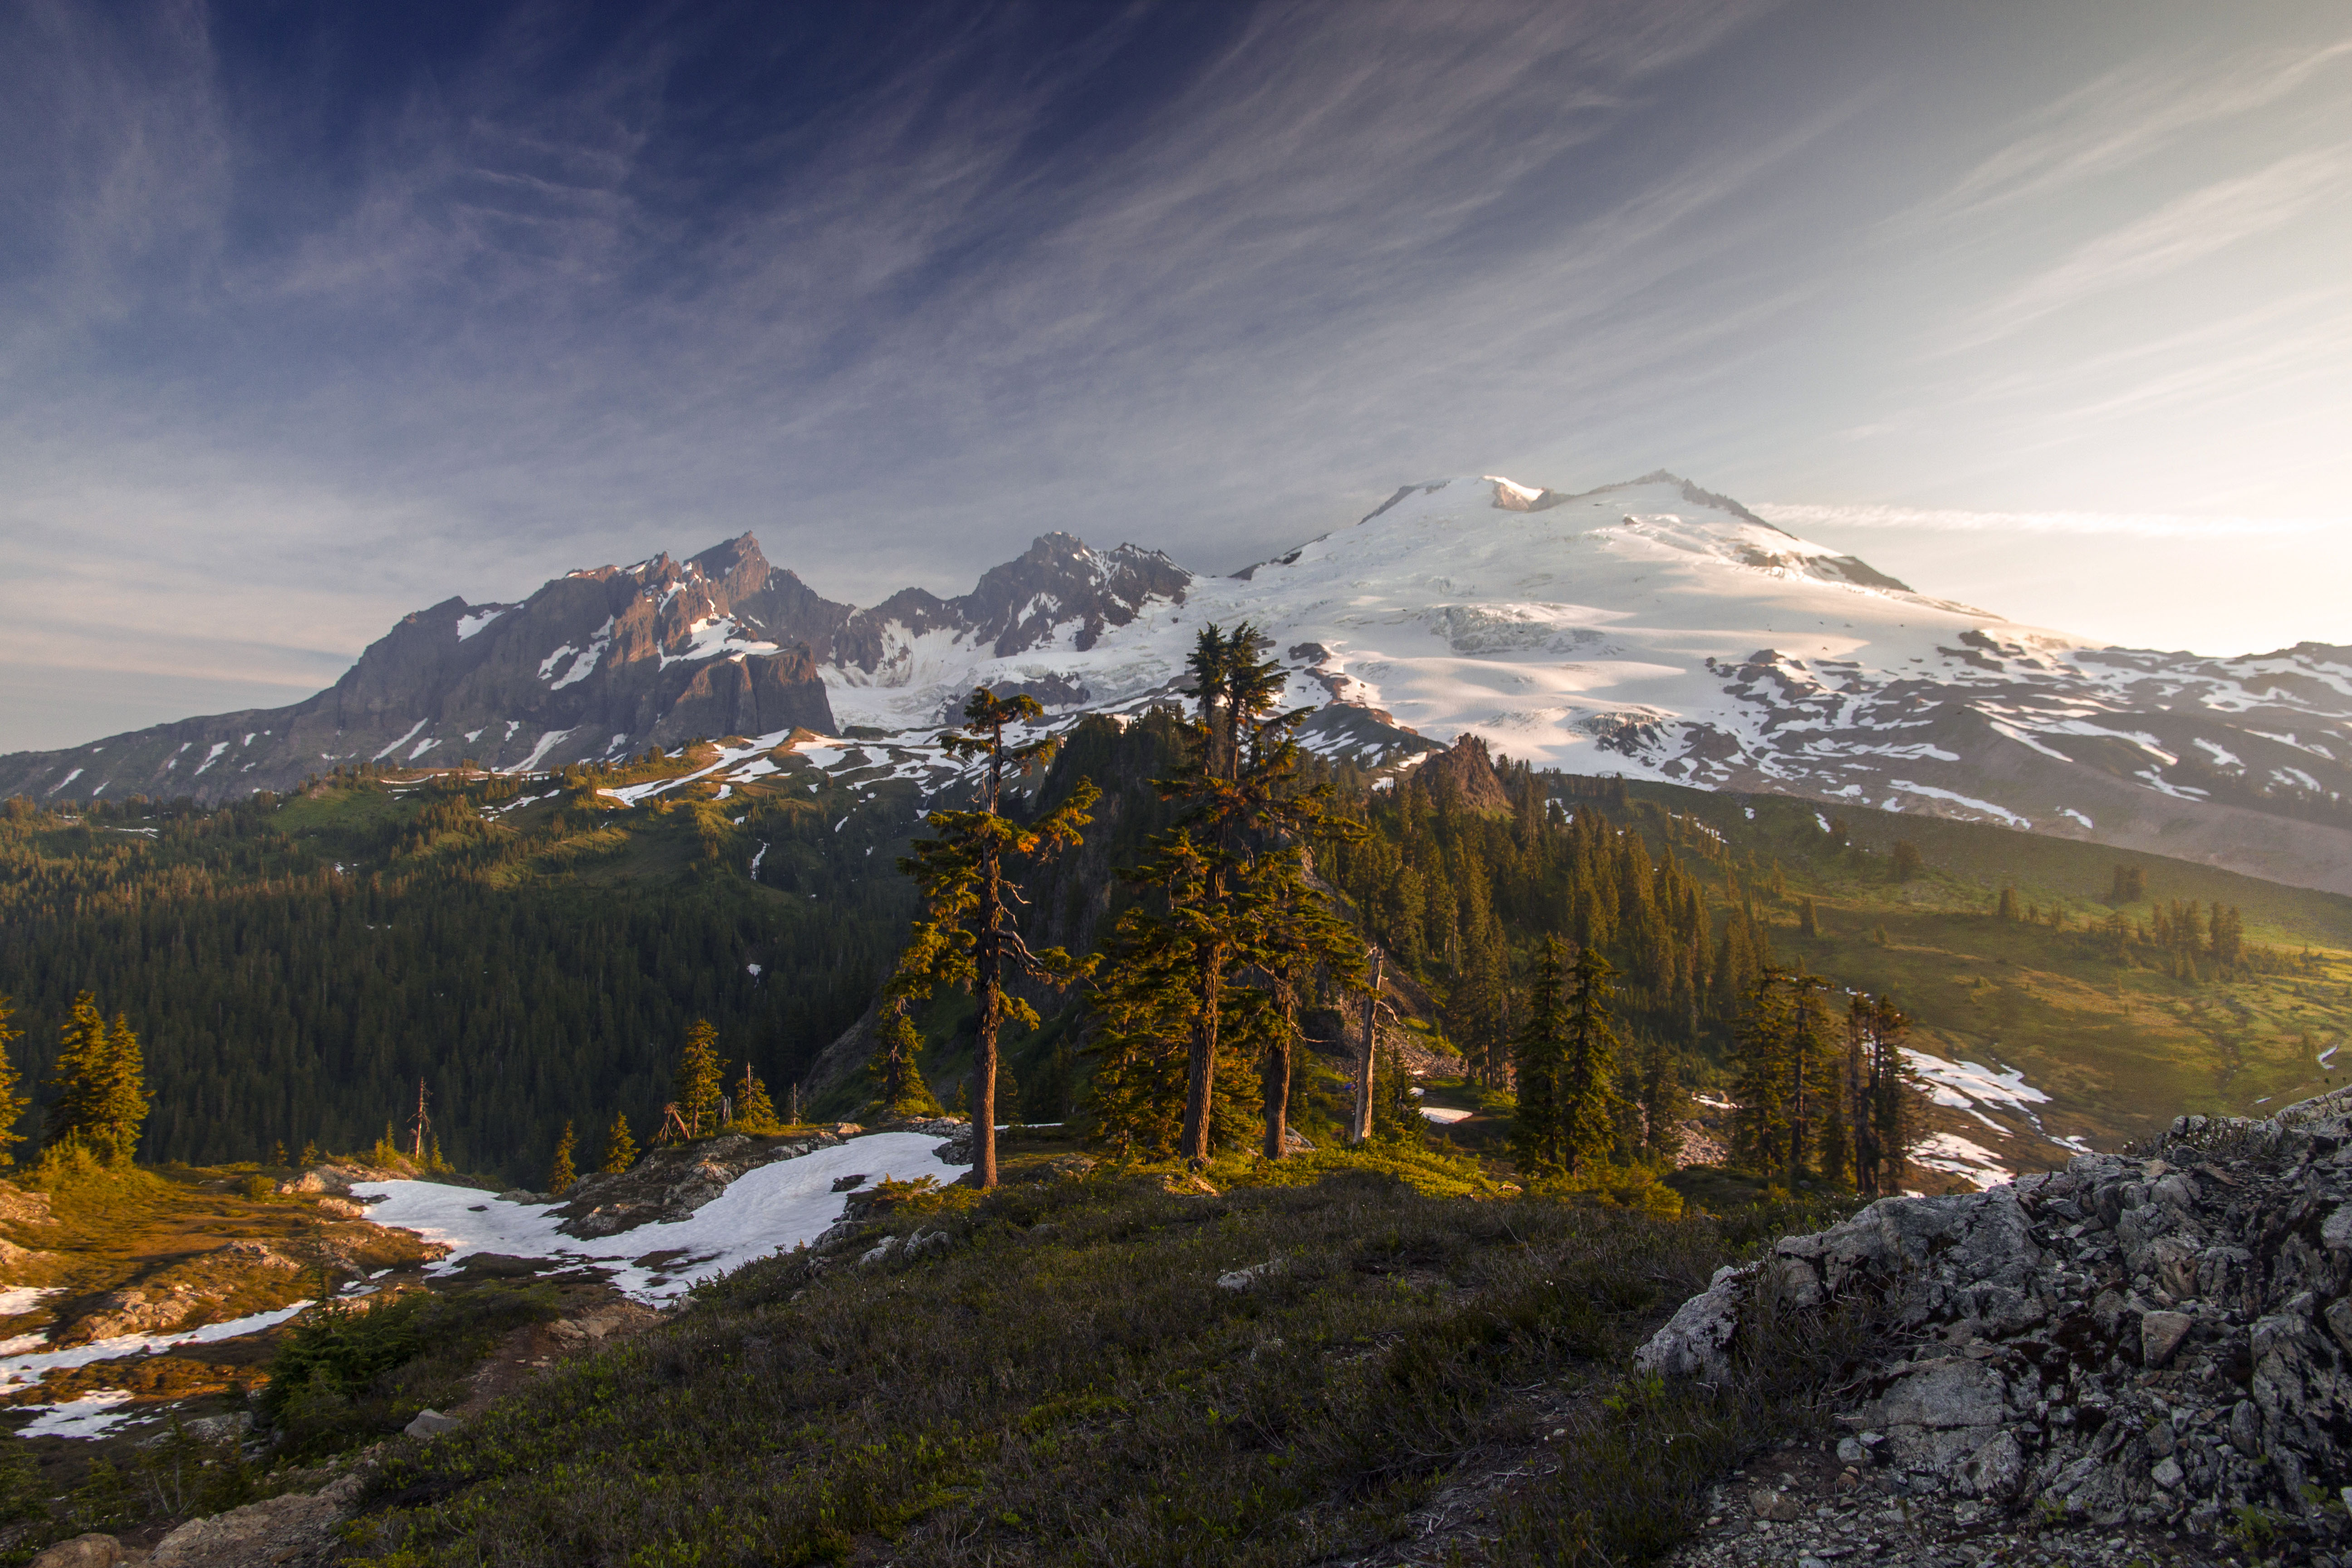
These images of Mount Baker were captured from the Park Butte Trail, on the south side of the mountain.

I had stayed overnight at the lookout tower and was on the way down at sunrise.

The rock formations on the left side of Mount Baker are called the Black Buttes.

Merry Christmas!
When composing a landscape shot there are many cool things to look for: a dramatic sky, any sort of reflection, a near and far effect and any lines which can pull the viewer into and around or through the image.
Lines present themselves with surprising regularity. I have not mastered the use of lines yet, by any stretch, but I love working to incorporate them into my compositions.
As I do a lot of backpacking and hiking trails are an often used line…

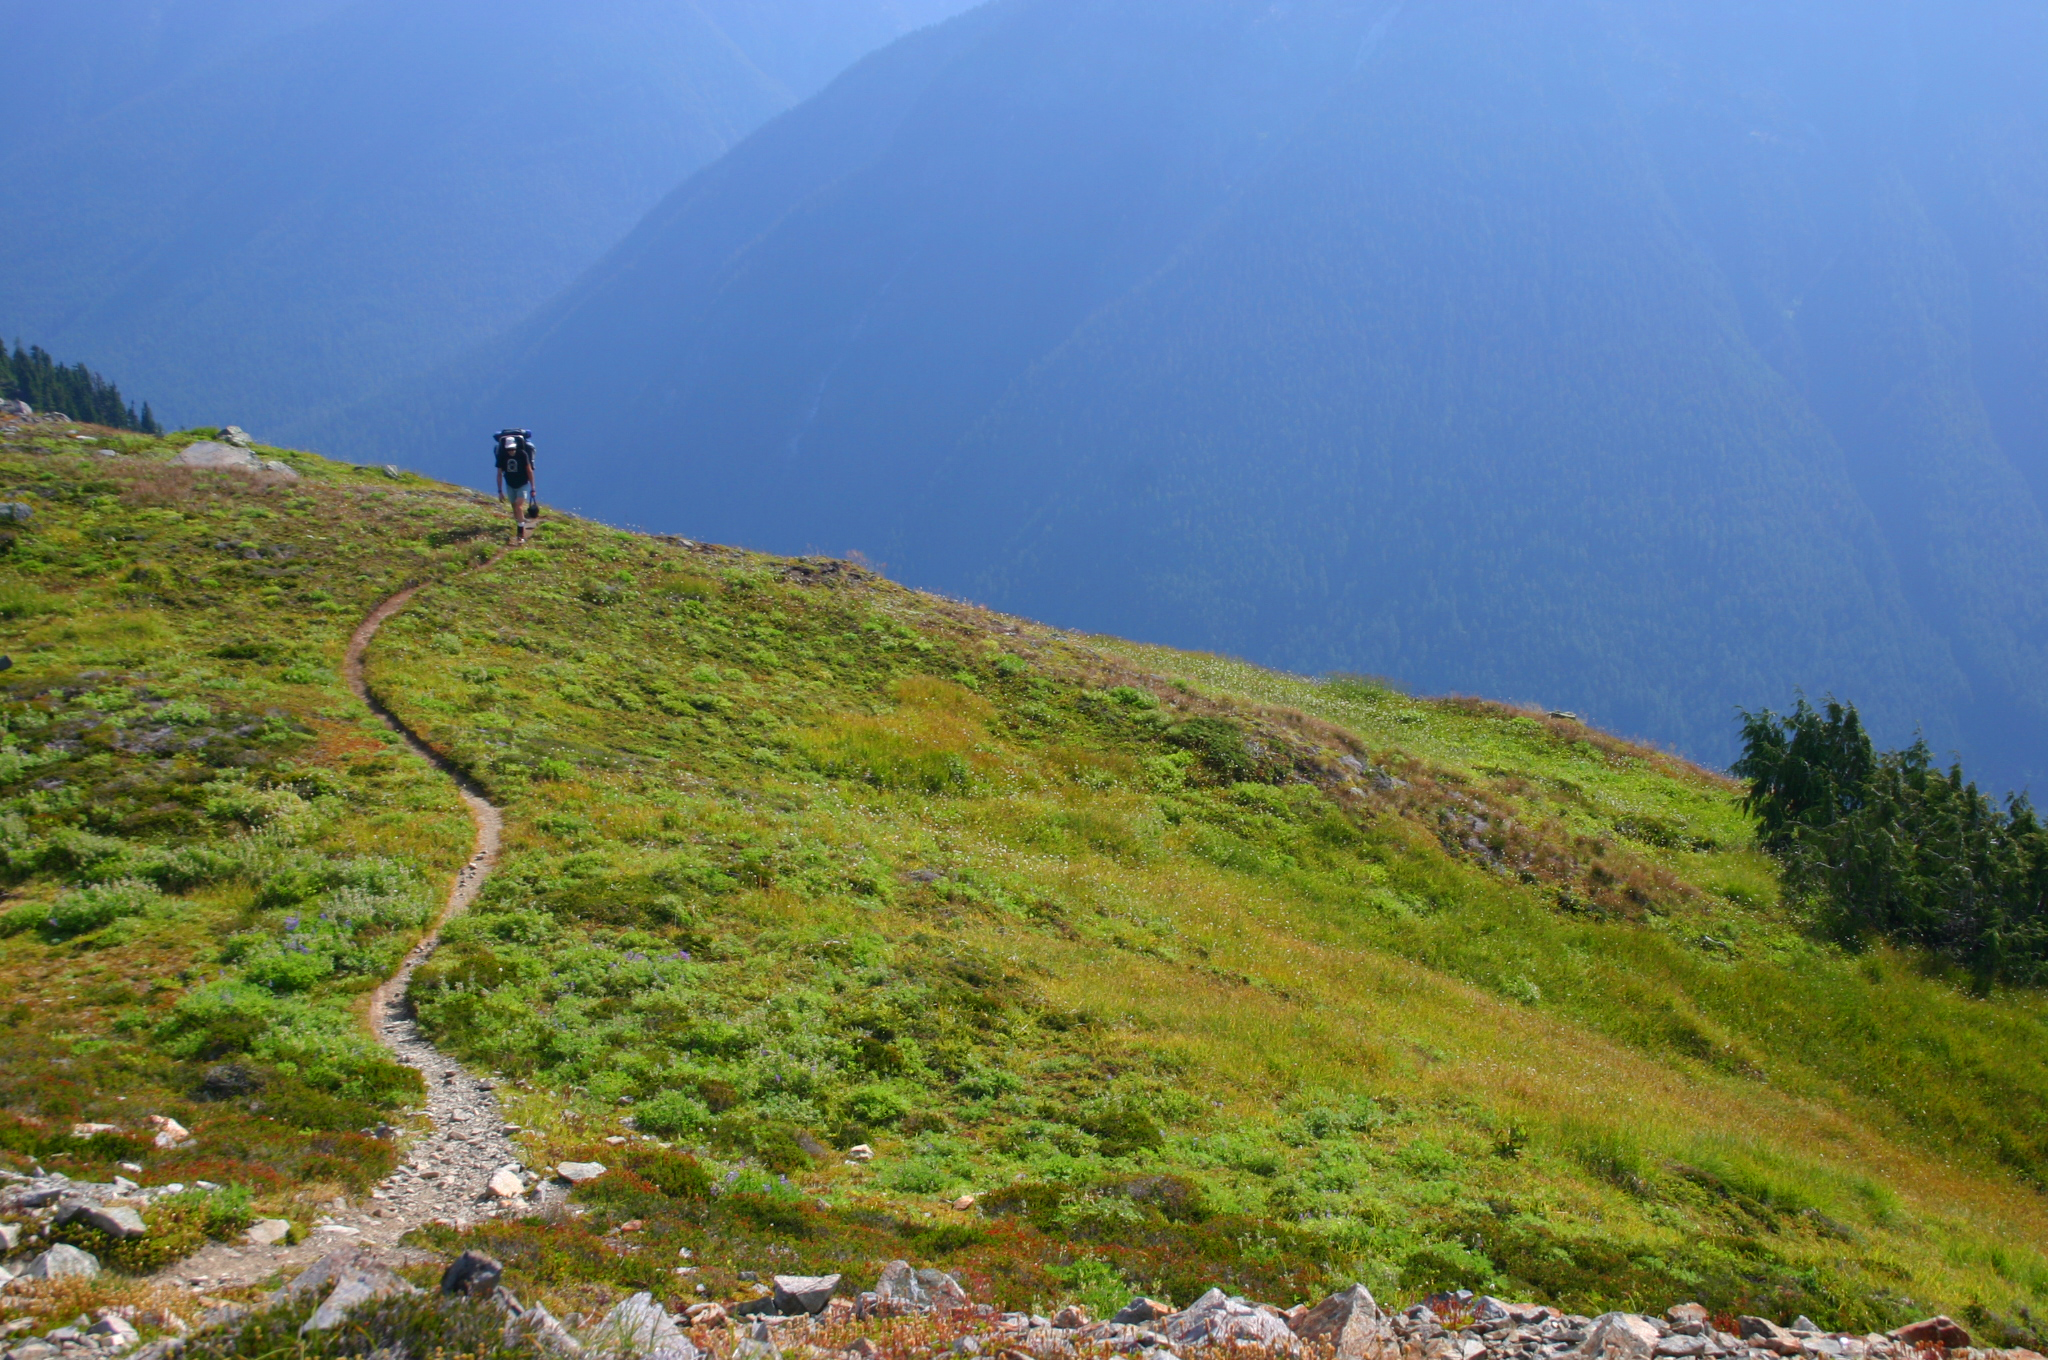
It seems to me that the zig-zaggy lines work better then the straight ones…

The image below benefits from a diagonal line originating at the lower left corner.
Of course roads already have lines painted on them and make a simple target! 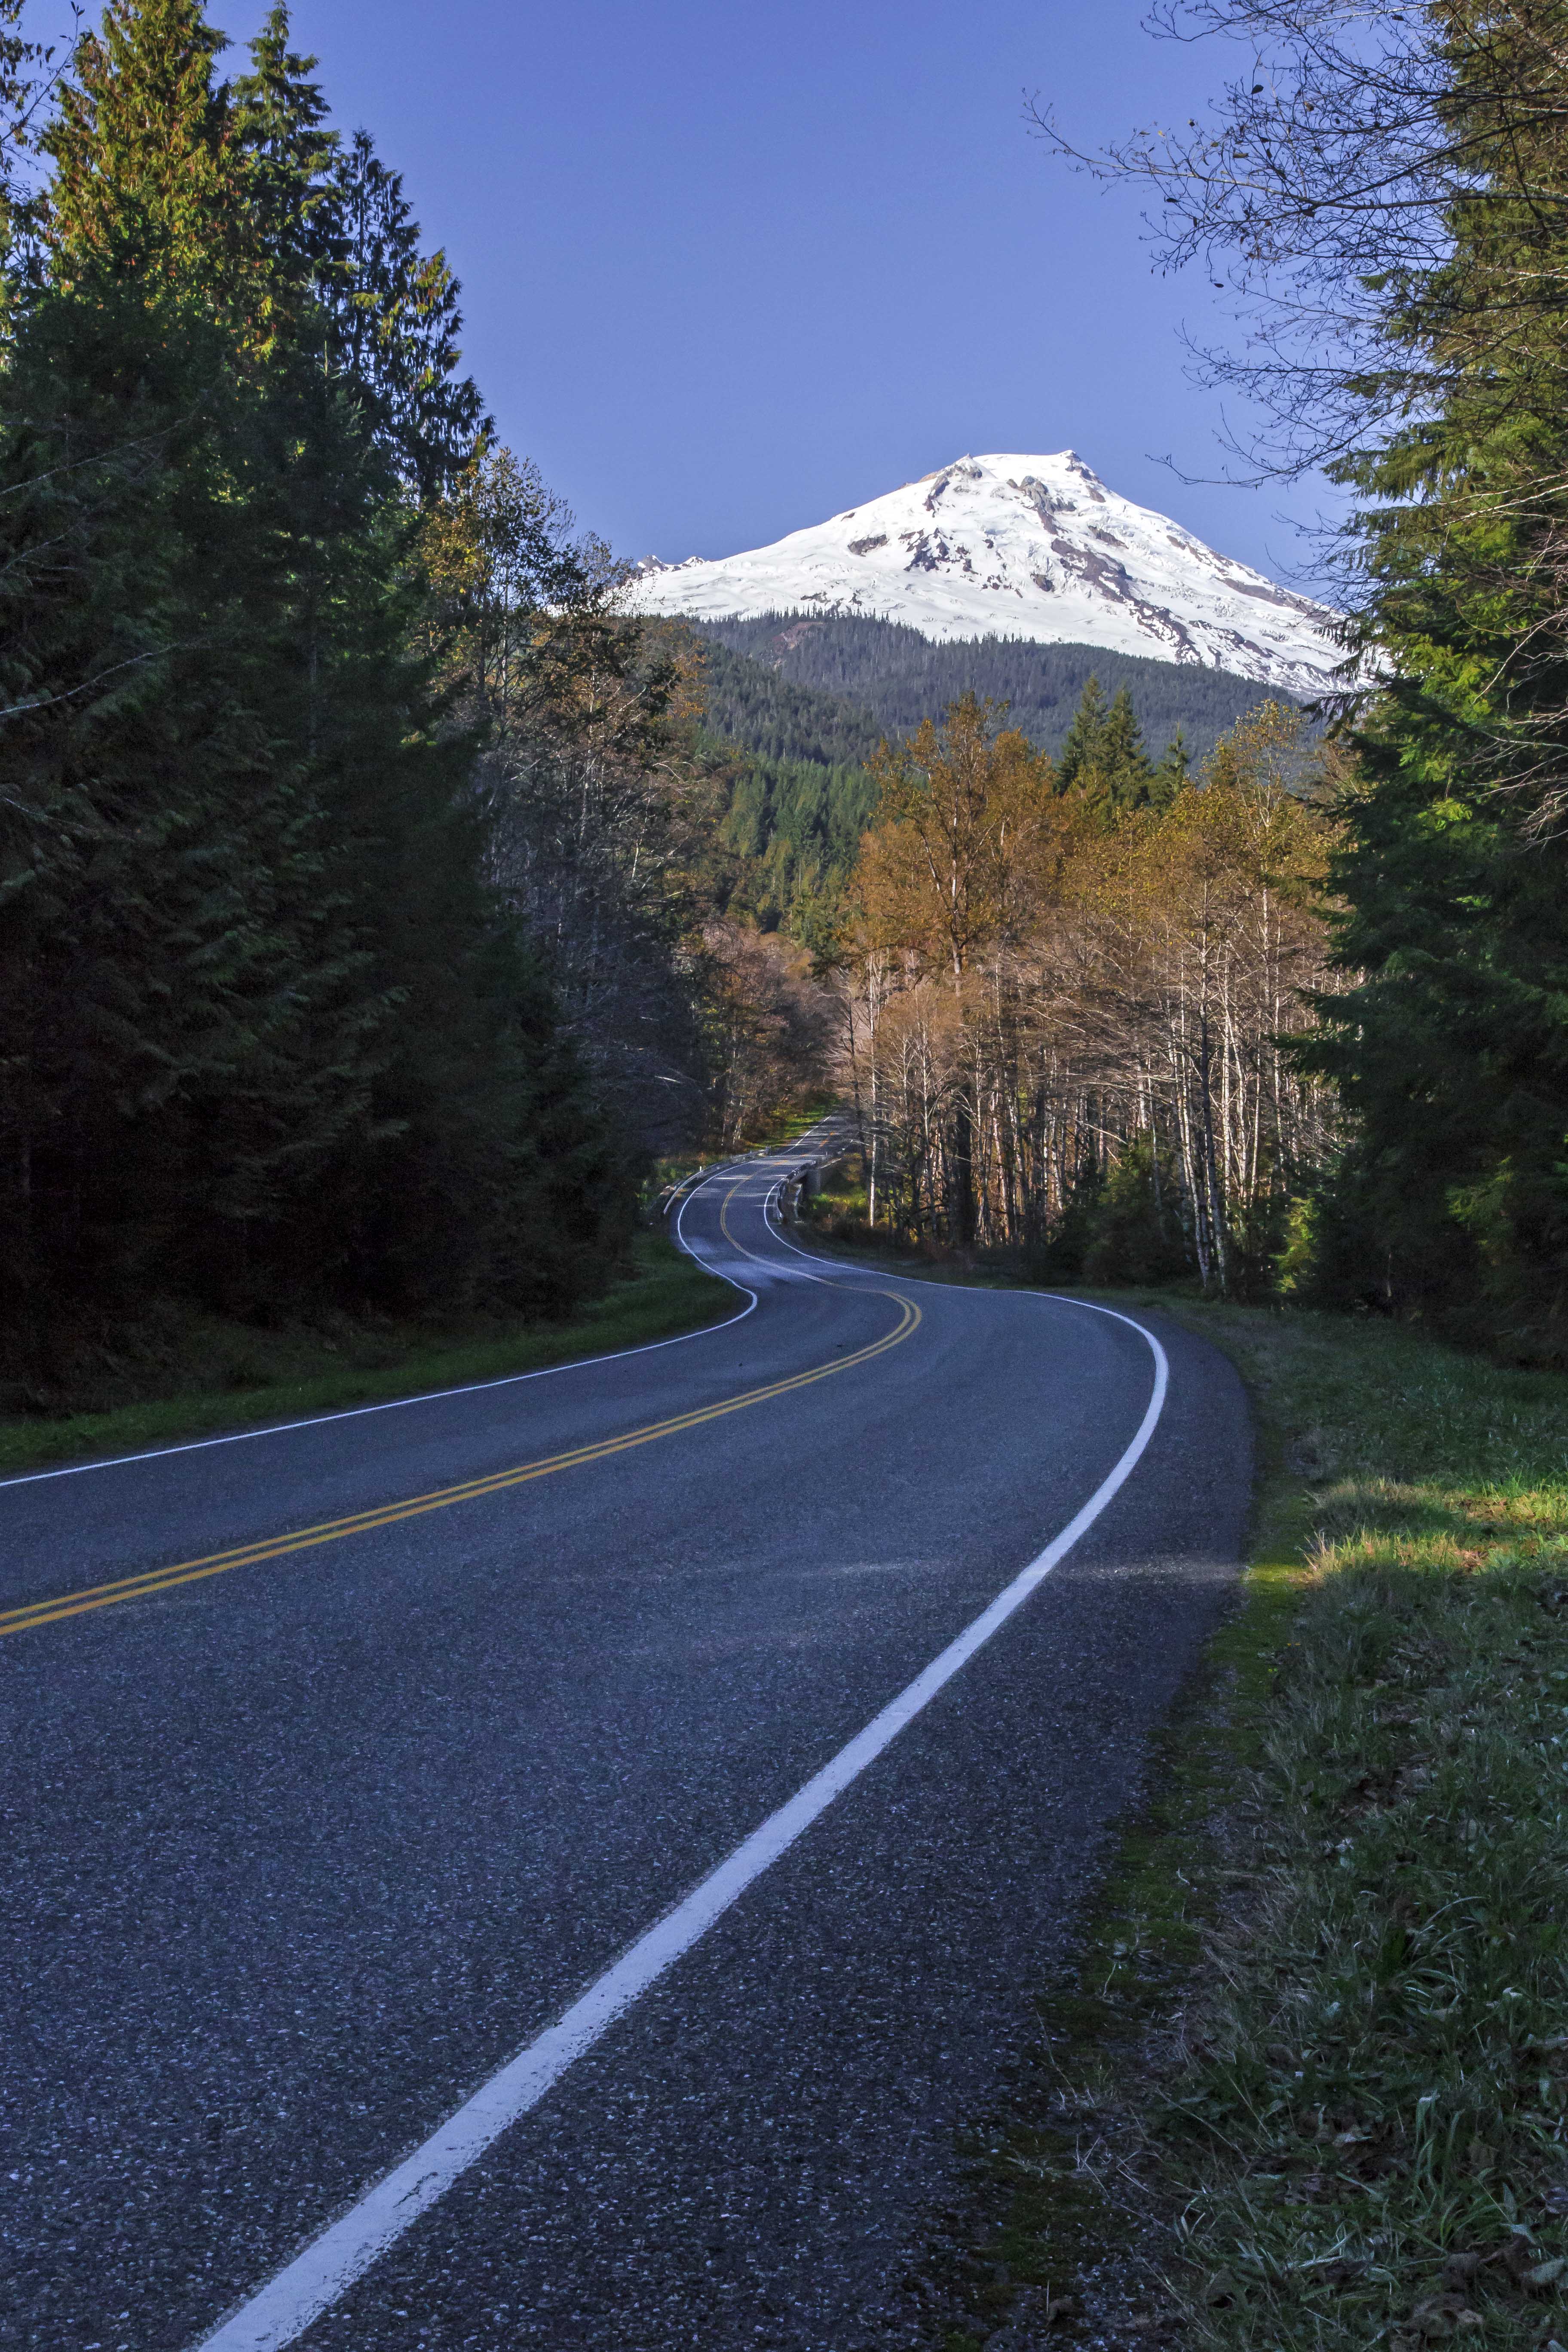
Here mud and stone provide lines into the light…

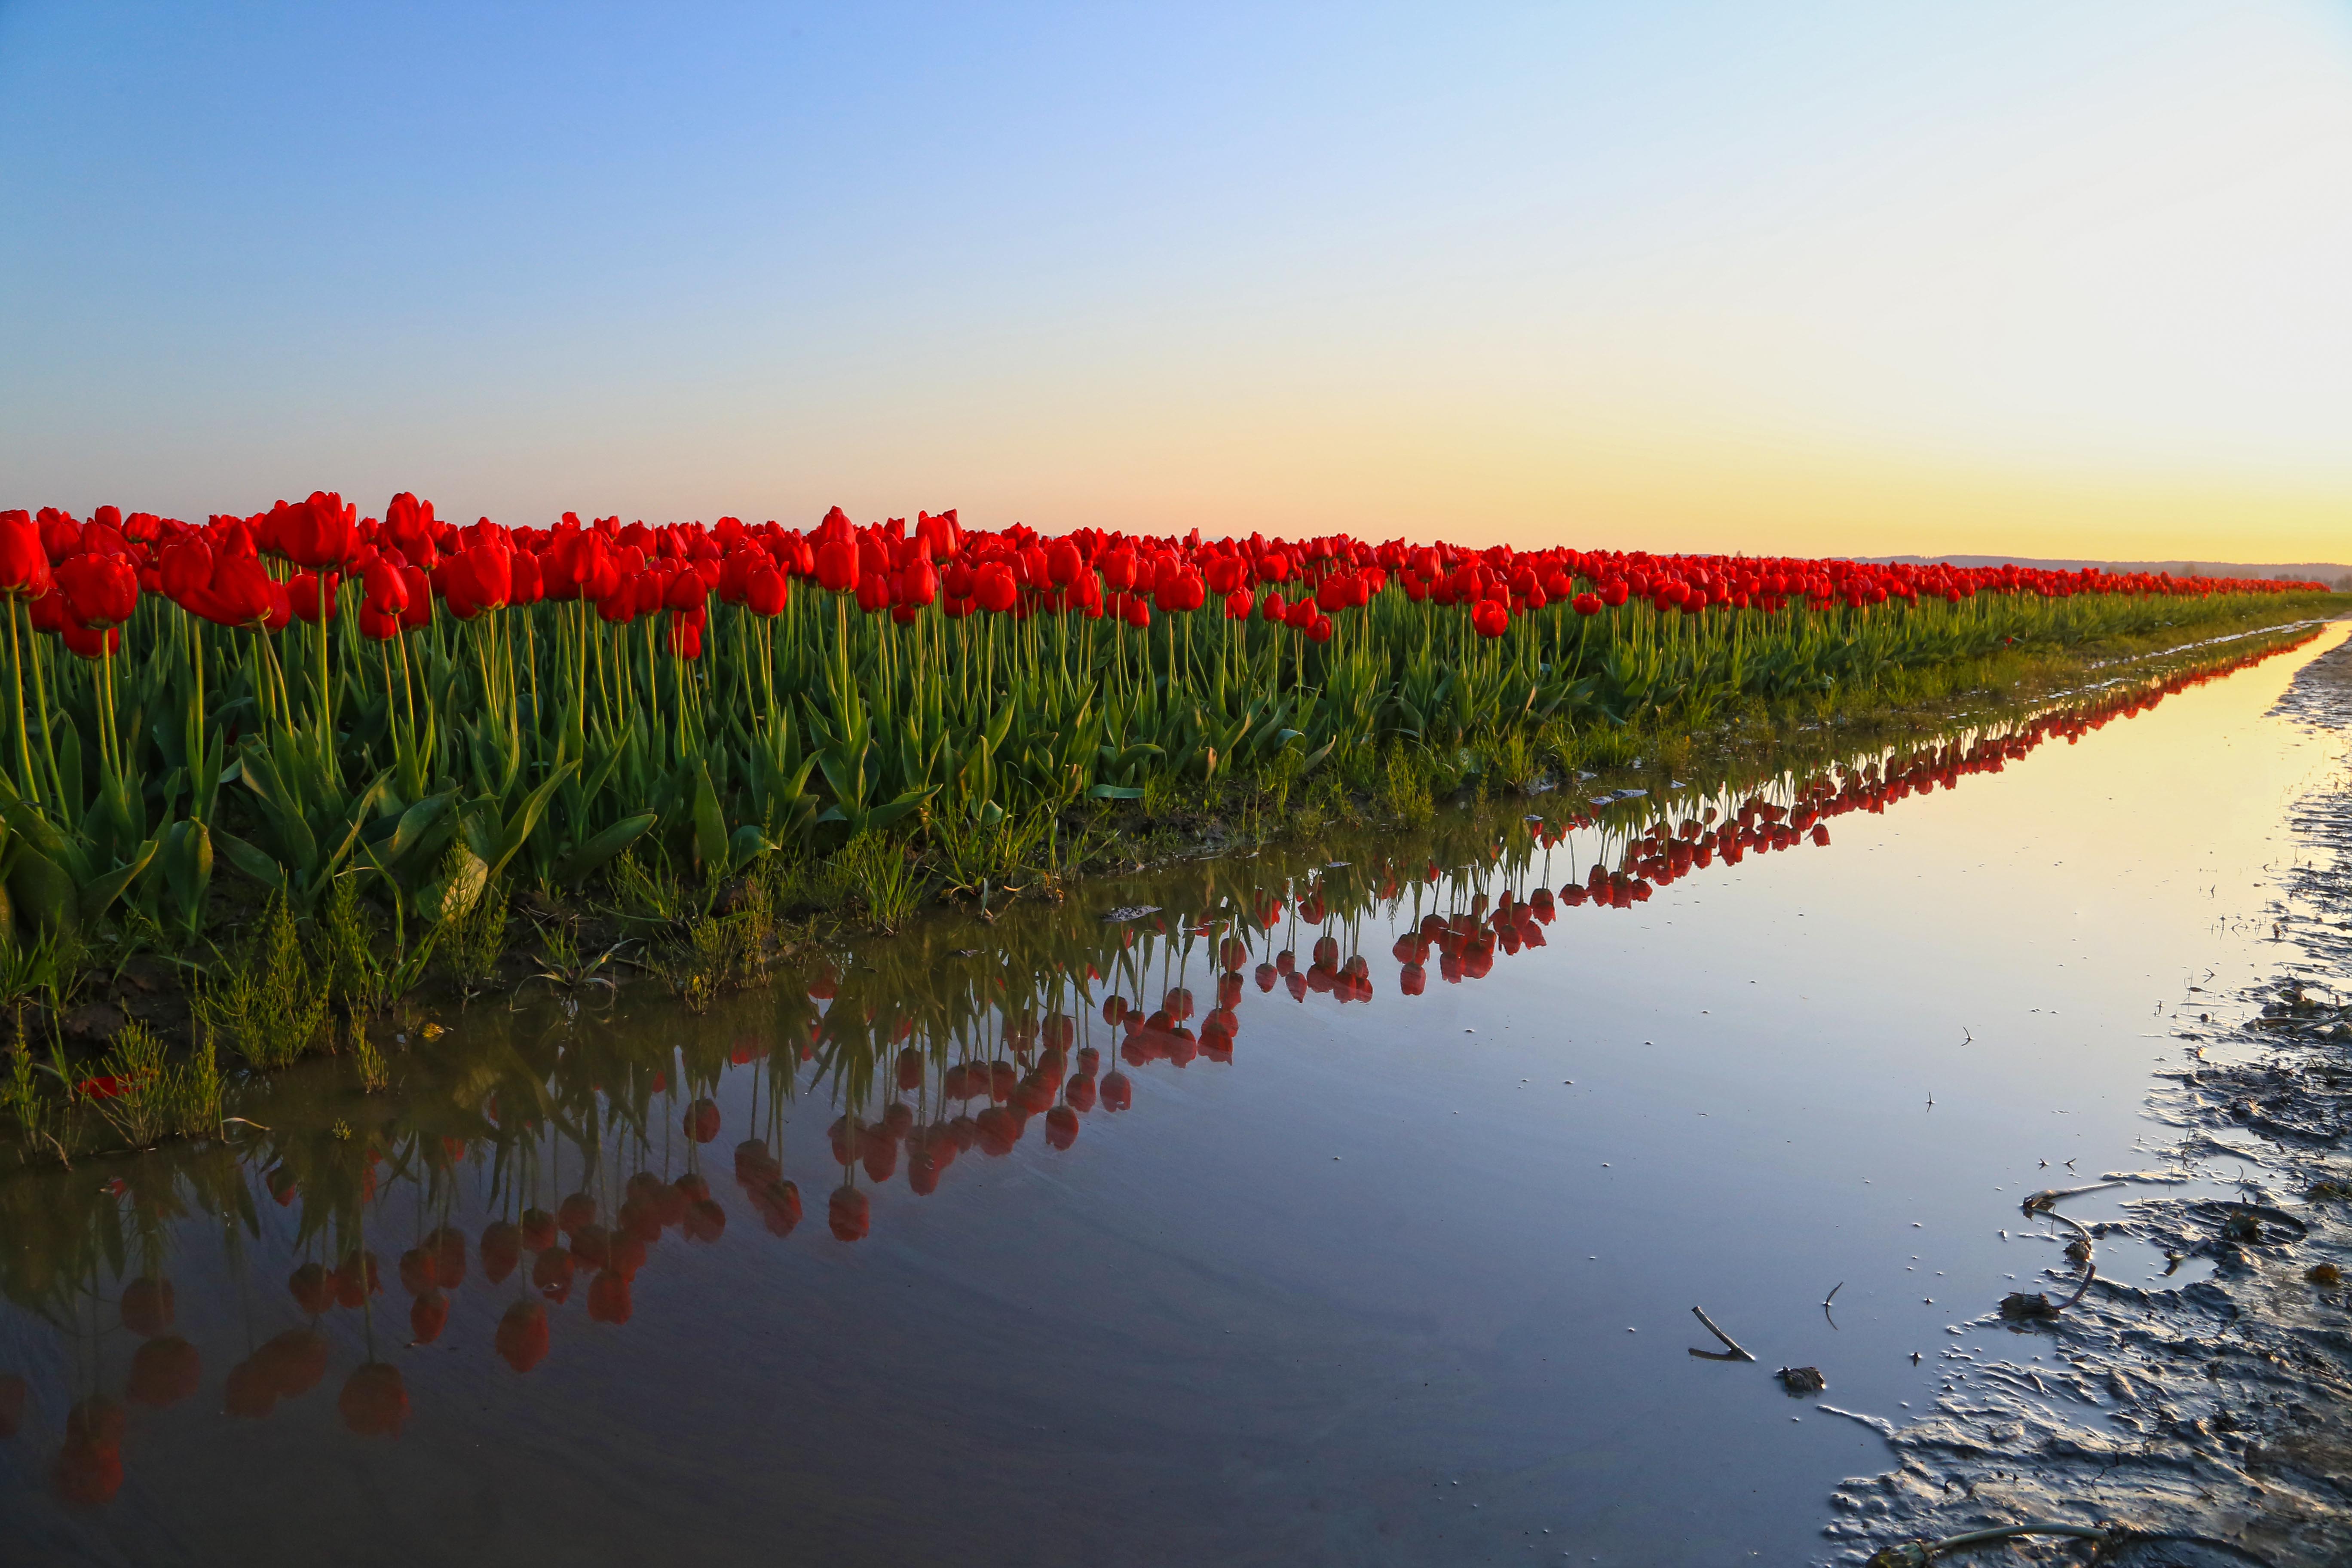
During Tulip Festival the opportunities for capturing lines amongst the rows is endless.
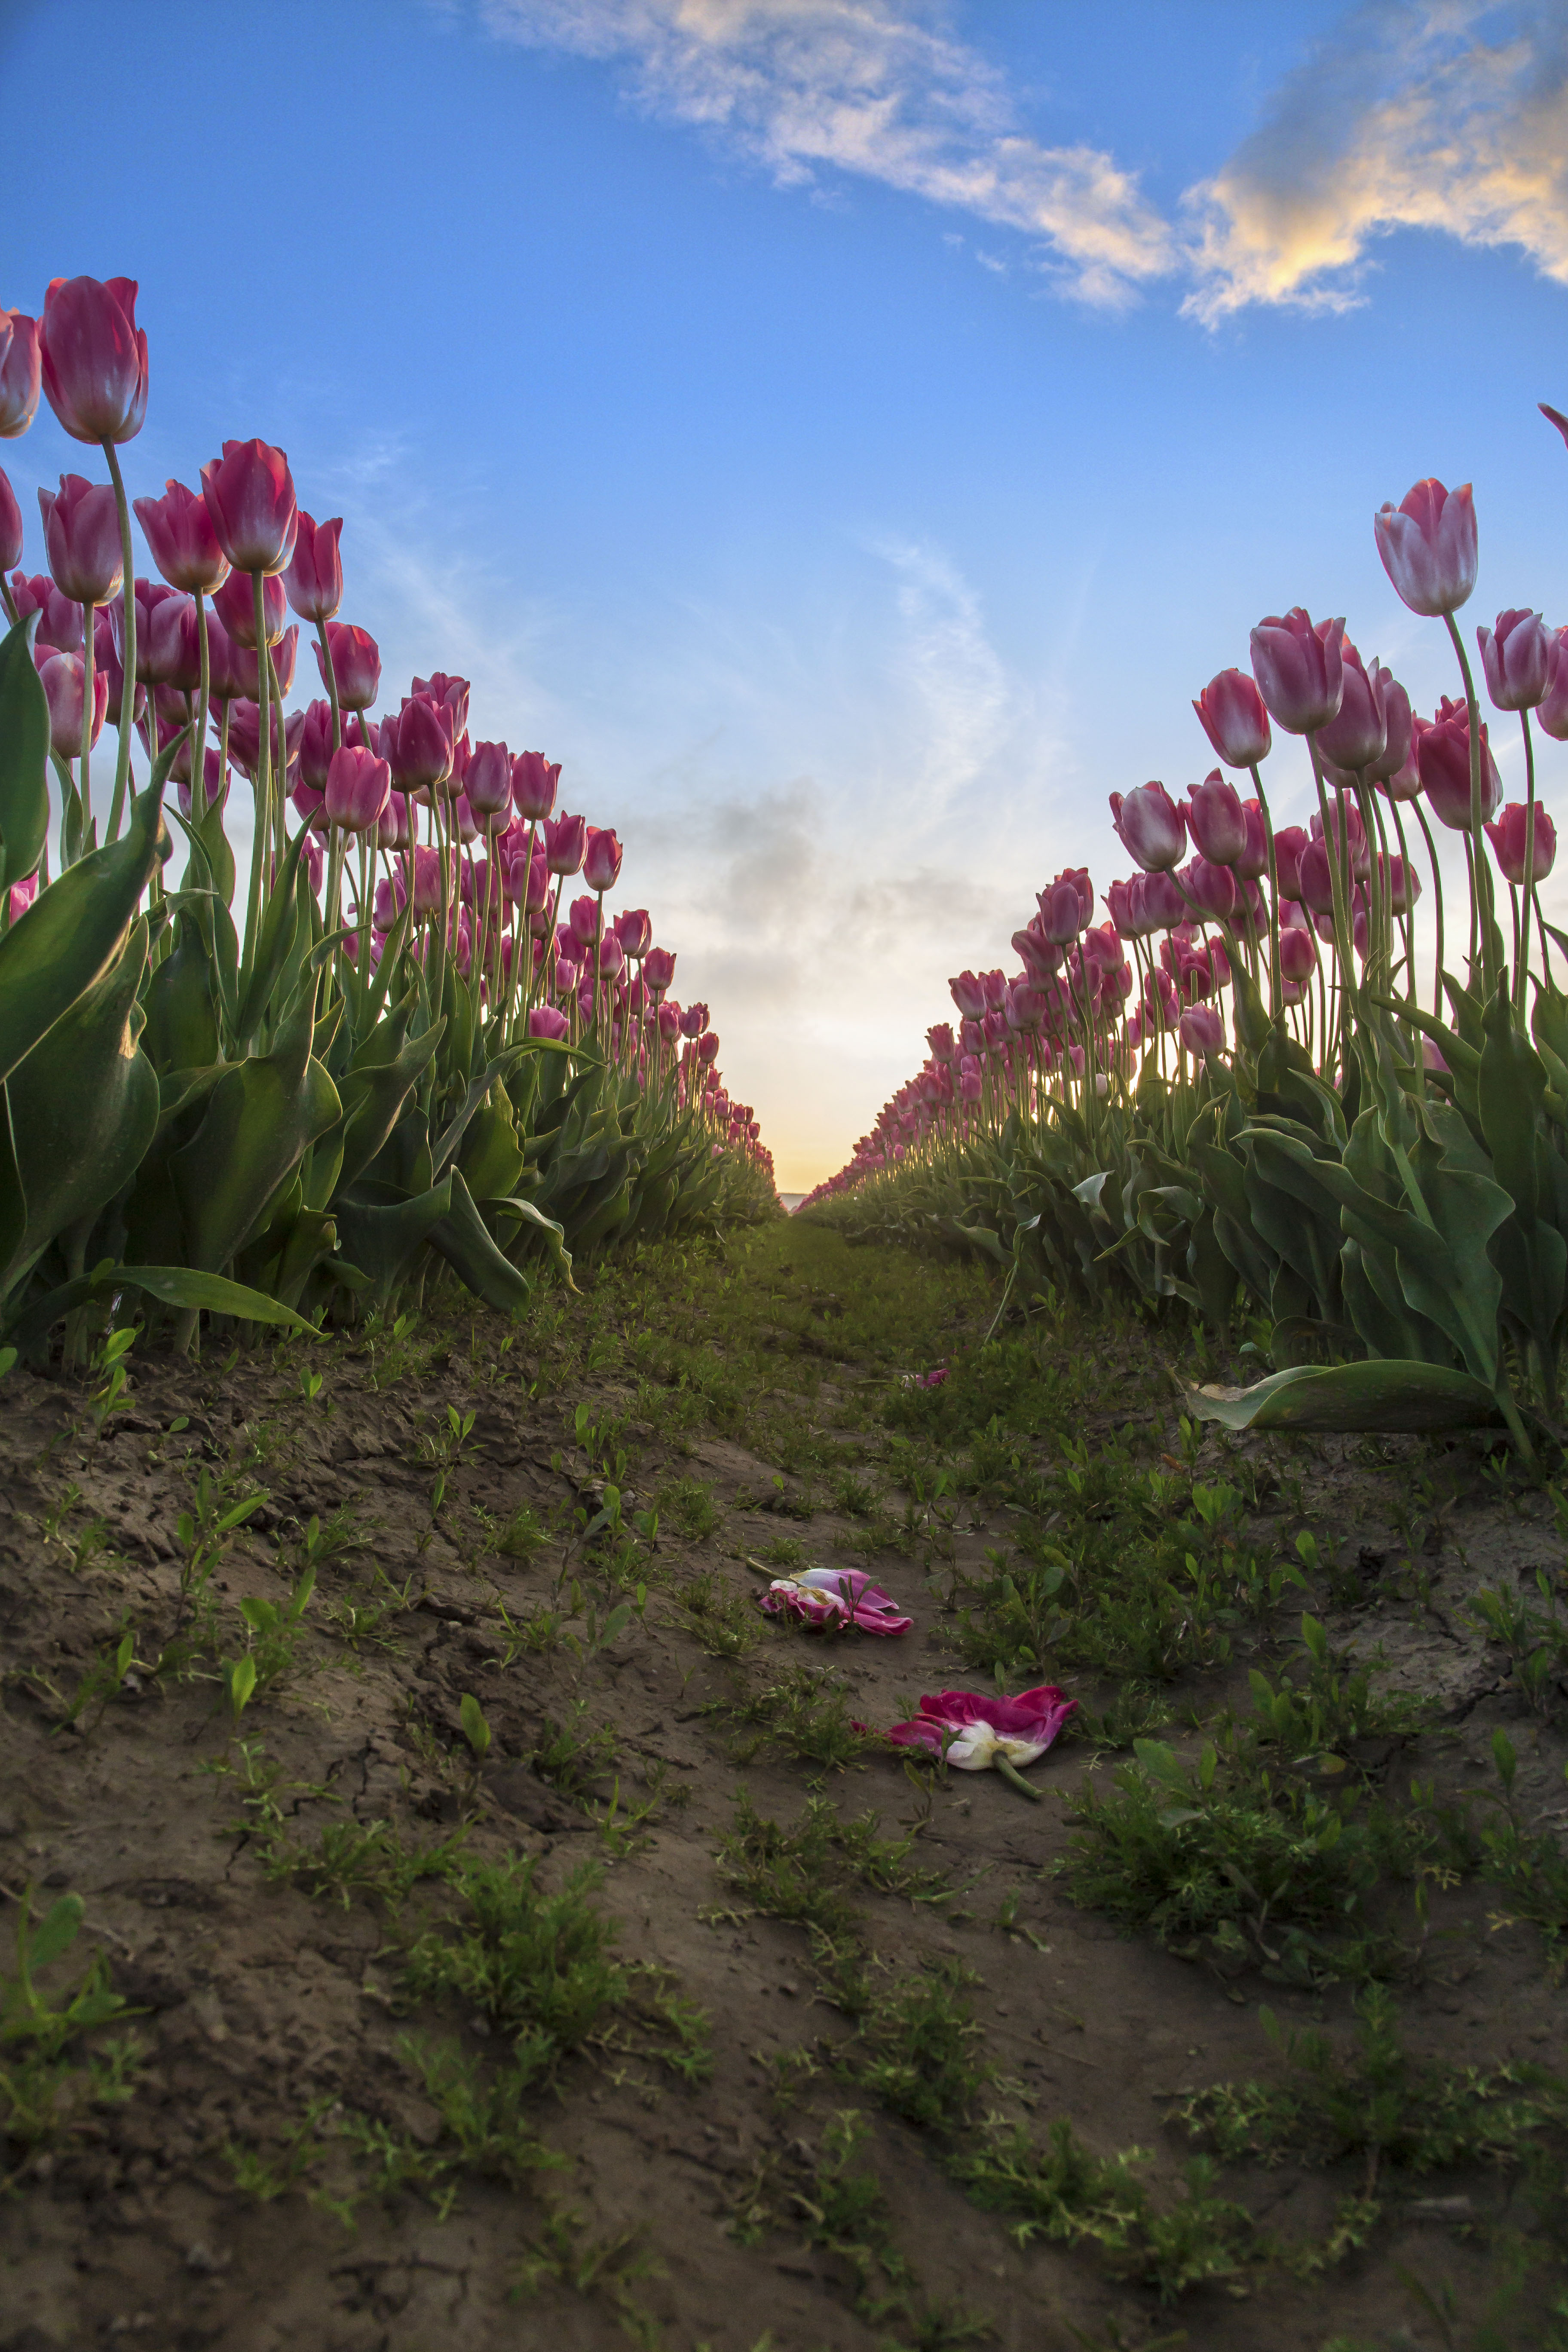
Straight…

or curved…

lines add a powerful dimension to any image!
Here is a link to the next series of classes! Look for a Photoshop Class Coming soon!
I am probably preaching to the choir here, but if you are not capturing your images in the RAW format you are really missing out.
For some years I set my camera to capture the largest JPEG file available and modified the images in Photoshop. I learned many cool techniques for selecting and altering the color, tone, contrast and more of these JPEG images.
About 2 years ago I changed my camera settings so that the images are captured as both JPEGs and RAW.
Since then I have studied how to make alterations to the RAW images and the difference is astounding. I found that when you start with a RAW image that you can make alterations to your shot so much easier.
Photoshop CS6 offers a simple set of controls for RAW images, modifying the lens distortion is an easy fix. Saturation also becomes SO much easier to alter, in the RAW format you can selectively change the saturation, brightness or tone of one color at a time.
Here is an example: This first image is the original shot.

This second image was modified as a RAW image in CS6.

Here is another shot. First the original,

then the altered RAW shot.

Have a close look at the boards on the barn, and the sky. There is no way that I could have made these changes as clearly and quickly if I started with a JPEG shot.
Without a doubt start to capture in the RAW format now. Even if you don’t currently have the software to alter images in the RAW format, do it anyway! Some day you will have the ability (software, time, interest, etc) to work with the RAW images and you will be most happy that you shot in RAW!!!
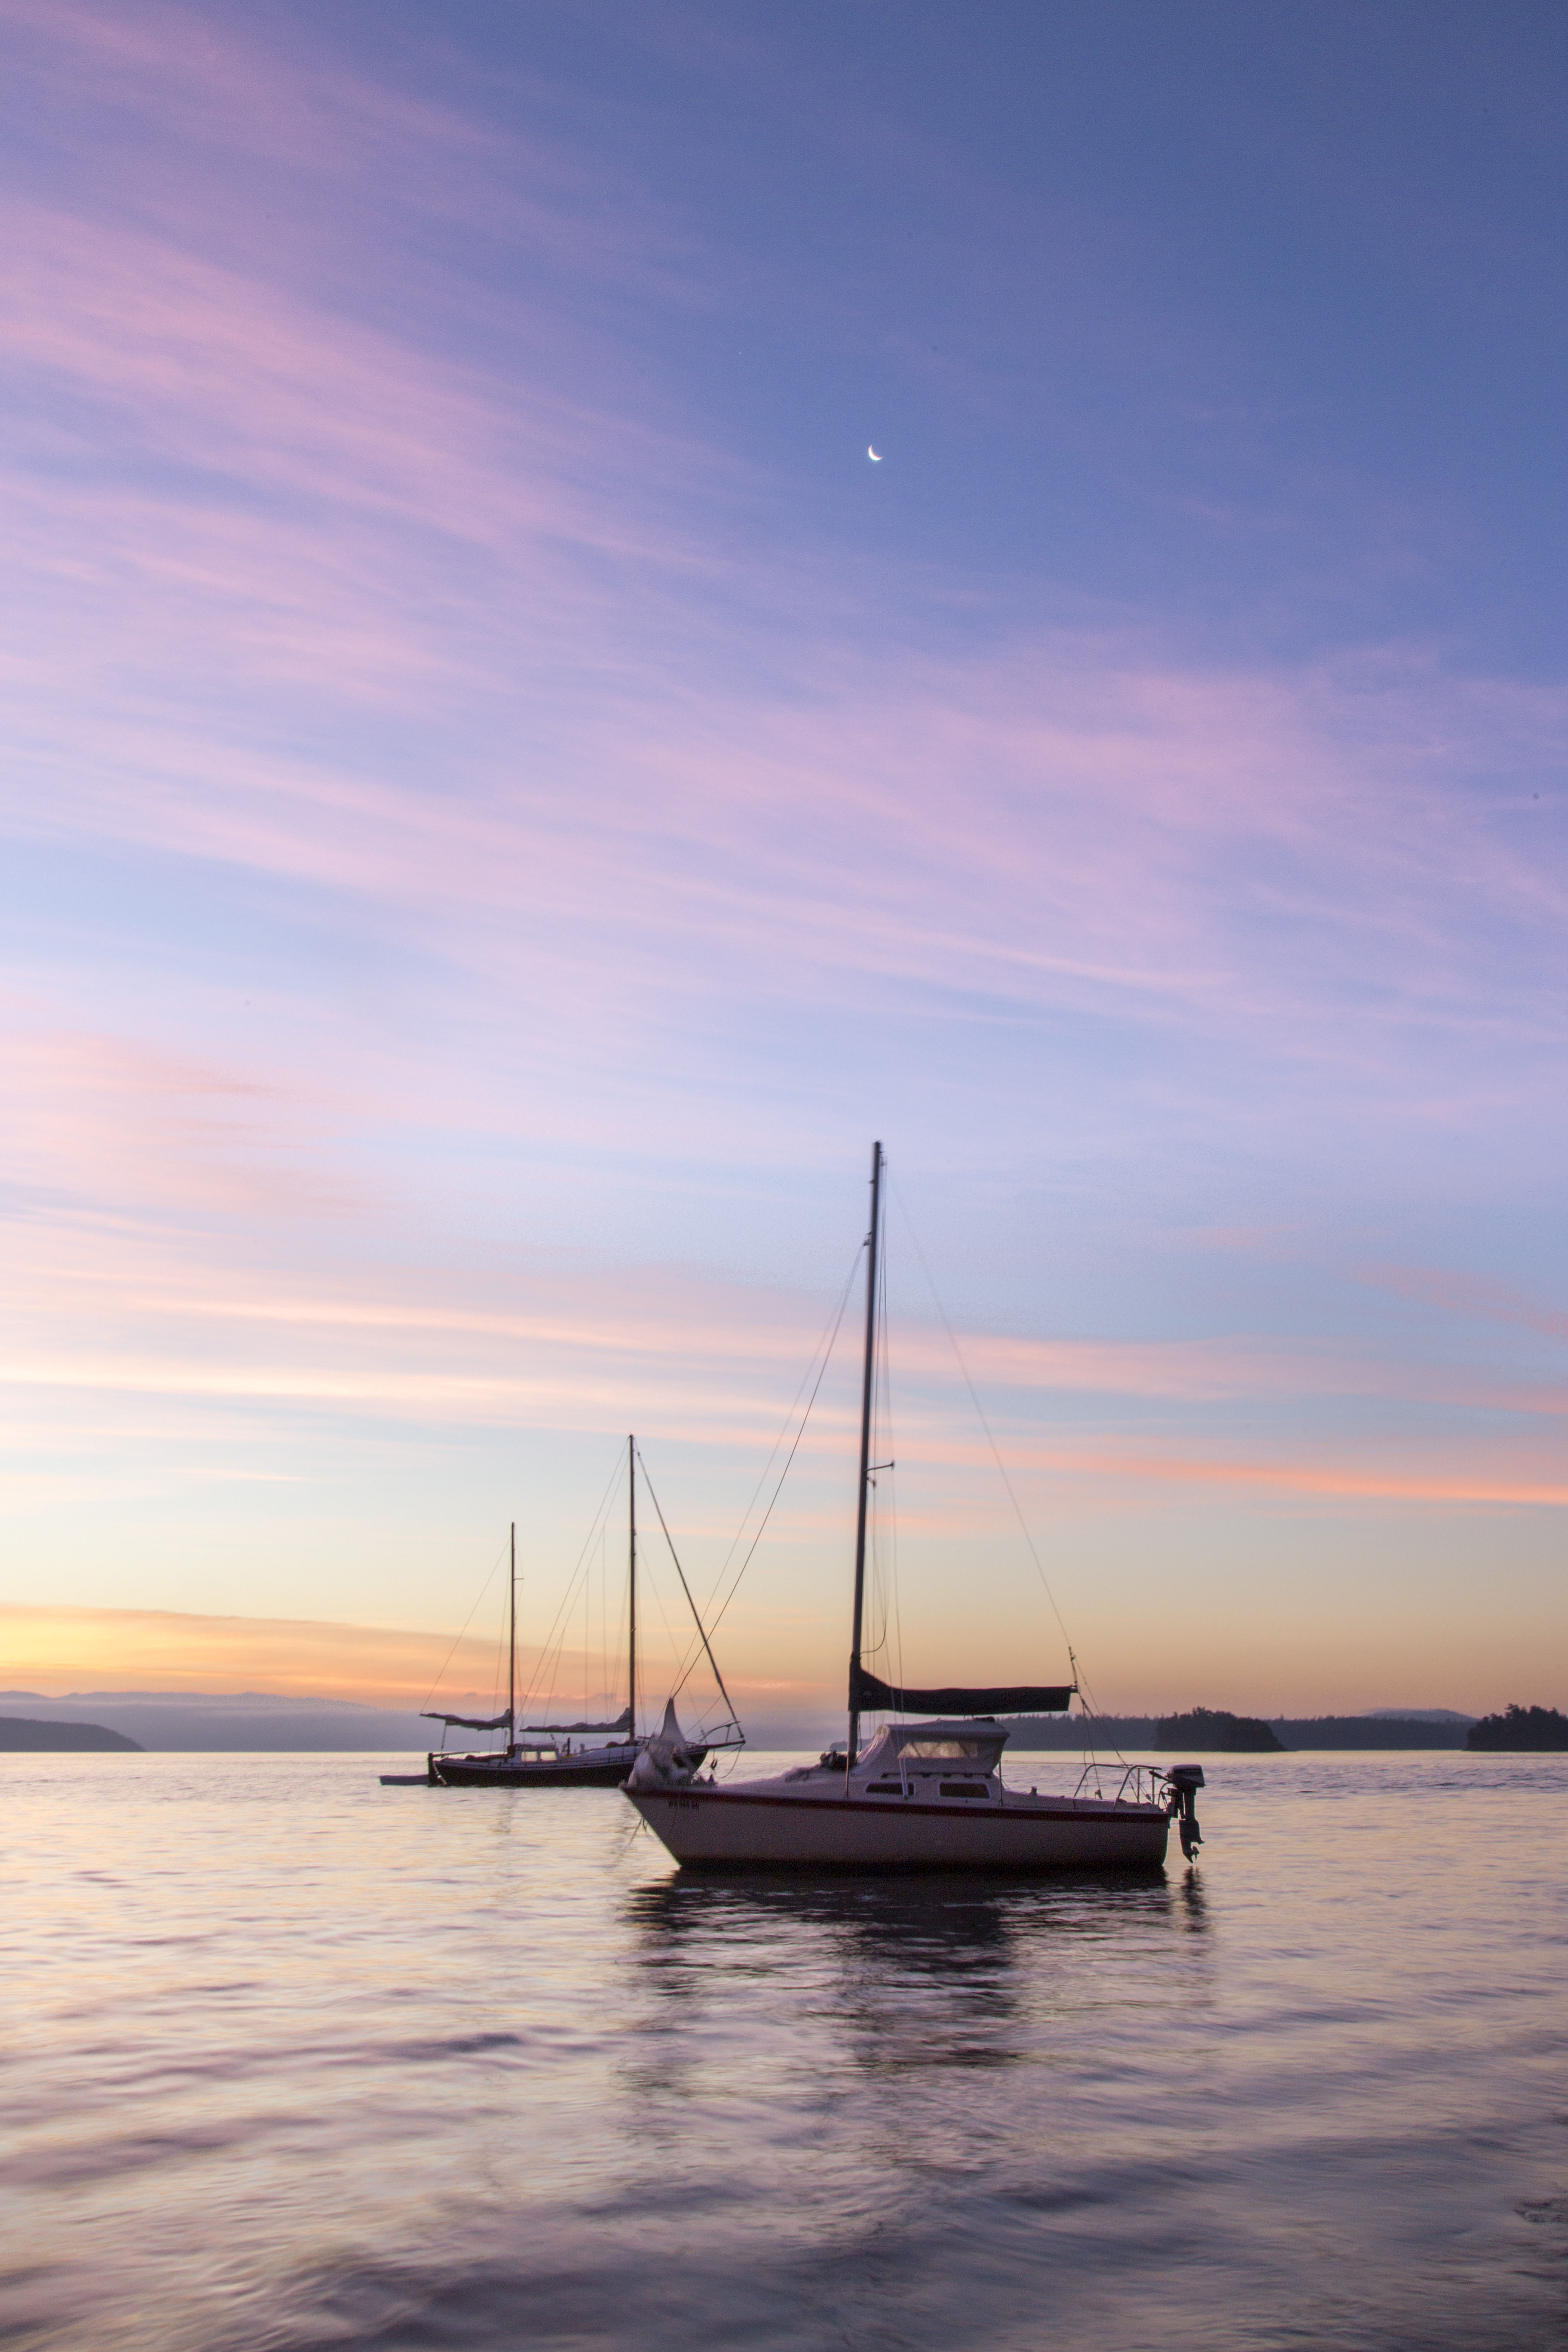
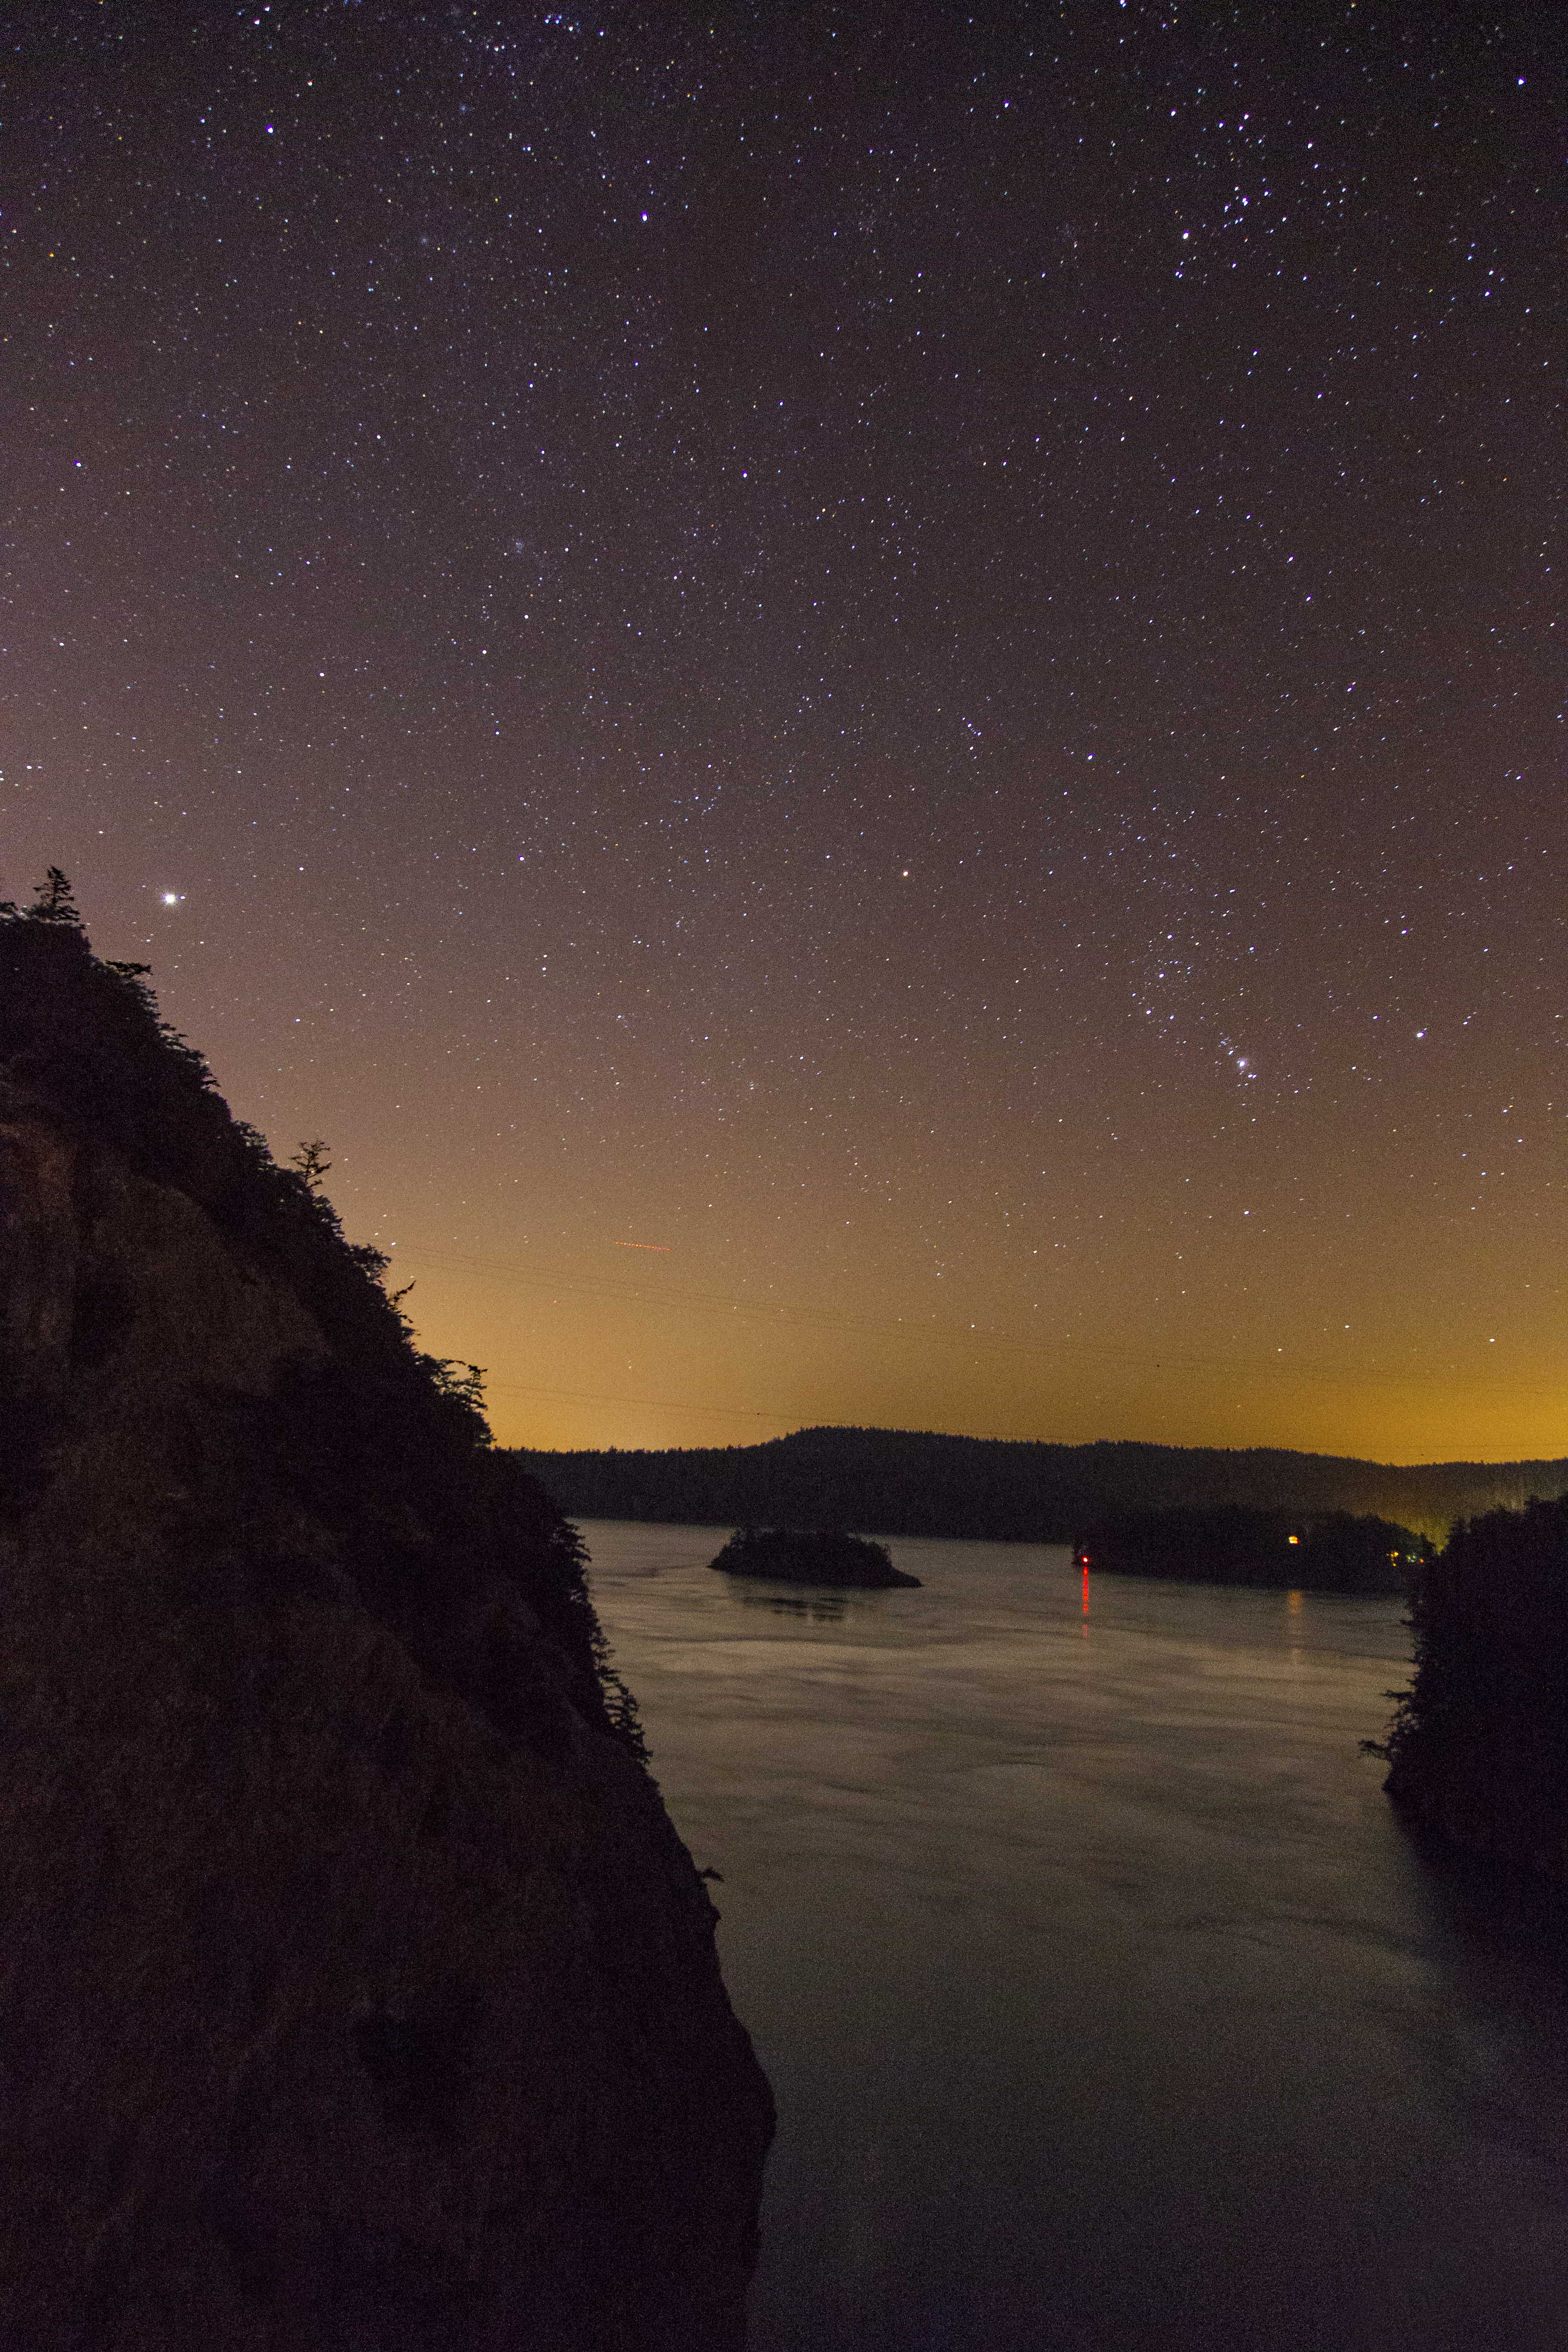
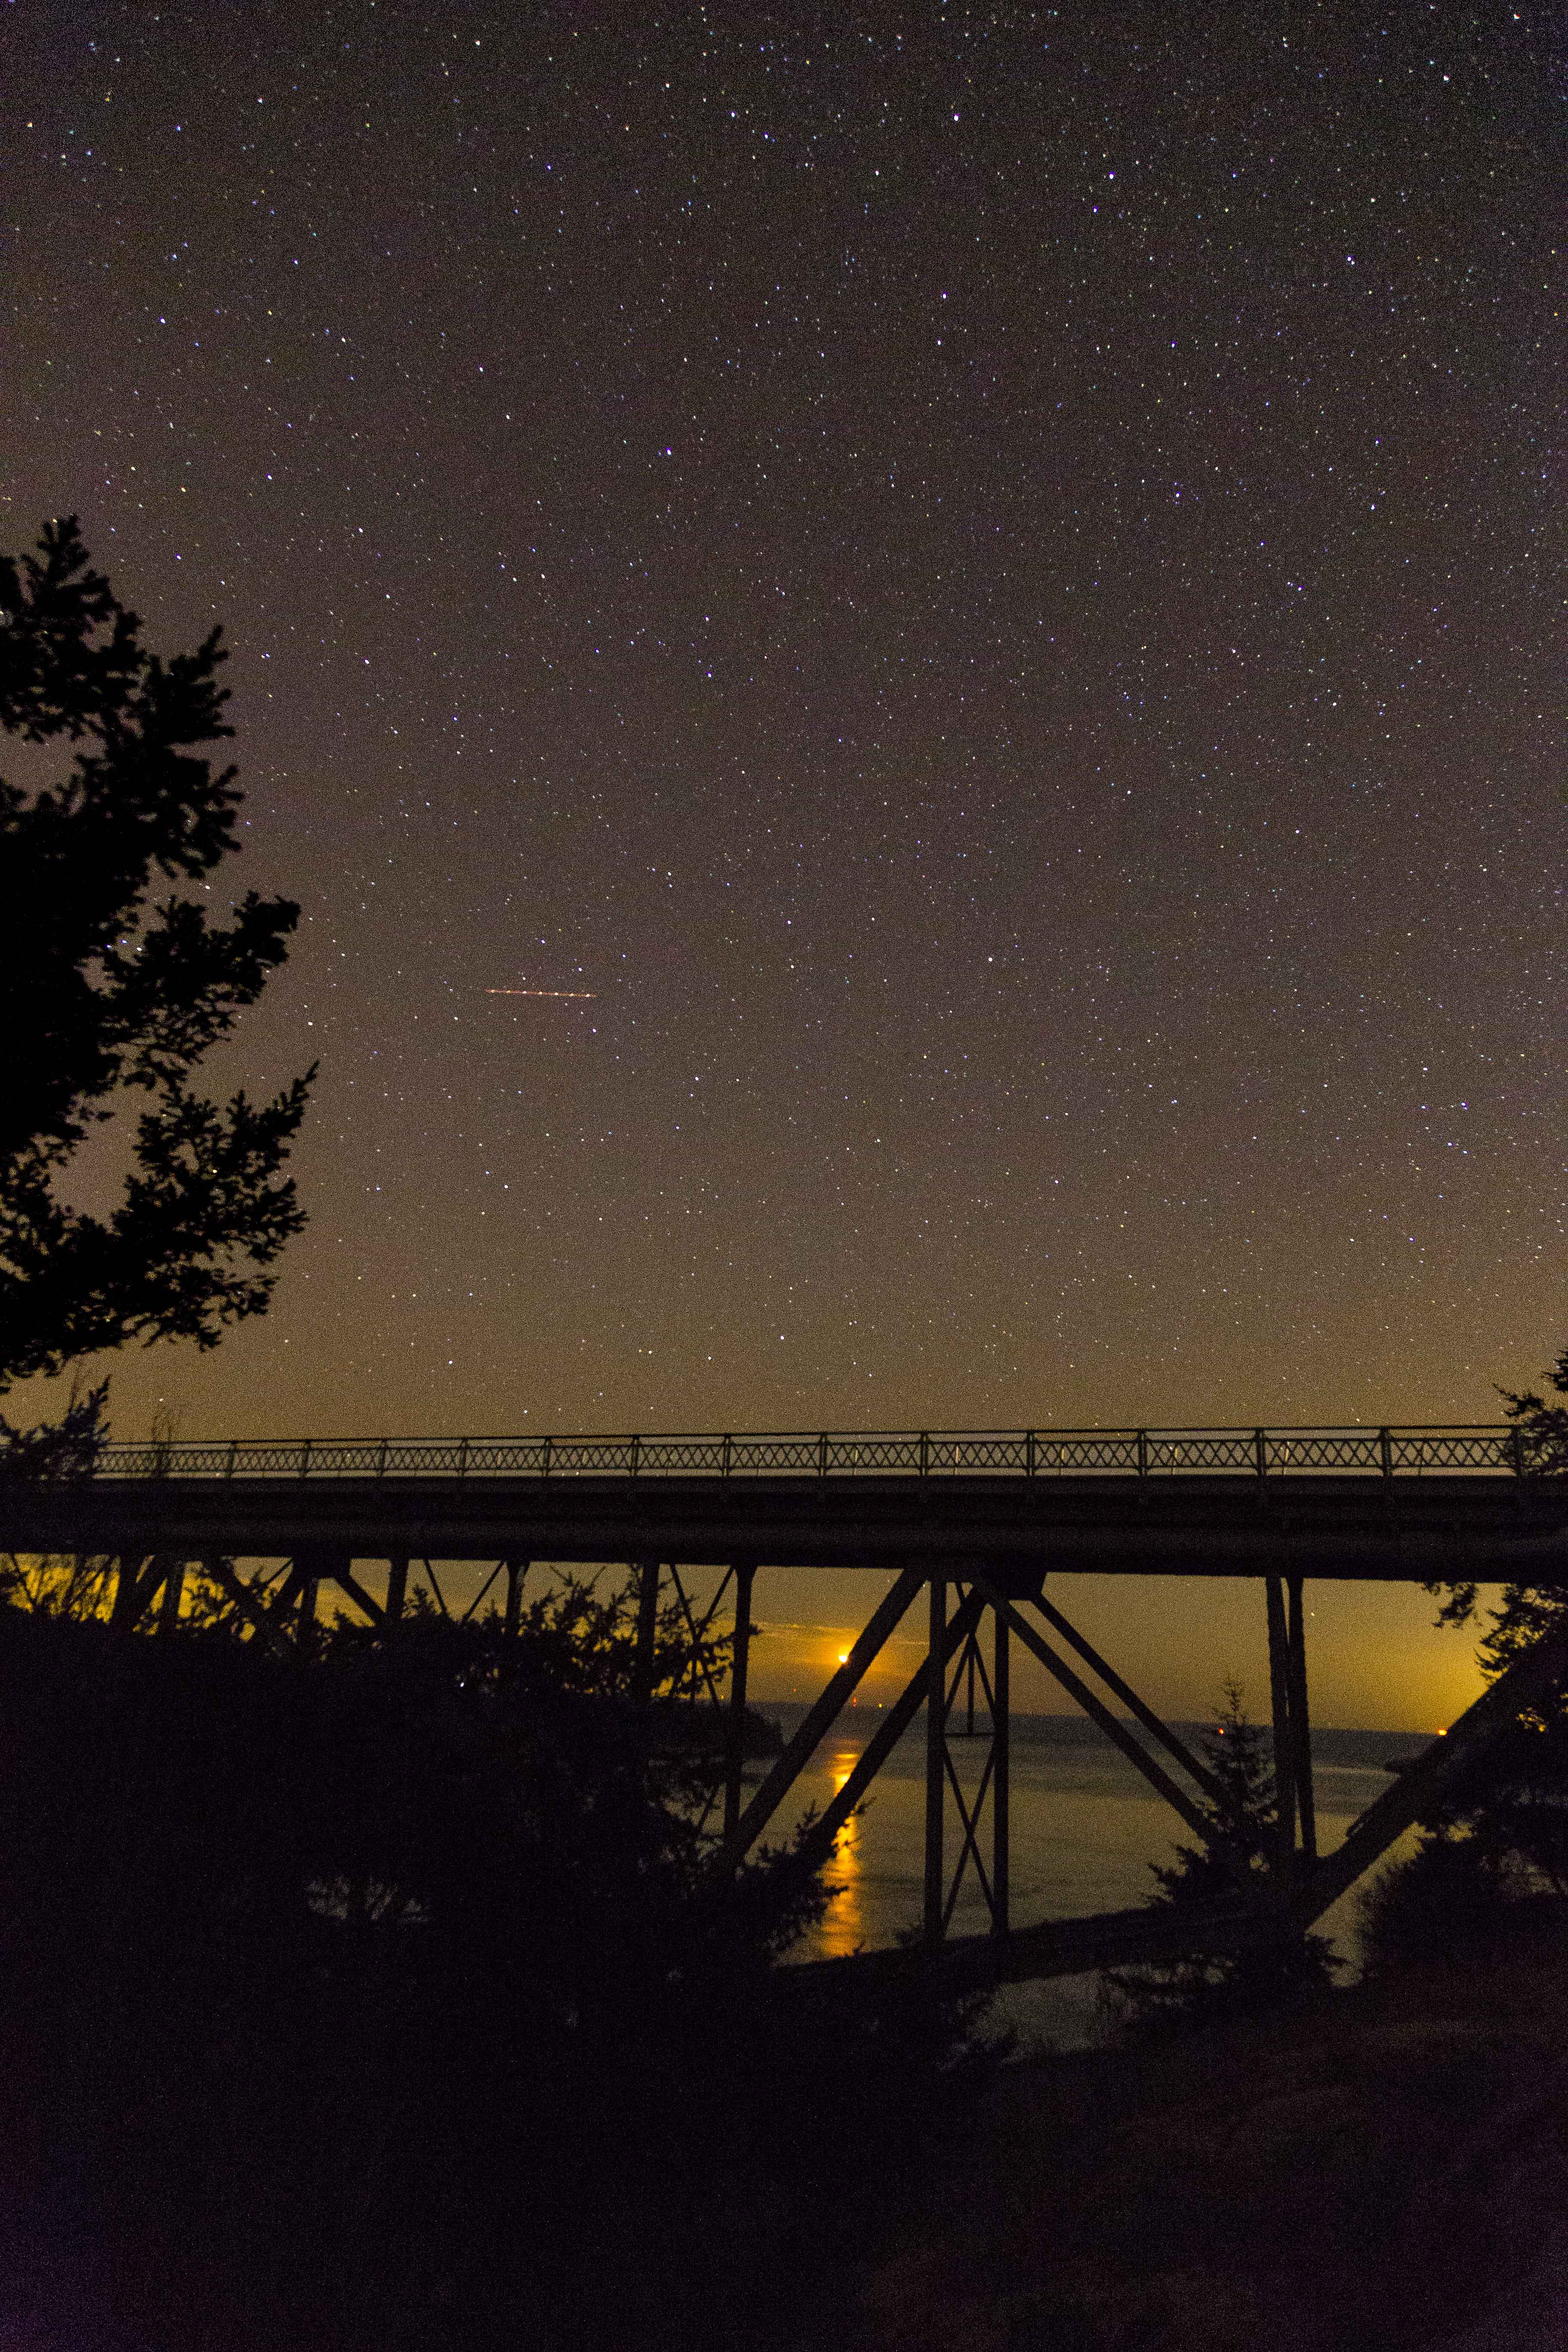
Encouraged by last Tuesday’s photo shoot along Baker River I headed out to Deception Pass on Friday night to see about some shots. There was a crescent moon, which was almost set by the time I got out there, maybe 10pm or so. Clear skies, cold, good time for capturing stars.
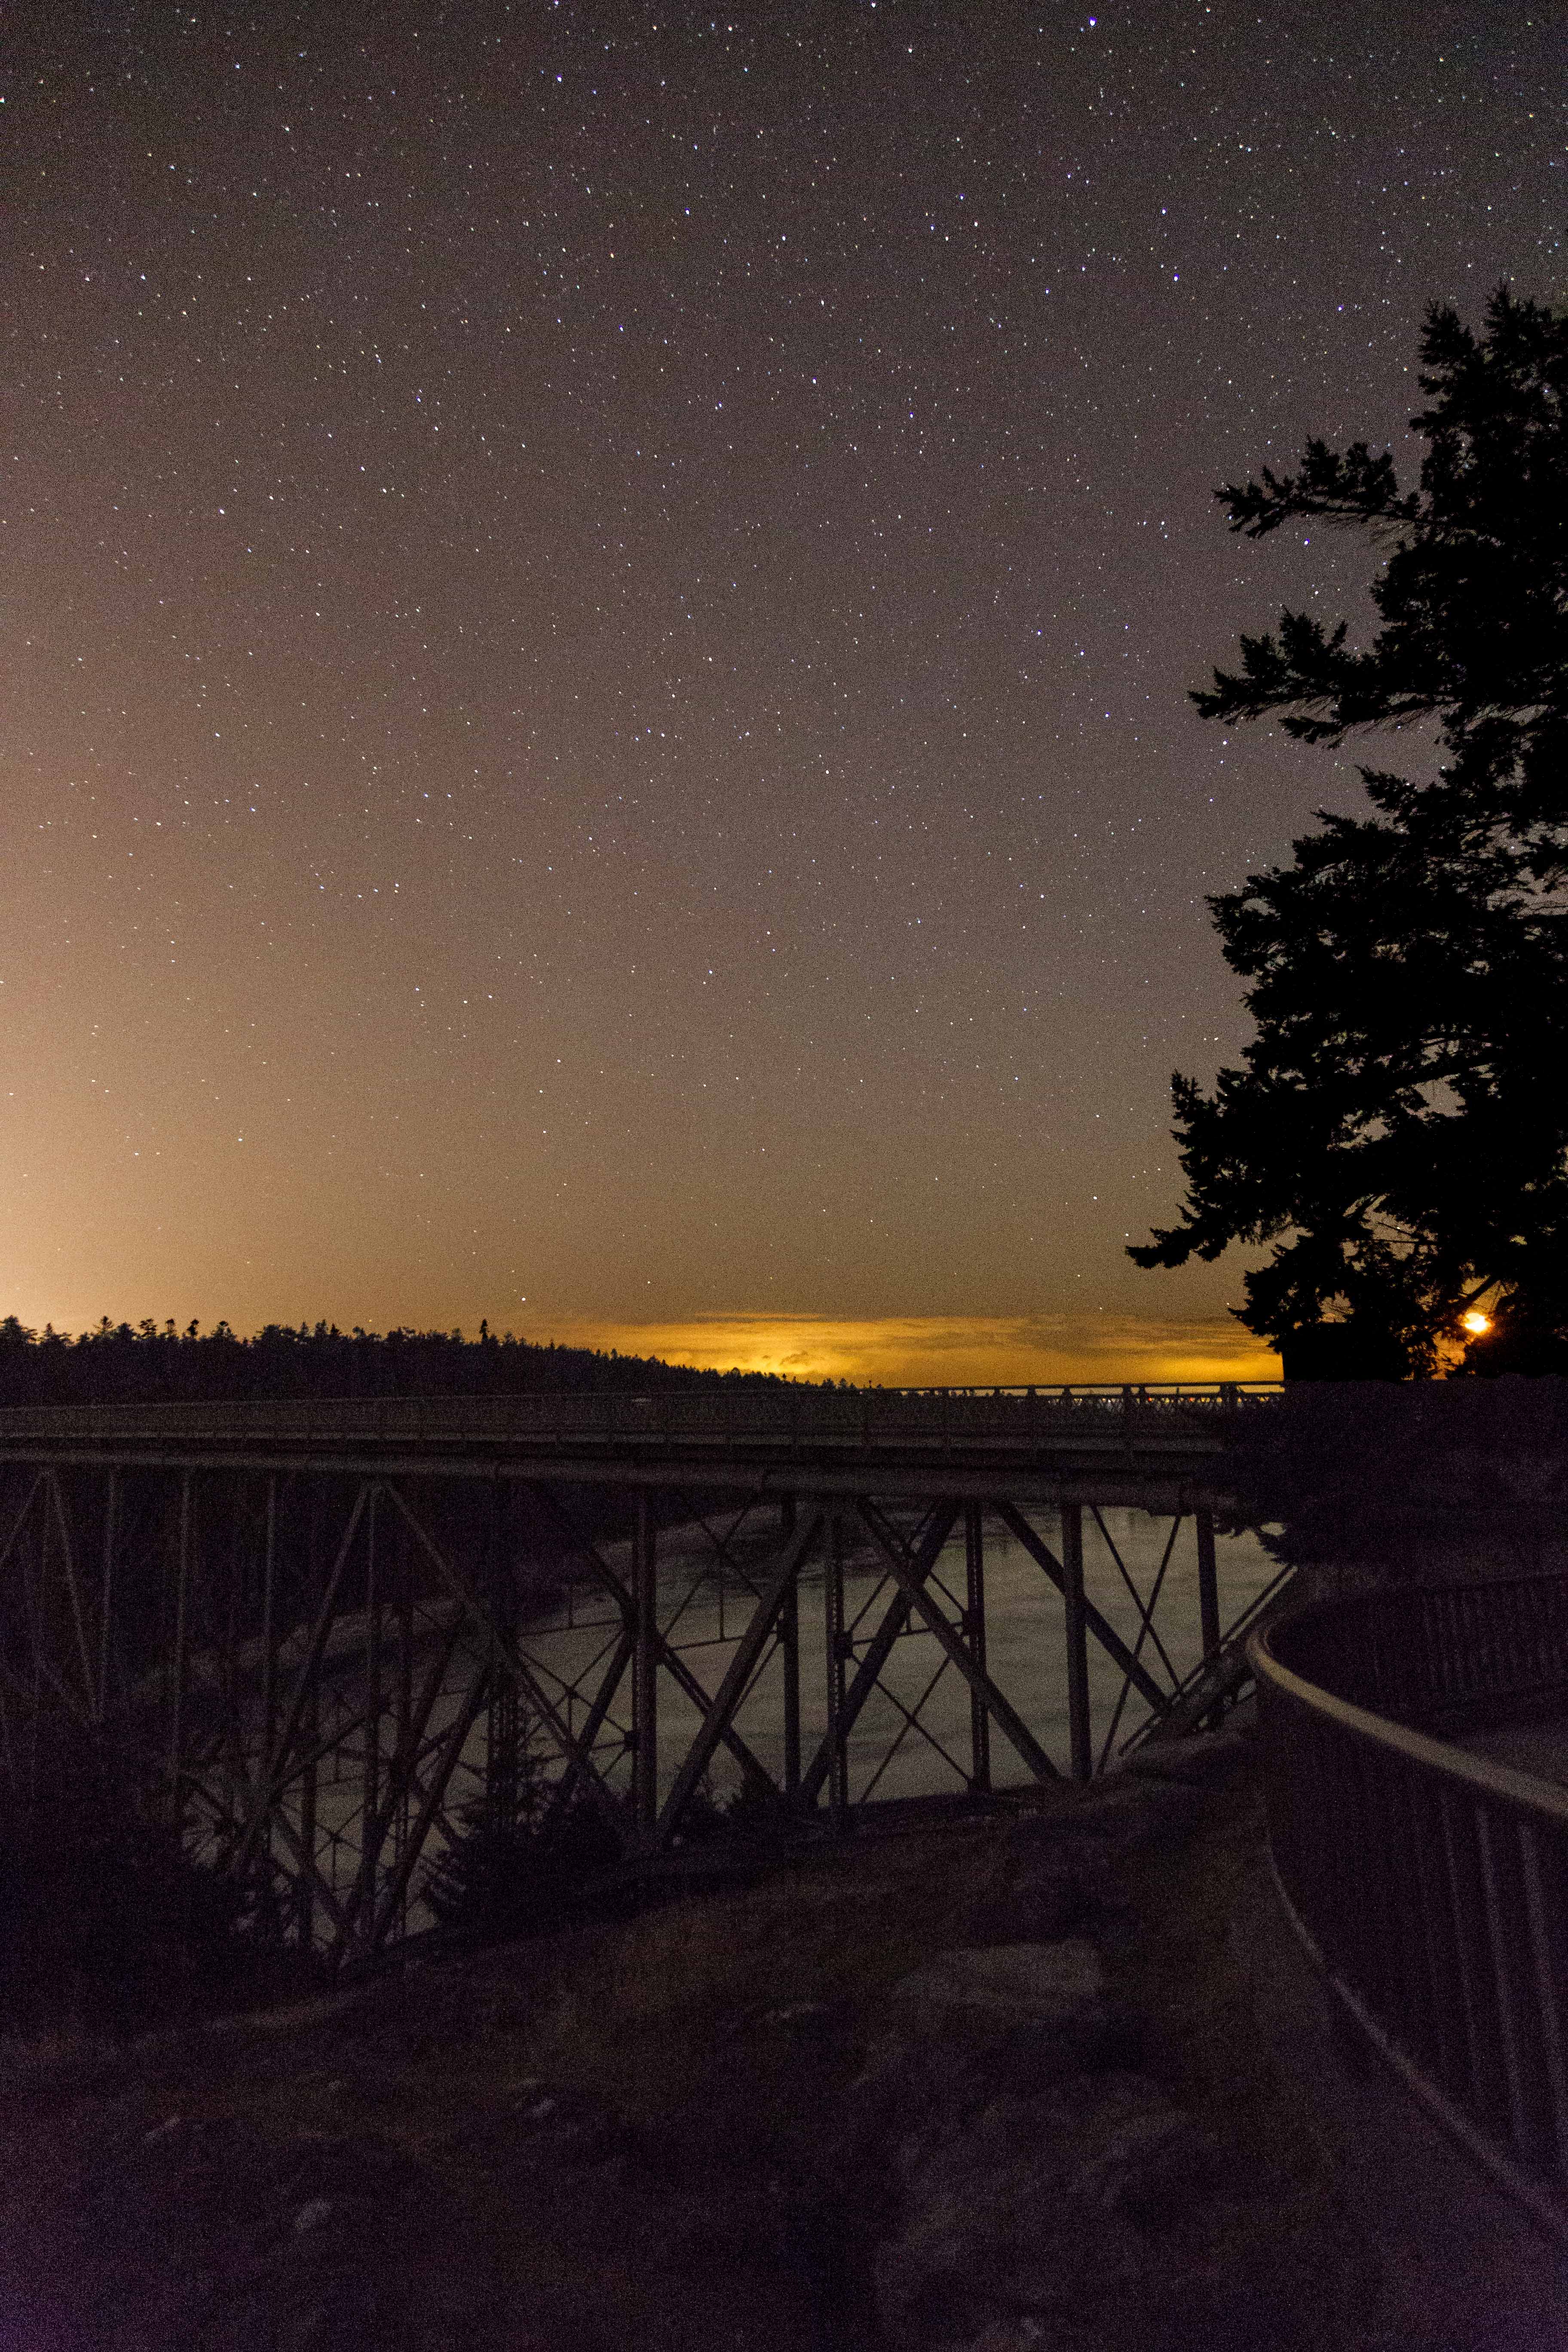
I started up on the bridge, got a few shots of the channel with Orion…
Then I jumped the railing, trying to get a better angle with the moon below the bridge. This view afforded silhouettes of the lower bridge structure as well.

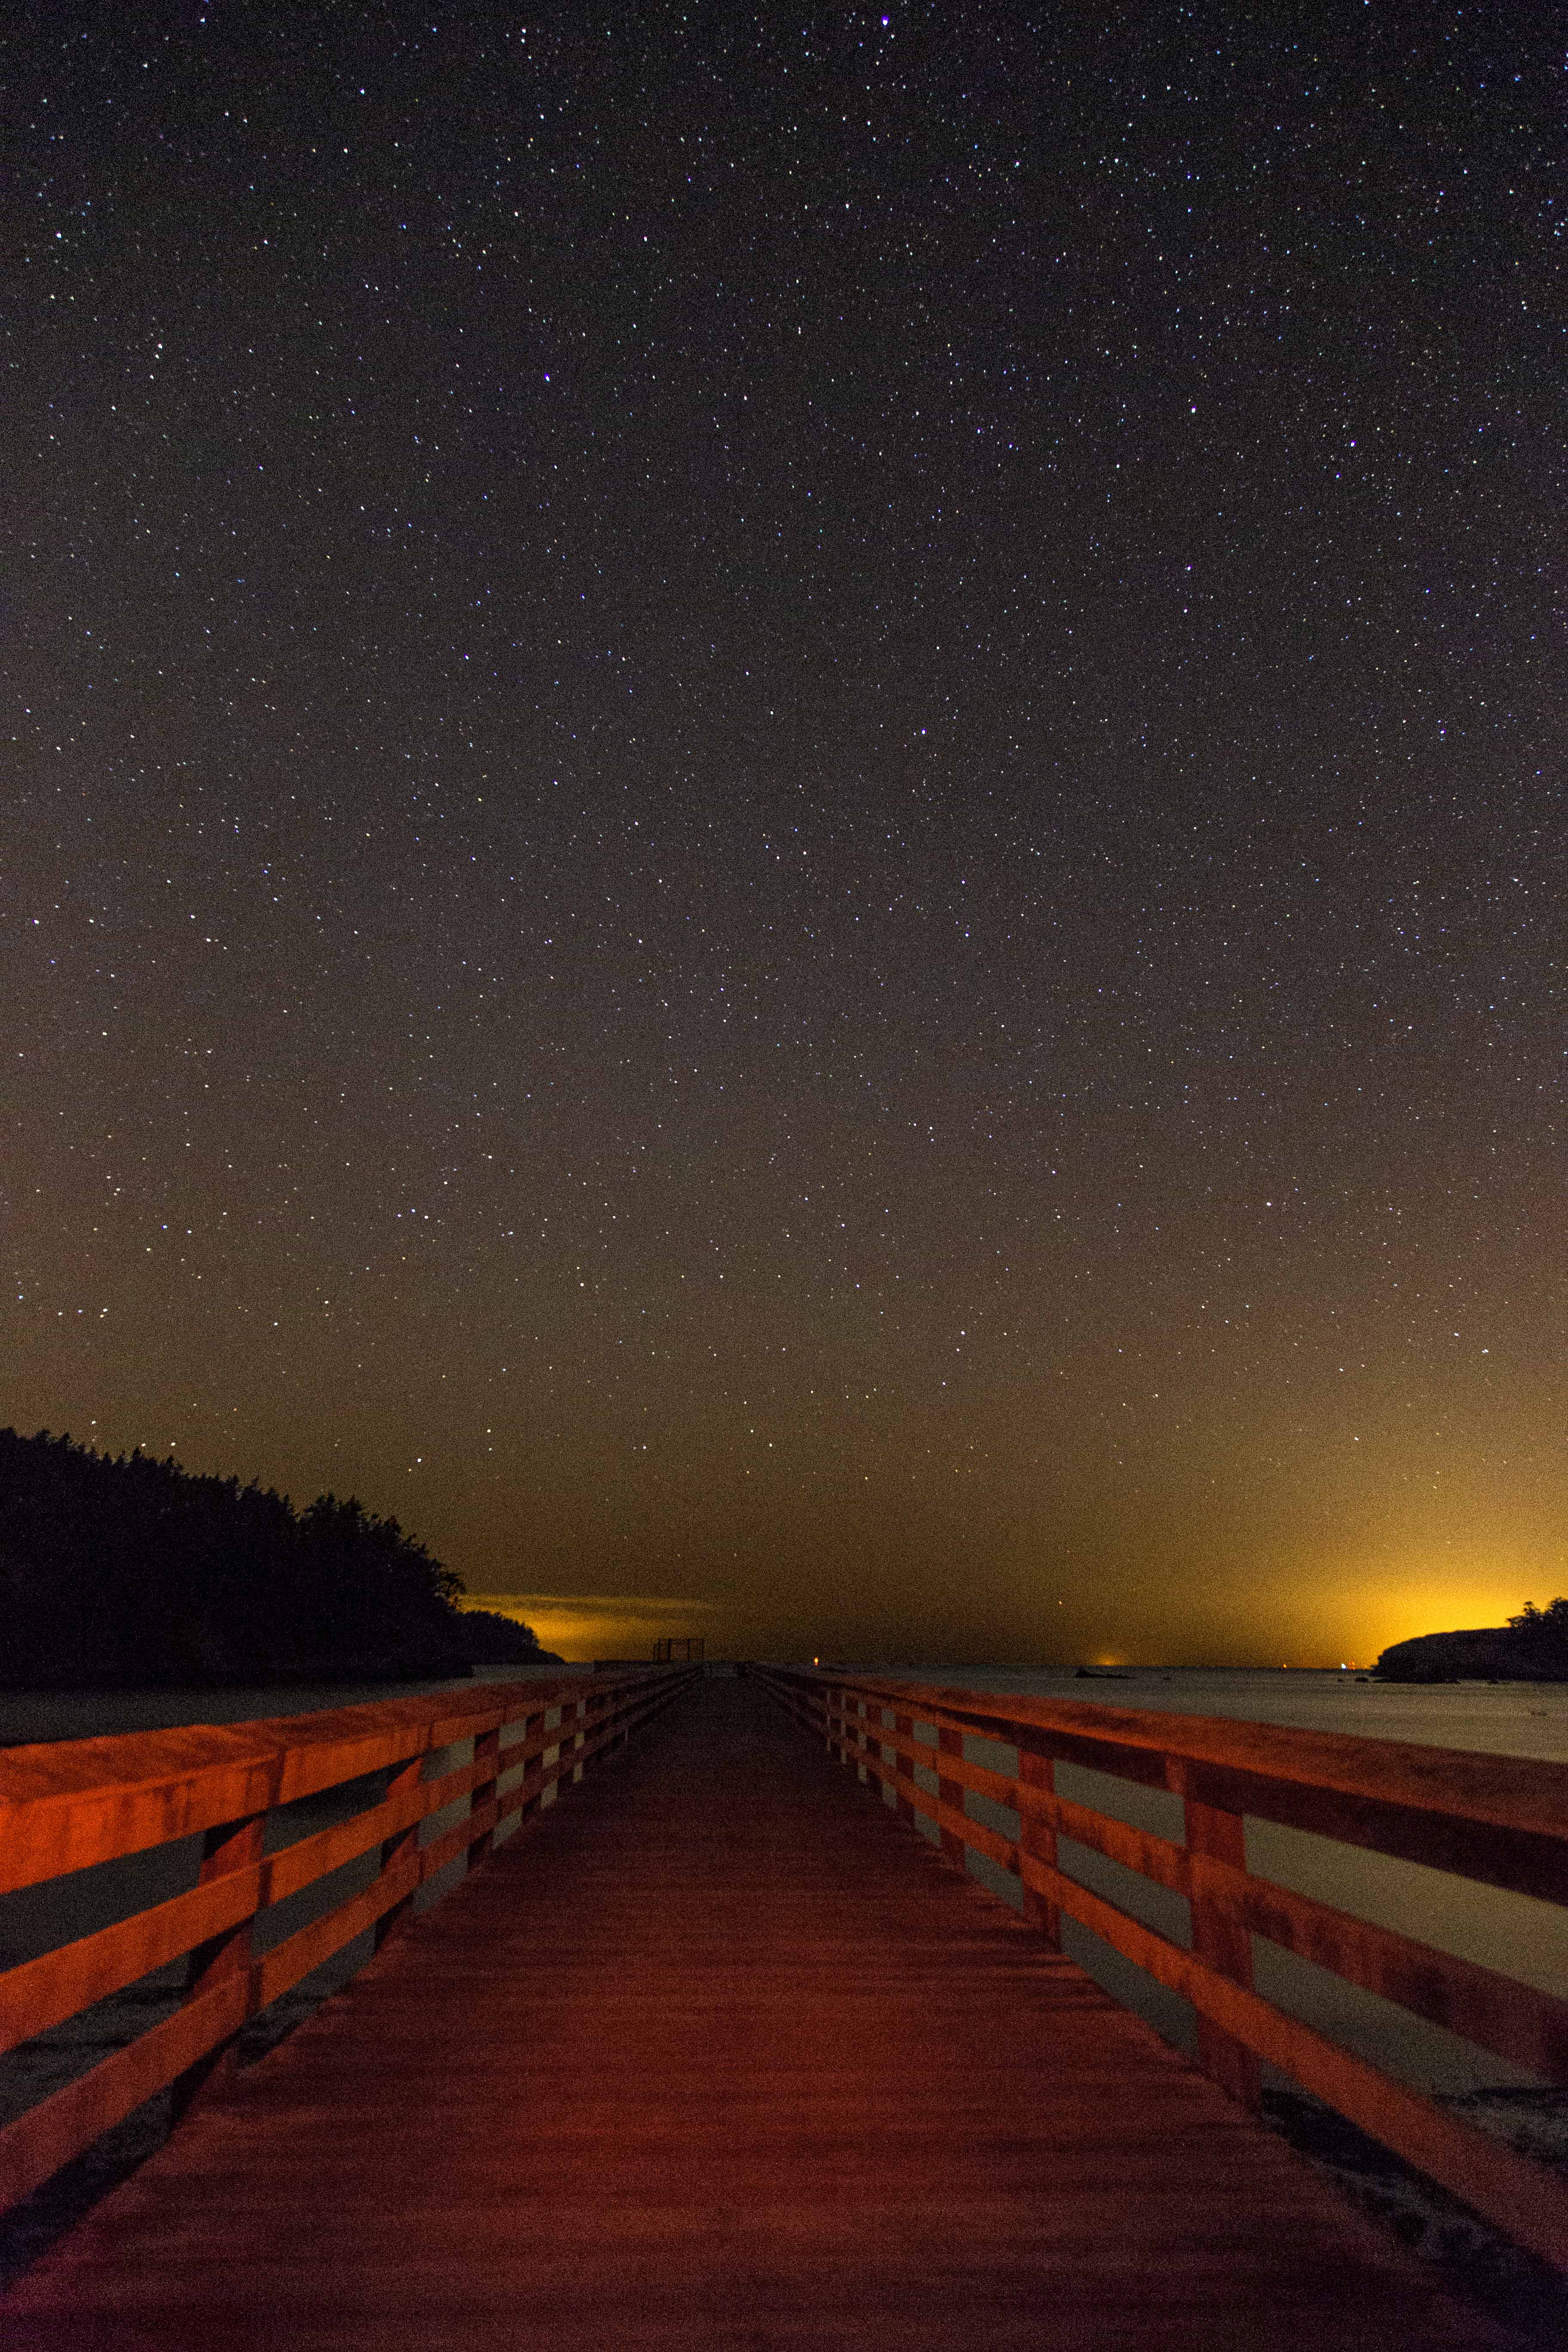
There was so much ambient light that it was difficult to capture the real strip of the Milky Way, so I decided to head down to Bowman Bay.
The road to the parking area was closed, so I hiked down and across the spit to see about some long distance view of the bridge, but that didn’t really pan out. However Bowman Bay had some great lighting…


And the long pier also suggested some interesting shots…
Nighttime photography is really a blast!
As for camera settings:
I used a Canon 6D, with a 24-105 mm lens, tripod and cable release. Aperture at f/4 (wide open), shutter speed at 8 to 13 sec. and ISO at anywhere from 12,000 to 20,000.
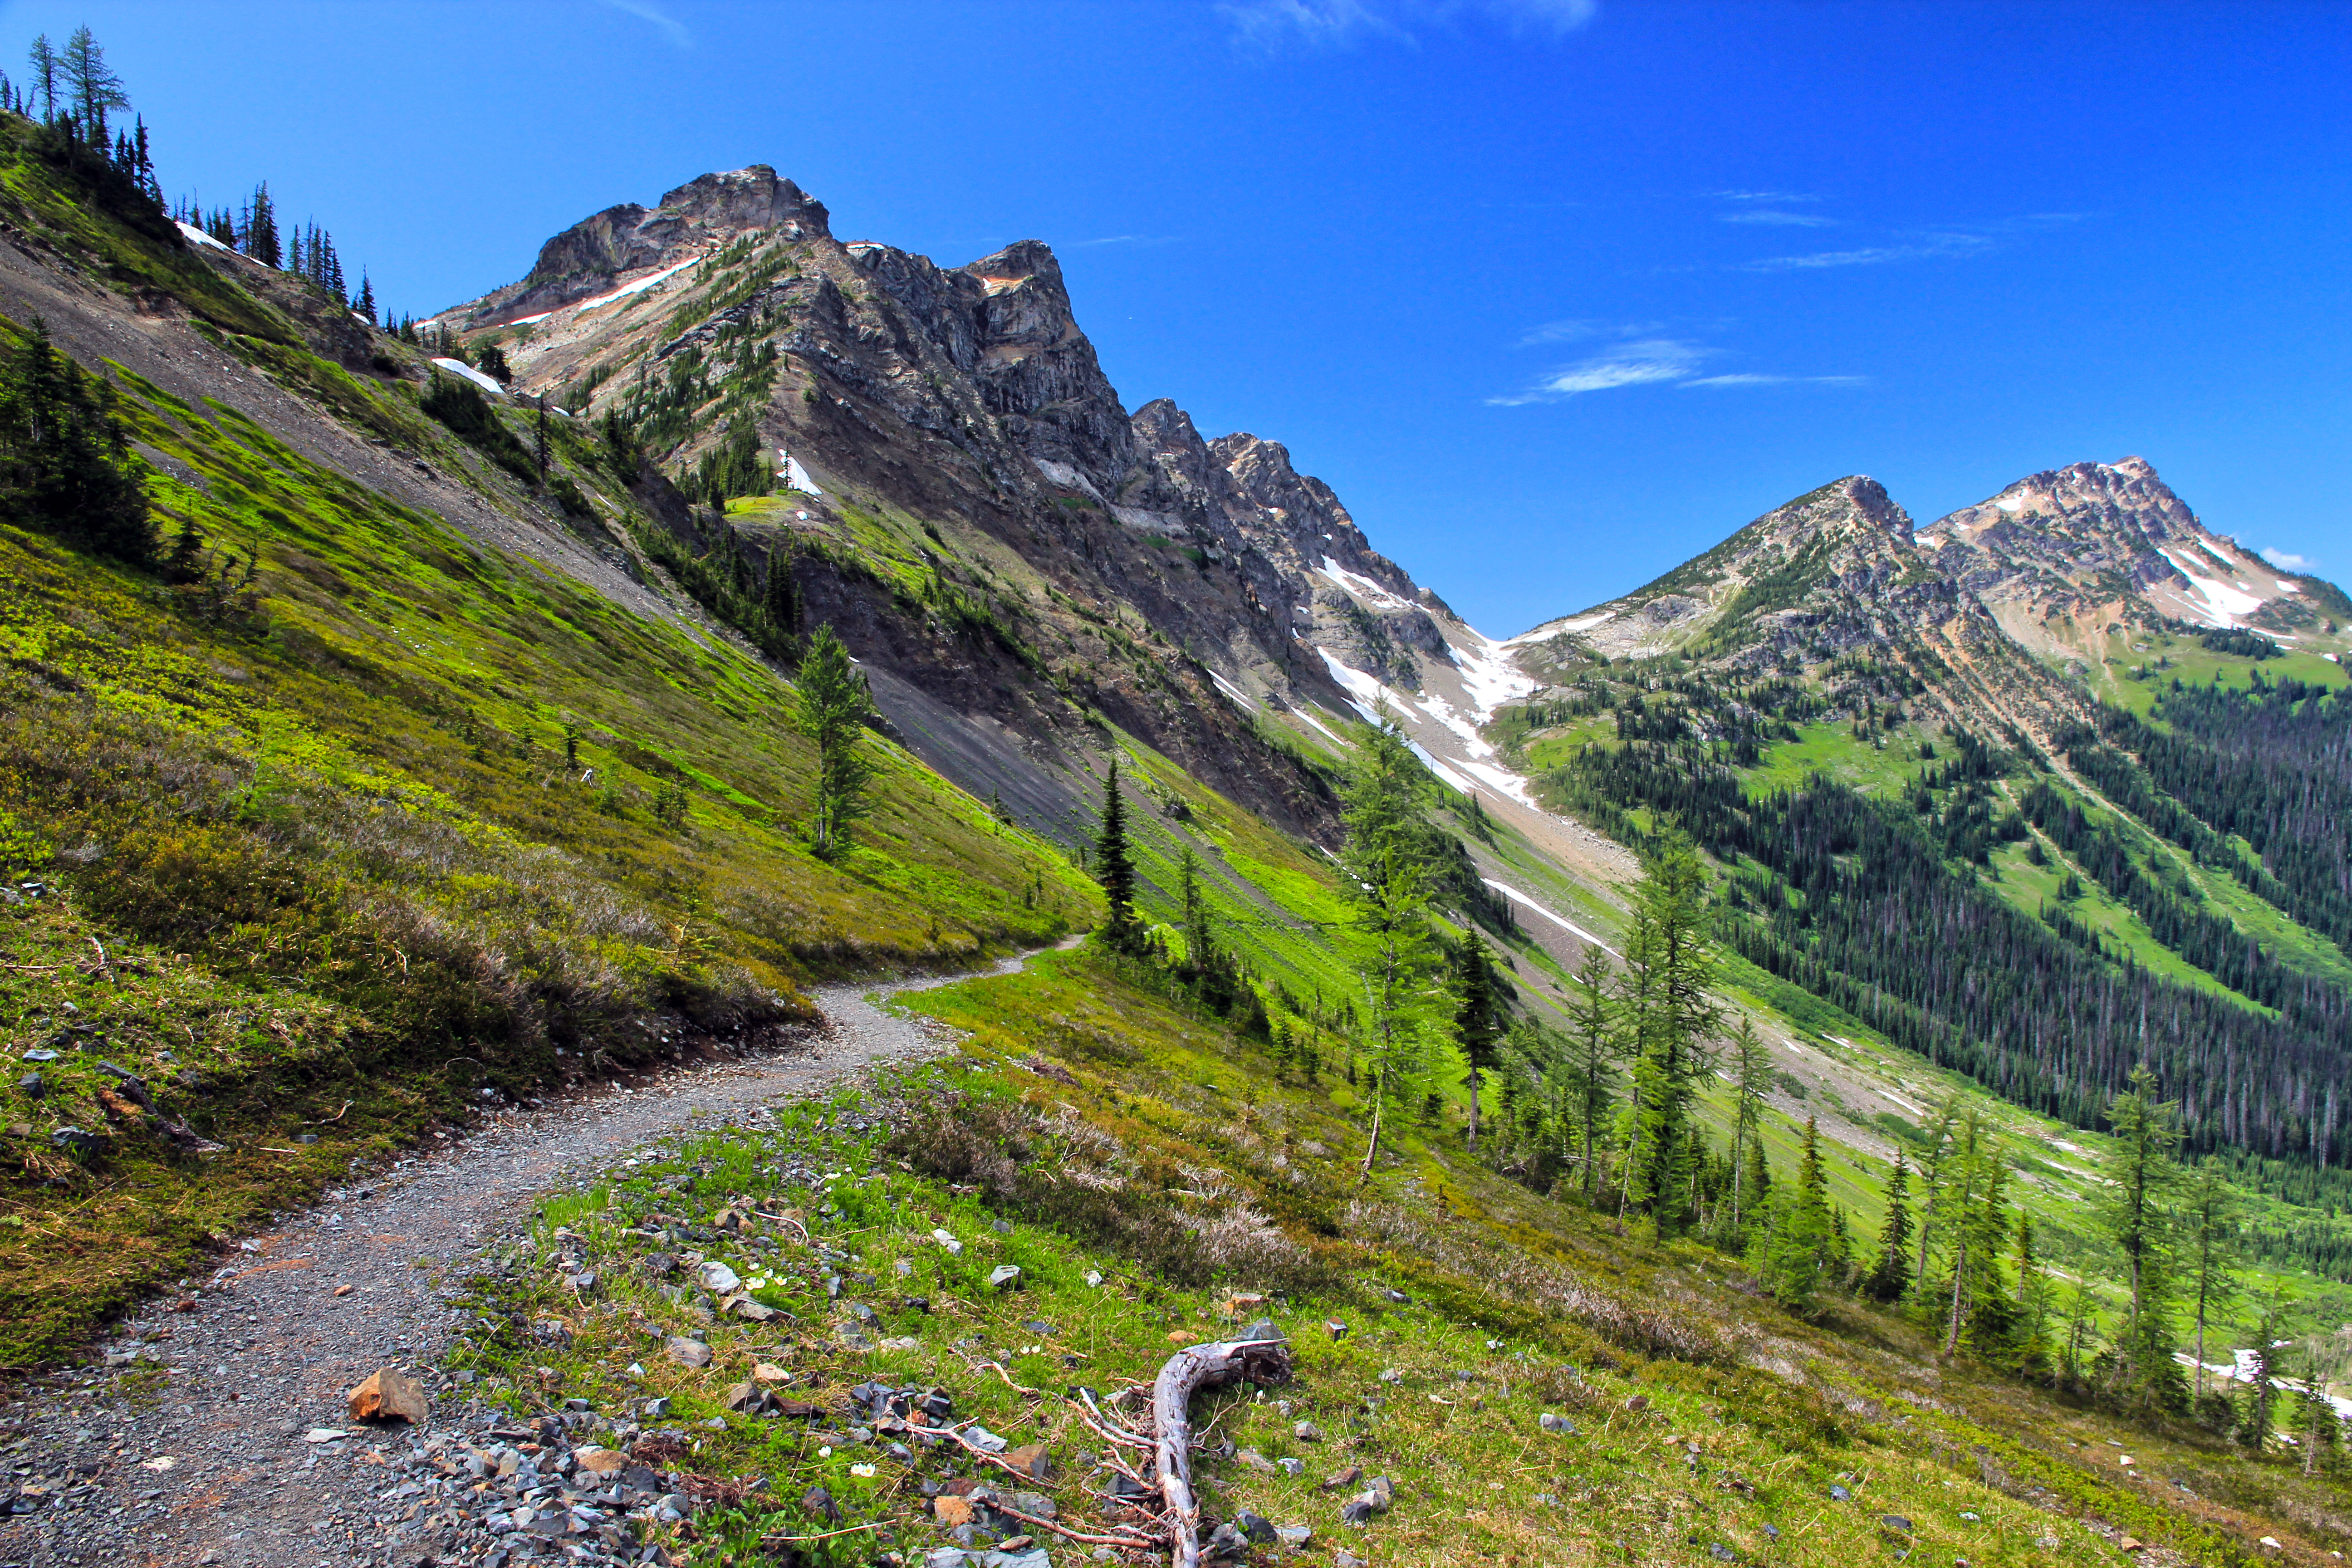
There are many fantastic destinations in North Cascades National Park. Sahale Glacier Camp is truly unforgettable. The Copper Ridge and the Chiliwack River Loop combines fantastic ridge views with deep, dark forests. North Fork Bridge Creek affords endless views of soaring peaks, waterfalls and meadows.
It’s hard to have a favorite, but if you love jagged peaks, lush meadows and exploration, Horseshoe Basin and the Black Warrior Mine can’t be beat.
The first time I visited the Basin was in August of 2012. We hiked over Cascade Pass on a hot day and took the spur trail up the valley towards the basin and the mine.
The basin was aglow in the afternoon light, orange granite spires surrounding the lip like fangs, too-numerous-to-count waterfalls glistening, their sparkling waters plunging down into the valley. There were wildflowers popping out everywhere, yellows and purples, reds and blues, all accenting the deep green of the basin floor.
 Horseshoe Basin, North Cascades National Park
The trail follows the stream up into the valley; it follows a course along the stream, across the stream and in the stream, brushy and wet. Shortly the trail emerges into a clearing where boulders dot the basin floor. Climbing up on the largest, the view is transfixing. The green bowl is surrounded with grandeur, full of color and drama.
 Wildflowers on the trail
We hurried on, racing the sun, heading up the valley, climbing across boulders and scree, on to a snow field, up to the gaping hole of the Black Warrior Mine. Black Warrior Mine
The North Cascades are full of old mining claims piles of colorful tailings and rusted remains of sluices and Pelton wheels littered about. But I had never visited a mine that I could enter and explore. The Black Warrior Mine operated until the mid-1950’s and is a National Historic place. 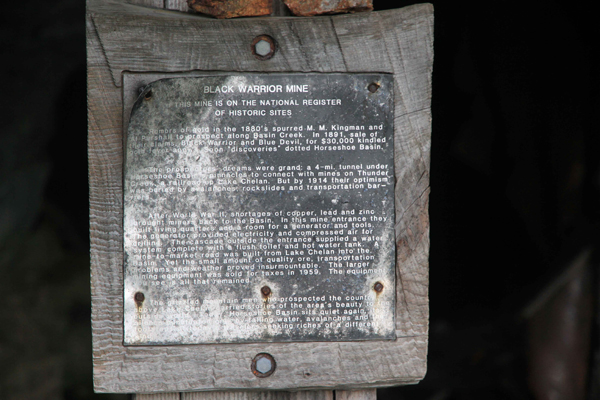
There is a sign at the entrance giving a brief history of the mine, the names of the prospectors and misled investors who poured their mostly futile efforts into this hole. There are two main cavernous rooms blasted into the mountain side which make the opening of the mine. Wooden supports and floor boards are flooded with water. Old tables and remains of habitation litter the floor. The shaft of the mine runs deep, several miles of tunnel remain; open for any brave person to explore. 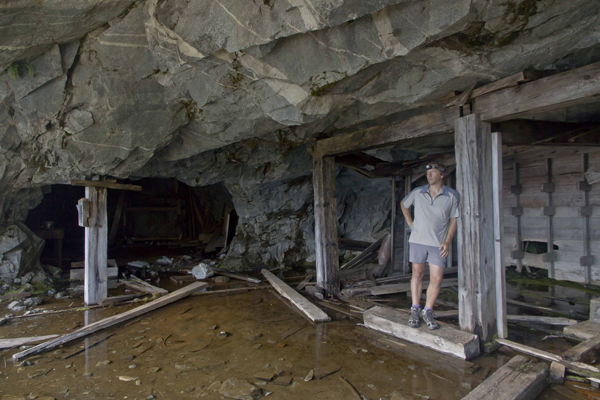 Black Warrior Mine: Kitchen
The wonder of the place is still with me. Maybe its the history, all of the people who worked so long and hard here, digging and scraping for naught. Here, as in many of the North Cascade valleys, it was miners who blazed the trails that we now use to visit the high country. The road from Stehekin, long ago, came all the way to the mine entrance. Over time nature has reclaimed the road, now vehicles can only go as far as High Bridge, 17 miles downstream.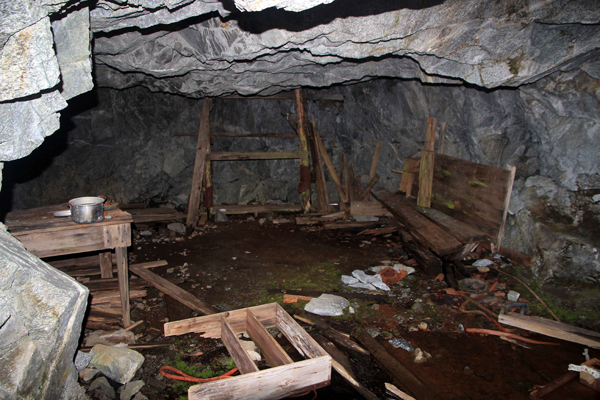 Black Warrior Mine Remains
The falling sun chased us out of the valley, we camped at Basin Creek camp that night and then next day headed down the valley, east, towards Cotton Wood Camp. View from Mine Entrance, looking down the valley
The next few days found us in Stehekin eating fresh pastry…
2 days and lots of espresso/tasty treats later we headed back up through Cottonwood and the upper valley on a bright summers day, with a welcome breeze we crossed Basin Creek again and started up towards the pass.
 Basin Creek
It was early in the morning when we came back to the trail junction with the Horseshoe Basin trail. I wanted to have another view, this time with different light. So we stopped and were having a snack before heading up the valley when we had a visitor.
The main trail coming down from Cascade Pass makes a long traverse of the mountainside, descending towards the valley floor. At the elbow of a switchback the spur trail heads up the Basin Creek draw to Horseshoe Basin. We were sitting at the junction, relaxing, when I saw a black bear heading down the trail towards us. My camera was nearby and I ran for it, got the settings adjusted and started shooting. As the bear approached she spied us and slowed her pace. My pulse was pumping with excitement as she got closer and the images clearer. I was viewing the entire scene from my view finder and suddenly had the realization that the bear was getting pretty close!
 Bear at Horseshoe Basin
I lowered the camera and considered what to do. The bear was now at the trail junction, about 15 feet from me, she paused, considering her options. My friend and I both realized that she wanted to pass up the spur, trail to the basin, right past us!

We sort of backed up, along the hillside, and spoke soft words to the bear. She gave us a look of resignation, then headed further down the main trail, cutting across the hillside, just below our spot, traversing below us for about 50 feet, then popped back up through the brush and back onto the spur trail. She gave us a last look, and continued her way on the trail up to, we assumed, good foraging grounds in Horseshoe Basin.
Exulting in our good fortune, excited and energized, we finished our snack and followed her up the valley to the basin.

