I have been working with Photoshop for some time. My learning curve has been rather slow and often painful! Slowly I learn new techniques for manipulating light and shadows.
Images of the night sky demand more work than daytime shots. The camera I have, a Canon 6D, and the 14mm lens I use allow me to set the exposure for 30 seconds.
In the unedited images you can see the strip of the Milky Way and in the edited images it pops out and grabs you!
Here is an image I shot a few years ago with a Canon T2i, a 15mm lens at 30 sec. and 800iso. Its a bit dark!
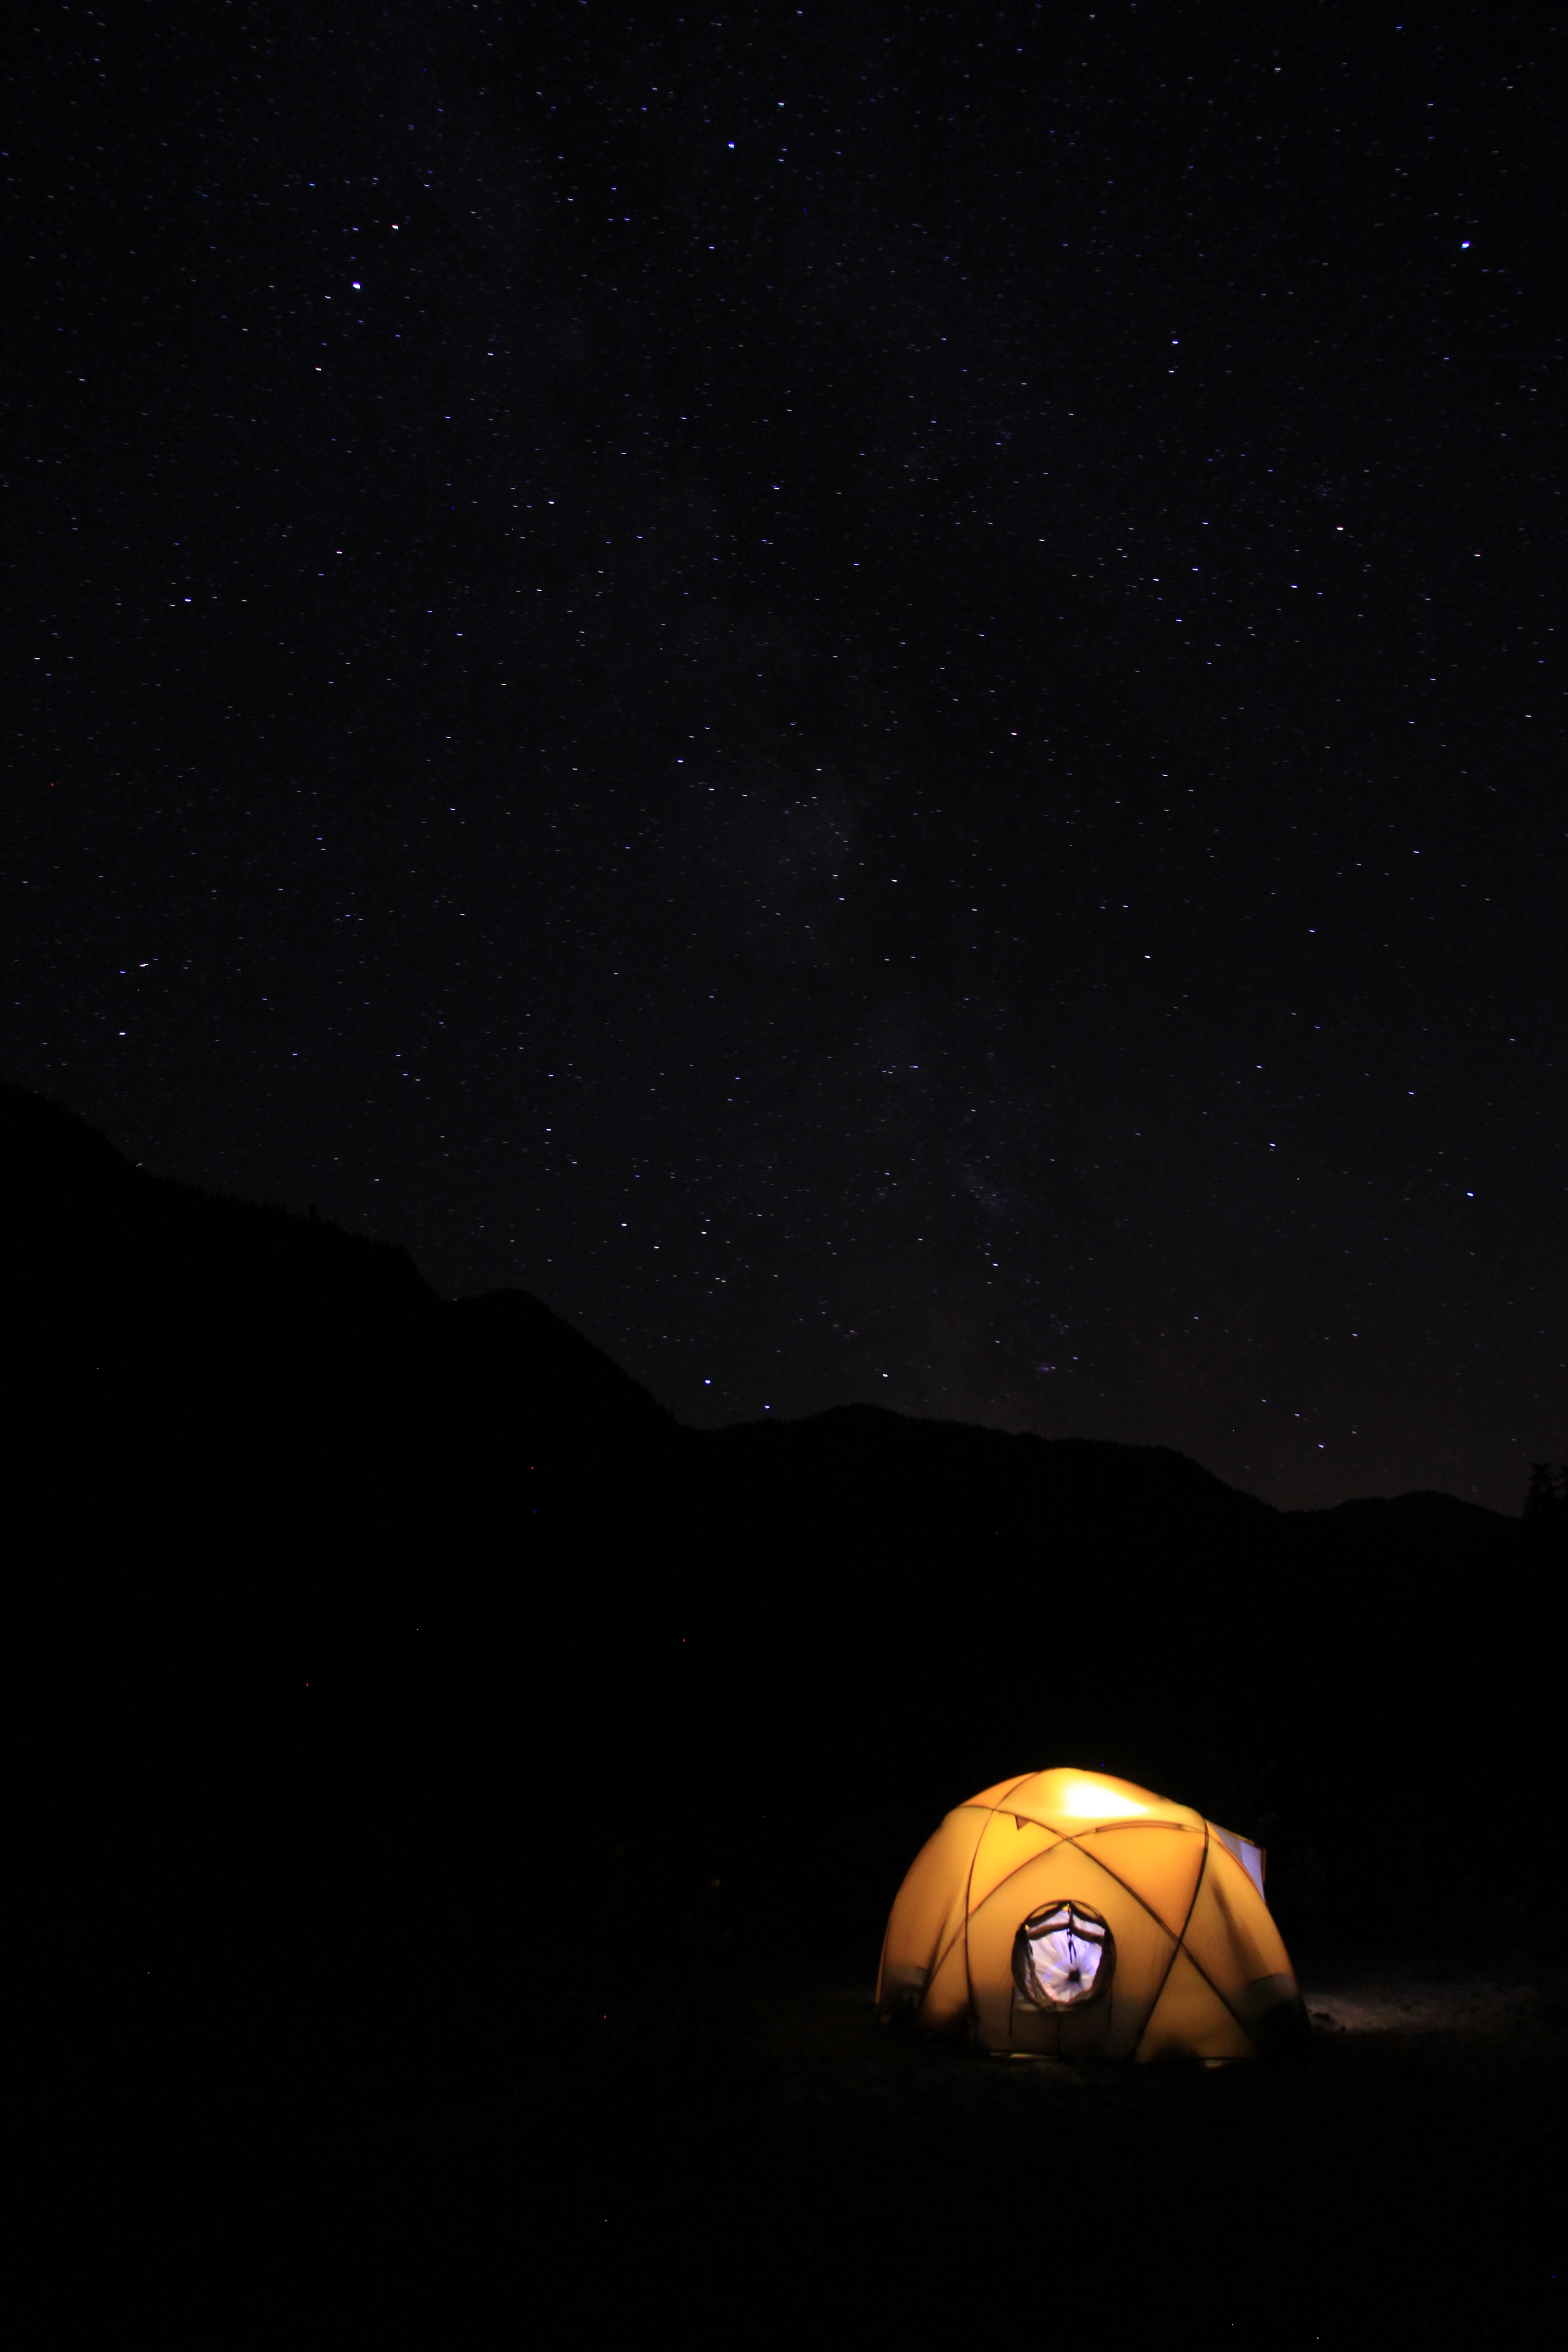
Now the newly edited version.

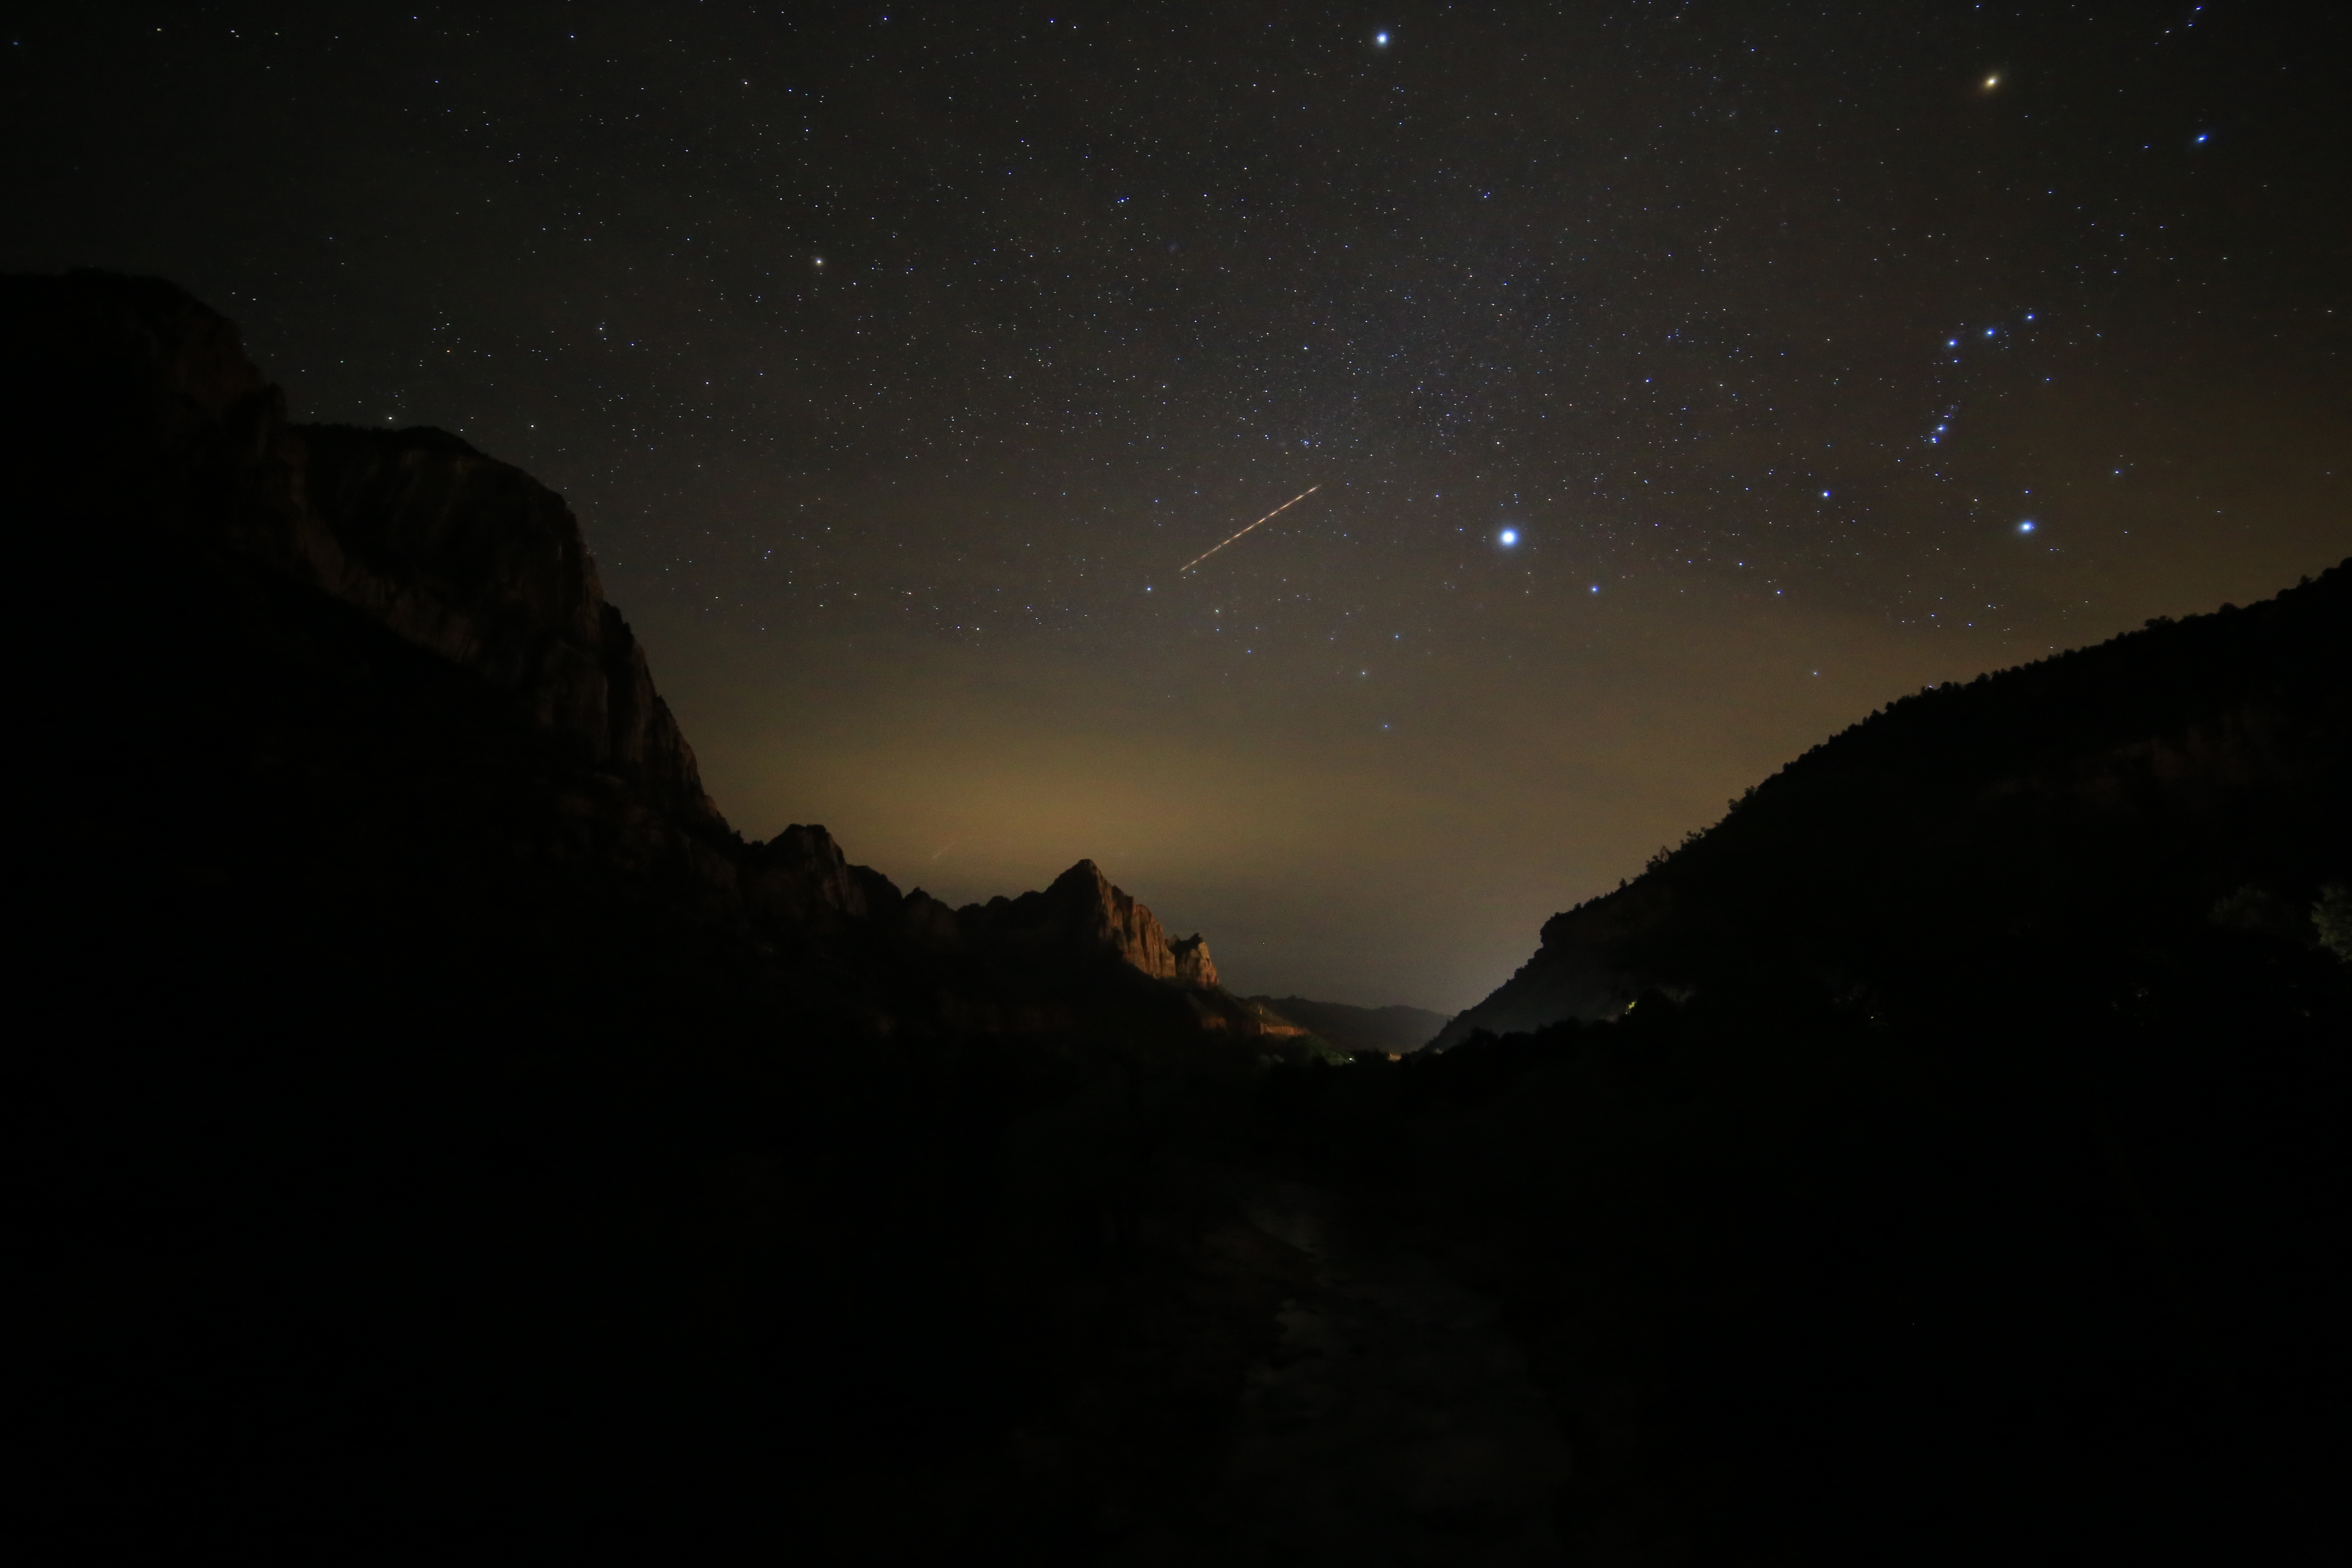
This next shot is from Zion National Park. I used the Canon 6D with a 14mm lens at 15 sec.
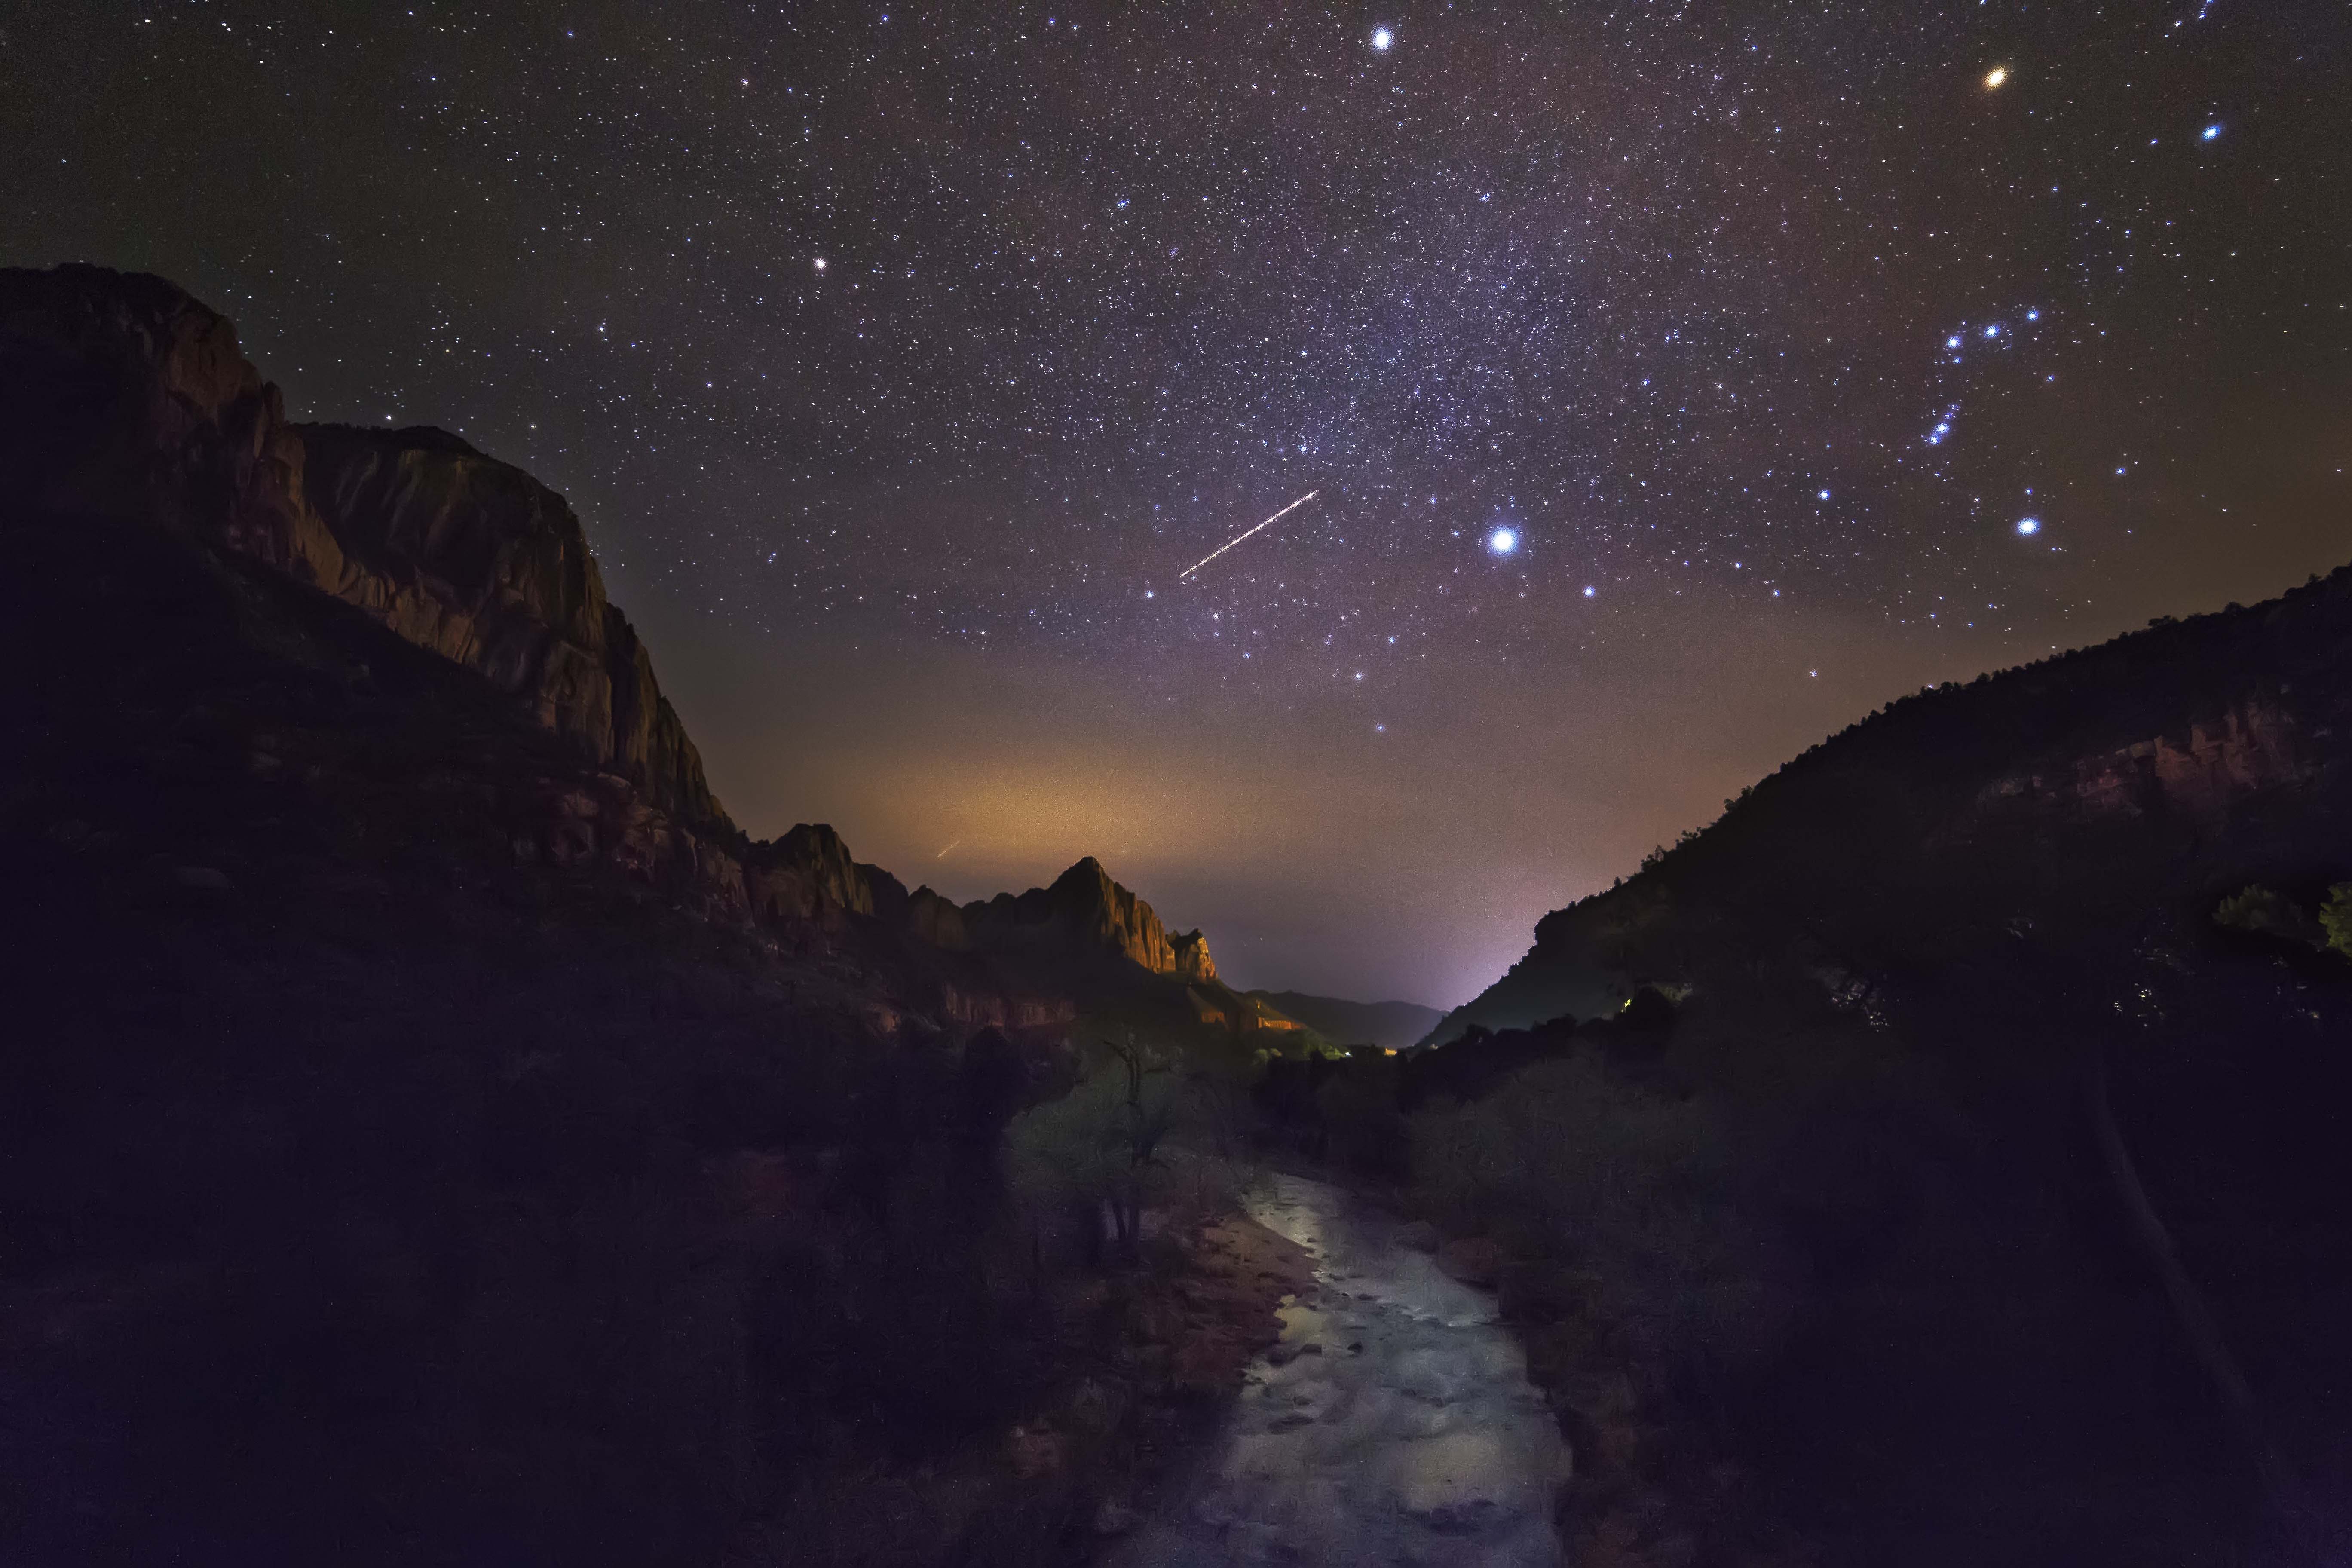
Here is the edited image.
Liberty Bell and the North Cascades Highway, Canon 6D, 14mm lens at 25 sec. Before

And after.

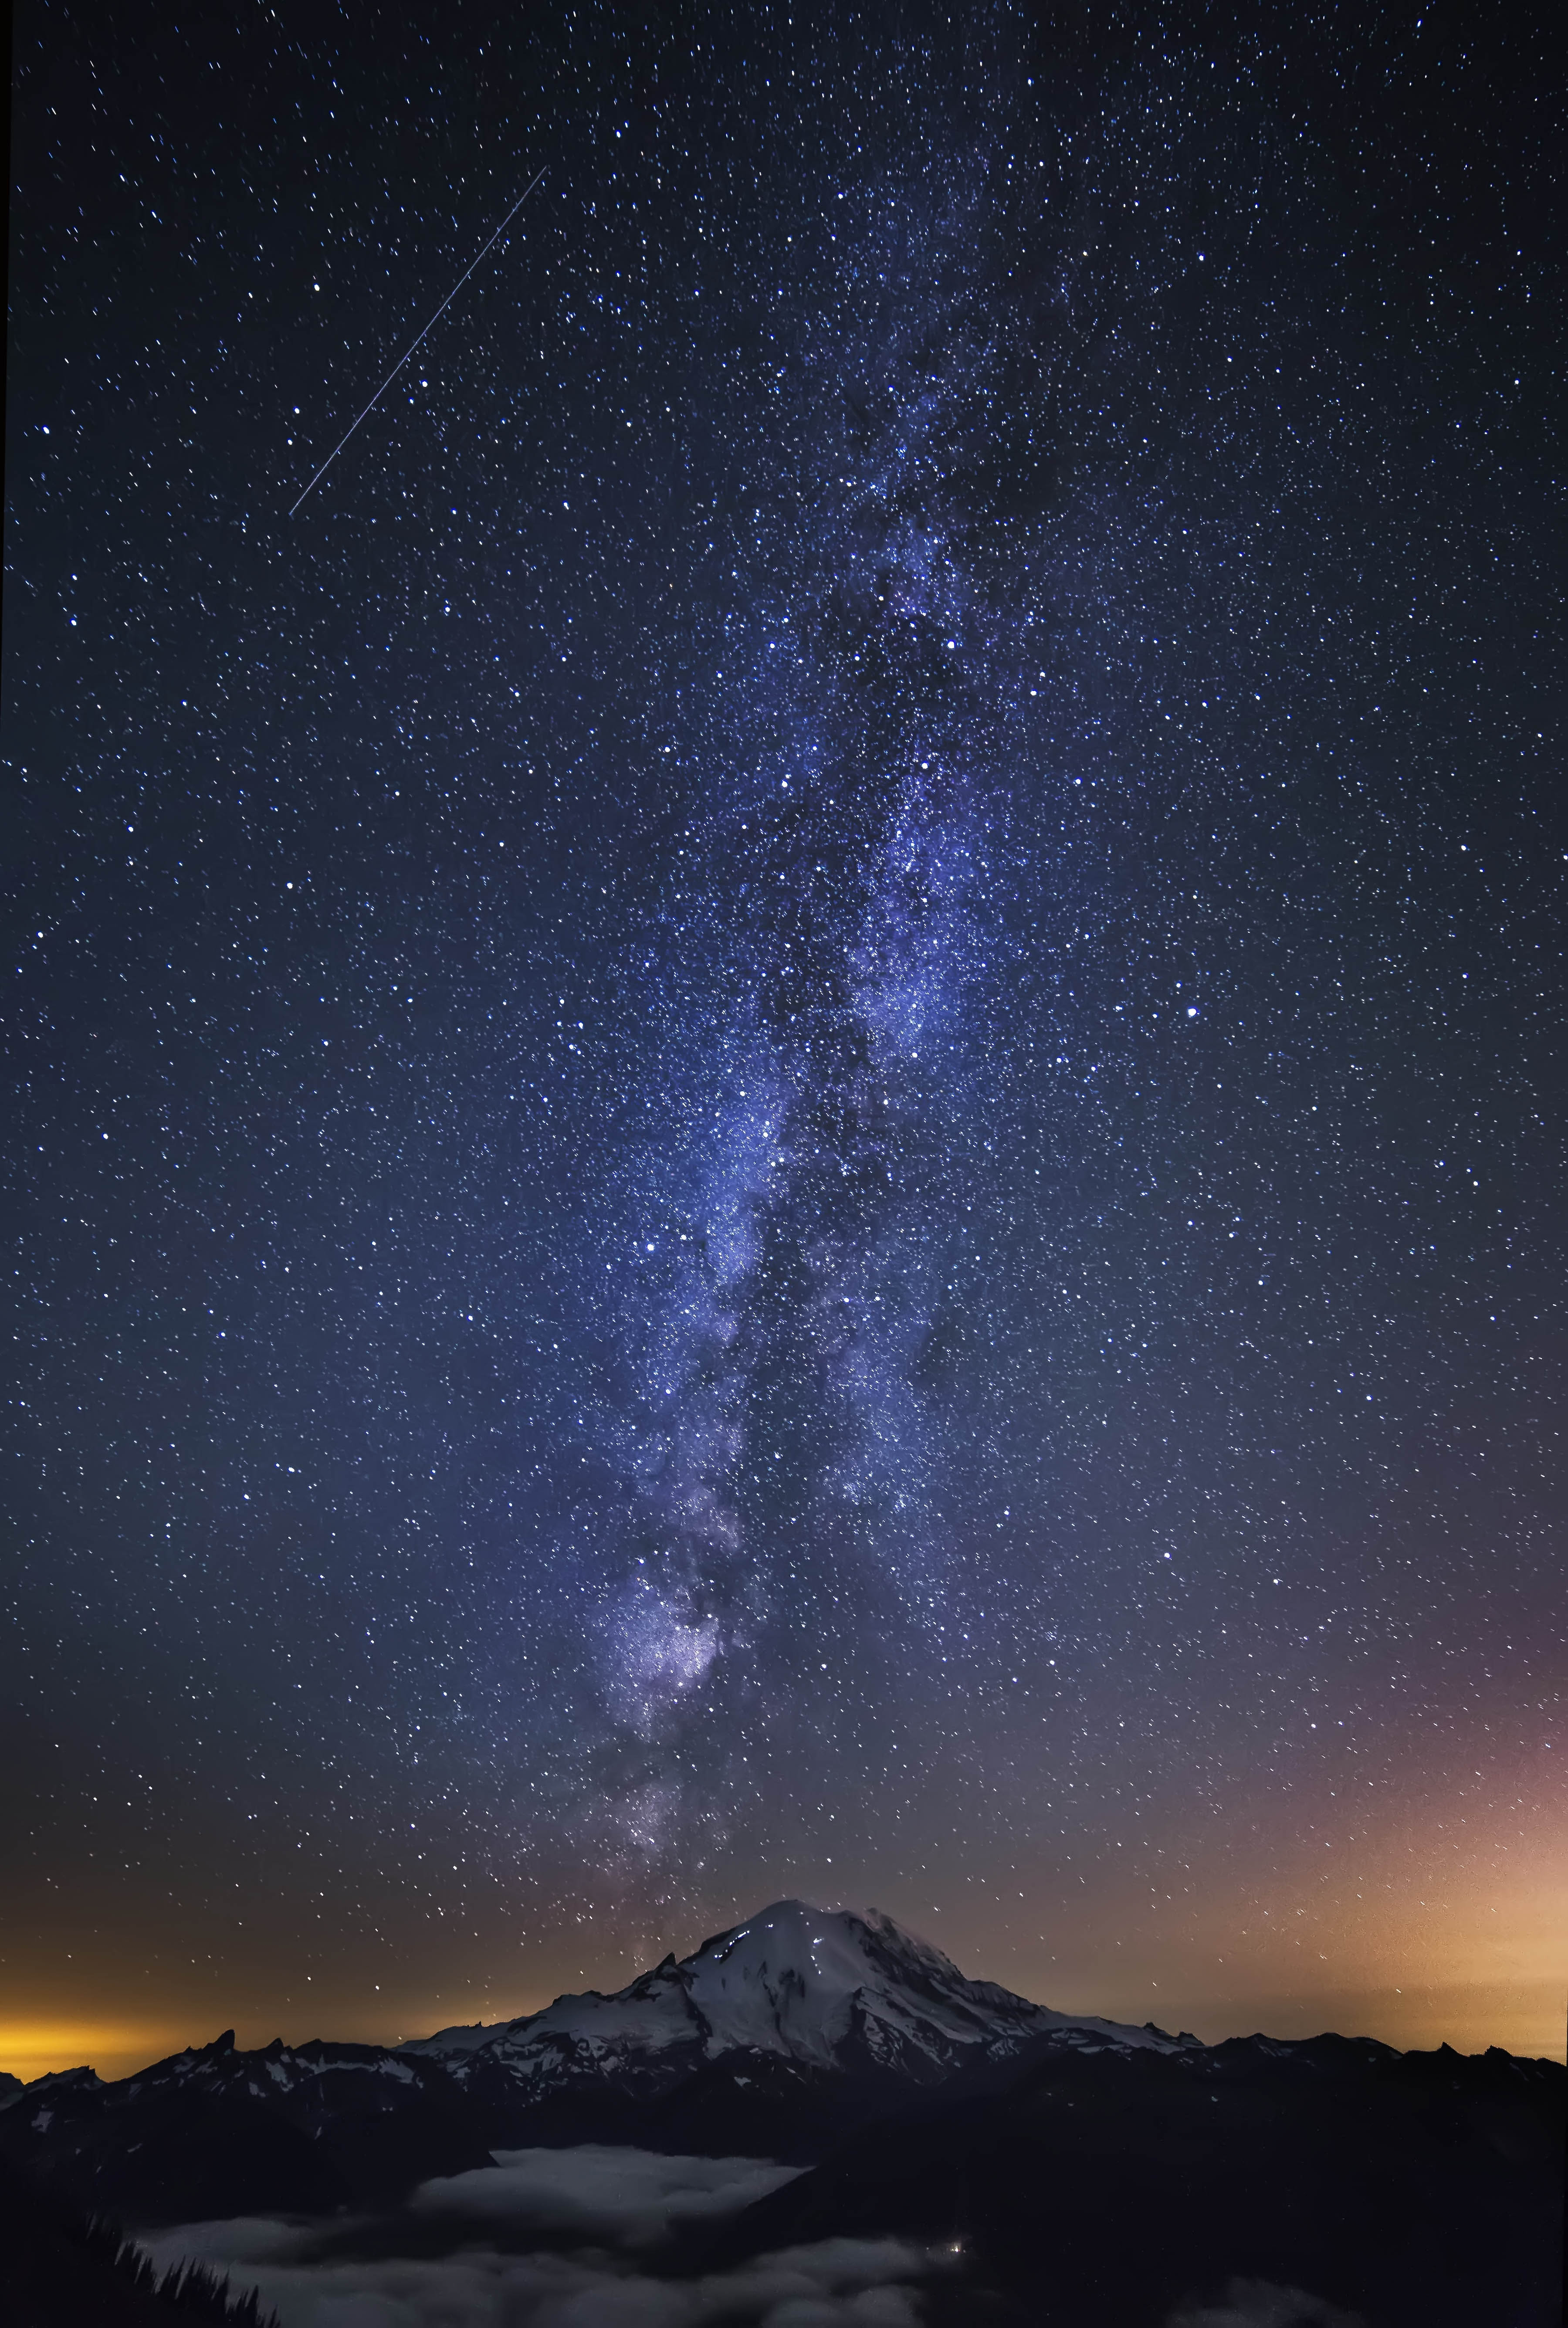
The last shot is of Mount Rainier from Crystal Mountain. Again using the 6D and the 14mm lens at 30 sec.
If you would like to attend a Night Sky Photo Tour and learn how to capture such images, here is the link with dates and prices!

And the final version.
For those of you who are already Photoshop savvy, the most useful tutorials and techniques for editing starry night shots I have found are at Dave Morrow Photography.
If you would like personalized Photoshop Lessons with me online, here is the link!
Happy Shooting and Editing!

Wow Andy! Wonderful shots and processing. I’m having some photoshop lessons this week .. Looking forward to them 😊
Nice…are you doing group classes or one on one?
And that’s what it’s all about, getting better and better. Awesome new editing skills. Thanks for the link to Dave Morrow. Will have to check it out.
I got Dave’s night sky editing tutorial, I think it was 40 or 50 dollars, very well worth it!
Andy
Wow, what a difference. I had no idea!
Yes, especially on the night shots, its a HUGE difference.
Beautiful night images!
Thanks Fuck Yeah! Great handle!
I want to be in that tent.
Yes! Me too!
Awesome! Thanks for the tips and links.